Showing posts with label stockings. Show all posts

Friday, December 7, 2018

OMG: And then there were 5...

I am the official stocking maker in my family. I've made...let's count...19 stocking so far! (You can see most of them here.)

My sister had her third baby on August 31st. Plenty of time to make the stocking, right? 
Well, it's December 7th and I feel like I should probably get started. :) 


Here are the stocking for the first four family members: 

My December One Monthly Goal is to make the fifth stocking for my new niece, Anna. Time to get sewing! Wish me luck!


Monday, December 28, 2015

December ALYOF: Stocking Complete!

Woo hoo! I finished my only homemade Christmas gift, which also happened to be my December ALYOF goal, in time! This stocking, for my new nephew, coordinates with his older brother's and his parents' stockings. Here's hoping Santa was good to him! 


Monday, December 7, 2015

December ALYOF Goal...November Repeat!


I didn't achieve my November goal (didn't even pull the fabric out!), so I'm recycling that goal for December:
My December goal for A Lovely Year of Finishes is to finish my new nephew's stocking. Below are his parents with their stockings, which I made several years ago. 


Saturday, November 7, 2015

ALYOF November goal: It's stocking time!

I am the unofficial stocking maker for both my family and my husband's family. And there was another baby this year, which means it's time for another stocking! 

I made these stockings four years ago for my sister-in-law and brother-in-law. Then in 2013, I made a stocking for their son (which I can't find a photo of?!). They had a second little boy this August and he needs a stocking to hang by the chimney this year.

Normally I make stockings in December, but this year I'm trying something different. :) 
So my November goal for A Lovely Year of Finishes is to pieced and quilt the stocking front and back. (I have a friend who embroiders the names, so I'm only committing to finishing the stocking up to the point of adding the name because I'm not sure when I'll get the name from her.) But if I have the stocking ready to be assembled by the end of November, I'll be in great shape for Christmas! 

Tuesday, July 21, 2015

Christmas in July Hop: Stocking Tutorial!

I'm over at Windham's blog again this week, taking part in their Christmas in July blog hop. If you've followed my blog at all, it should come as no surprise that I chose to make a stocking; I've made stockings for my immediate family, all of my nephews and nieces, as well as my sister and brother-in-law and sister-in-law and brother-in-law (see them here). Each family's stockings use different color palettes and have a slightly different look as I've experimented with various designs. One thing they all have in common? Color! So I was excited to work with the Glisten collection by Whistler Studios. It's all gold and silver with metallic accents--a little more sophisticated than what I've used for stockings in the past. 

I couldn't stop with just one stocking, though, so I created a second one (fat quarter bundles are great for making multiple stockings!) and am sharing the tutorial here, on my blog. Enjoy! Be sure to scroll down to the bottom of my post to find out how you can win a fat quarter bundle of Glisten! And don't forget to visit Windham's blog to see my second stocking tute!


Here's a look at the Glisten fabrics:

Materials:
10 fat quarters*
1/2 yard of lining fabric
12" x 22" piece of batting
12" x 22" piece of fusible interfacing
Fabric chalk

*You'll only use a strip or two from many of these fat quarters, so you'll have plenty left to make additional stockings or some other Christmas project!

Let's get started!
Download the template here. You'll have to assemble the three pieces to make the full stocking shape. Then you can decide which way you'd like your stocking to face--I've seen them both ways! 

Lay the stocking template on the batting piece and trace it. This will help ensure that your fabric strips cover the entire stocking shape. 


We'll be assembling this stocking front using improv strip piecing, with the batting as the foundation. I'll list the strip widths I used to piece the stocking front, but you can also use whatever strip widths you'd like--especially with the improv piecing--yours won't look exactly like mine.  The lengths are approximations--just make sure your strip is long enough to cover the stocking outline. Reserve one full fat quarter for the stocking backing. 

Cut one 3-1/2" x 12" gold strip and one 2-1/2" x 12" white/silver snowflake strip. Layer the gold strip right side up on an angle, making sure it covers the bottom of the stocking outline by at least 1/4". Layer the snowflake strip on top, right side down. Pin, and then stitch through all three layers.

Press the strips open.


Add a third strip (mine is a 2-1/2" x 14" fussy cut gold snowflake strip). Here's what the fabric looks like:

I cut the snowflake strip you see here at the bottom to use on the stocking but I love the little houses too!

Lay the strip right side down on a different angle than the snowflake strip. Tip: Always aim for a little more angle than you start with. You want the end result to look like angled improv strips and not strips that you might not have sewed straight!


My next strip is a 4" x 14" ornament strip. Set it on a different angle than the previous strip.


After each strip added, fold the batting back and trim the seam allowance to 1/4".

Add a 2" x 12" gold strip, and then a 4" x 12" fussy cut reindeer strip, continuing to vary the angles and trim excess seam allowance.


Here's a look at the fabric with the reindeer and sleigh on it:


My last three strips are a 2-1/2" x 12" gold snowflake strip, a 2-1/2" x 12" silver strip, and a 4" x 12" gray strip. Tip: Cut your last (top) strip wider than you need it. This gives you some wiggle room to make your stocking slightly taller or to simply square up the stocking top. 


Lay the stocking template on top, making sure the strips cover all the areas under the template. (The stocking shape doesn't have to line up exactly with your original drawn line--that was just a guide.) Pin the template and cut out around the shape.

Your stocking front will look something like this:


Following manufacturer's directions, fuse the interfacing to the wrong side of the fat quarter you've reserved for the stocking back. Lay your stocking front on top, right sides together, pin in place, and cut around the stocking shape. You could use the template as well, but I like to use the stocking front to eliminate any possibility of cutting out the backing shape with the stocking toe facing the wrong direction! :)


With the front and backing still right sides together, sew around the stocking with a 1/4" seam allowance, leaving the top edge open. Turn right side out.
Fold the lining fabric in half right sides together. Pin the stocking template on top (direction doesn't matter here!) and cut out the shape. Sew around stocking edge. Leave wrong side facing out.


I cut the stocking binding and loop from the same fabric--the metallic gold. Cut a 2" x 9" piece for the loop and a 2-1/4" x 22" piece for the binding. Press the binding strip in half lengthwise wrong sides together as you would for a quilt. Press the 2" x 9" loop piece in half lengthwise wrong sides together, then open up and fold each long raw edge in to the center fold and press again. Refold on main seam to enclose all raw edges and stitch down the middle. This is your hanging loop.


Tuck the lining inside the stocking so wrong sides are facing. Line up the top edges of stocking and lining, and pin, aligning the seams of both layers. Fold the loop in half and pin raw edges to the lining, just to the back side of the non-toe side seam. 


Stitch back and forth with a scant 1/4" seam allowance to secure the loop (this will all be covered up in the next couple steps). Pin the binding in place, matching raw edges, like you would a quilt. Arrange binding strip so the seam will be on the back of the stocking, near a seam, where it will be least visible. 
Stitch the binding to the stocking layers from the inside of the stocking. This may seem strange, but trust me, it's much easier! Join the raw ends of the binding with a straight seam rather than the traditional angled seam--it's just easier on a project this small. 


Fold the top of the stocking down for easier access and hand stitch the folded edge of the binding to the stocking lining.


After the binding is secure, fold the loop up and stitch back and forth several times where the loop is folded. This will make it more secure and point it in the right direction.

Don't forget to head over to Windham's blog to see their entire Christmas in July blog hop and my second stocking tutorial!

And last but not least, here's a little behind-the-scenes look at my "photoshoot"!

Now for the giveaway!

For a chance to win a fat quarter bundle of Glisten, like Windham on Facebook, follow their blog using Bloglovin' and leave a comment here with an idea of what you would do with this bundle. Giveaway is open through Friday, July 24th at 11:59 pm EST.

Thursday, January 15, 2015

A stitched Christmas gift recap

Now that the holidays are over the pine needles are cleaned up (see the bottom picture!), it's time to share some of my Christmas gift sewing. 

First, a fabric toy bucket. I love these fabrics!

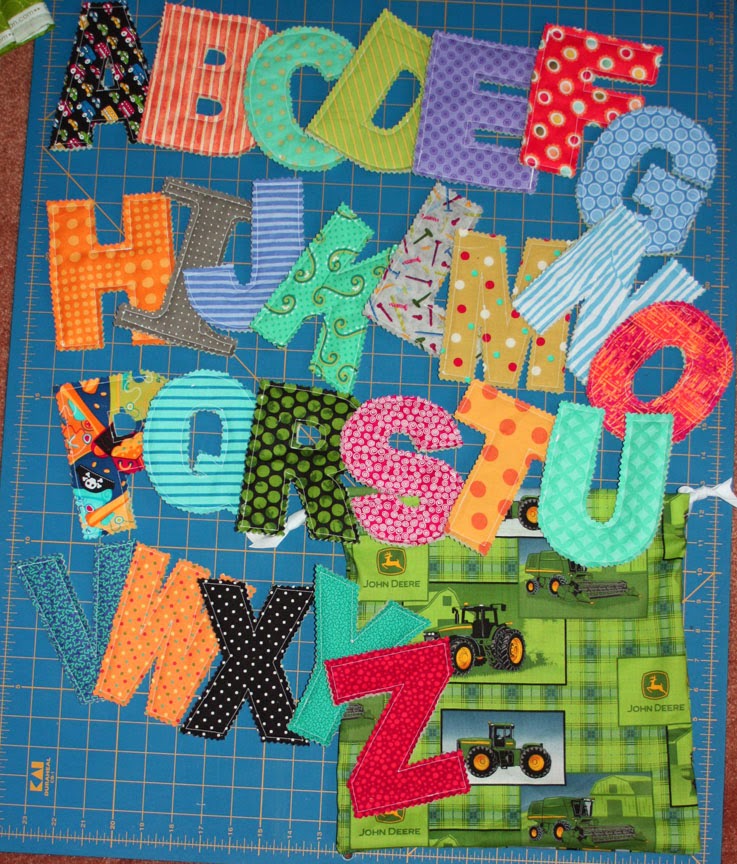
Two sets of fabric letters with drawstring bags. This has become my new go-to gift for 2 and 3-year-olds.

Set #2:
 

My newest nephew's stocking:

The photos my sister sent of all four stockings together. I love this!

I know I showed this off already, but since Ben's stocking was part of my December sewing, I'm sharing it again! Come St. Nick's Day next December, all three of my kids will be set with stockings and I can sit back and relax!

Another one I already showed off, but also part of my December sewing. Thrilled this was done too!


And then just for fun...here's what our tree looked like on January 6th. In all fairness to the tree, we were out of town for 7 days, home for 3, and then gone for another 5 over the holidays. So we definitely were not watering consistently. Quite a pine needle carpet! 

Wednesday, December 31, 2014

December ALYOF Goal Complete

It may not have been done for Christmas, but I finished my little guy's stocking for my December 
A Lovely Year of Finishes goal. (He wouldn't have known the difference, and I had gifts to sew before the 25th!) But...next December, I will be so thrilled to pull this out, ready to go!

Here's his finished stocking:

And a close-up of the top and lining:

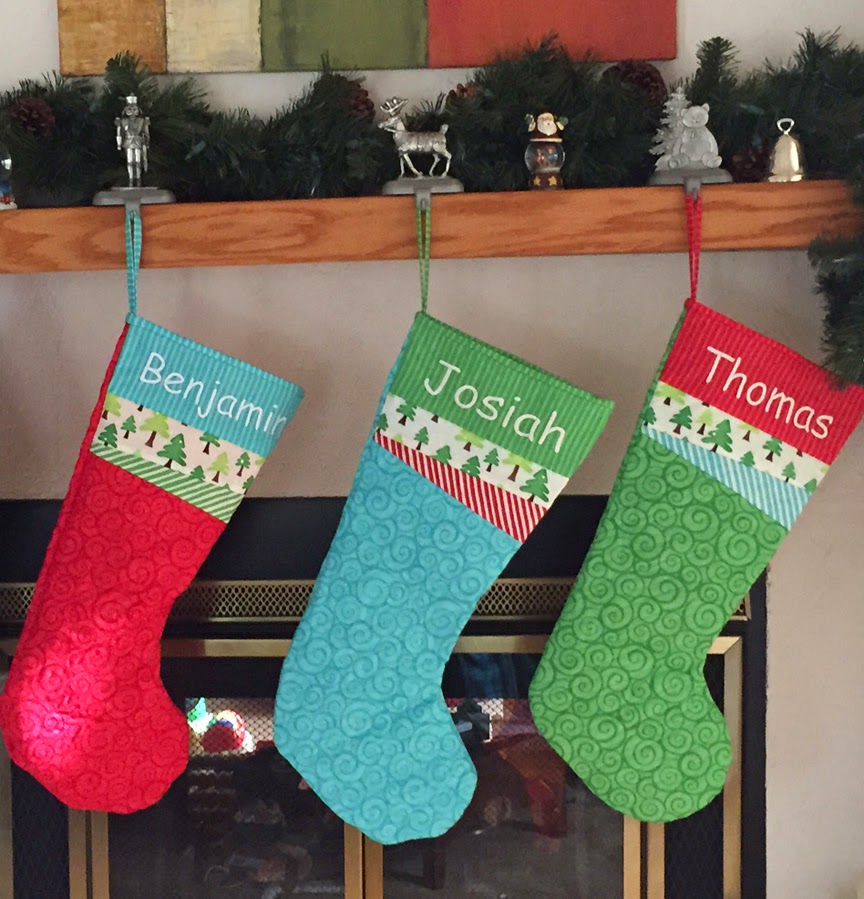
And a pic of all three boys' stockings together:

And a pic of my little guy, Benjamin, now 4 months, with his stocking. My story is that he looks displeased because his stocking was late. :)

Happy New Year, everyone!

Sunday, December 7, 2014

December ALYOF Goal: Stocking time!

I didn't make my November A Lovely Year of Finishes goal (I think it's because December snuck up so quickly after Thanksgiving!). So I'm upgrading my December goal...to actually finish my new baby's stocking.

Here are the four we have right now, on our freshly decorated mantel:
 (Sidenote...my best friend created the art hanging in the photo there--isn't she talented?!)

Little B's stocking will have a blue cuff and a red sock. I dropped the cuff fabric off with my embroiderer friend on Friday. Now it's time to get the rest of the stocking quilted! I'm making this my December goal because I can see getting pushed to the bottom of my to-do list as the holidays get closer. So here we go!

And, before I go, here's a sneak peek at what I have been working on--finishing my tree skirt. I finished quilting it on Saturday and stitched the binding on. I've got about half the hand stitching of the binding left!

Monday, January 28, 2013

It's beginning to look a lot like...Christmas?

Are you sick of red, green, and all things Christmas? I am.

That feeling is compounded by my almost 4-year-old, who truly caught on to the "Santa is watching to see if you deserve presents" concept right around December 26th. So he's stilllllll telling me, "Momma, Santa is going to bring a present because I gave my brother his blankey" and so on. Newsflash, kid: I'm sure you're going to do enough naughty things in the next 300+ days to negate any good behavior in January.

Here is my last Christmas-y post for many months, and I have the Lovely Year of Finishes to thank for it. There is NO WAY I would have completed my kids' stockings in January without this deadline egging me on.

So here we go!


You can read the initial story of these stockings here and then my original Lovely Year of Finishes January post here

 Close-ups of both stockings. I didn't do the embroidery myself. I originally had another, more geometric print planned for where you see the trees. But with the angled piecing, no matter what I did, it looked like a mistake because of the straight lines of the geometric design. So I scrapped that idea and went with the trees. I love having the stripes in the piecing on the bias, too. The stocking body is just basic straight line machine quilting.

A peek inside the stocking. I love this dot fabric!

So happy to have these complete! It will be a joy to pull them out next December.

Now it's time to start thinking about my February goal...


Also sharing over at Quilt Story's Fabric Tuesday.

Monday, January 7, 2013

January Goal: Finish the stockings!

I have seen the "A Year of Lovely Finishes" button popping up on many blogs, and I've decided to jump on board! I work soooo much better with a deadline or peer/public pressure breathing down my neck (bonus points for both)!

And first up, for January, are my boys' stockings.
Here's where they stand right now:
I need to add a few more quilting lines to the blue one and then piece the cuffs and assemble. Not too much to do, and I already stated in an earlier post that it would be my first project for January. 

But then that little voice in the back of my head keeps saying, "Well, the boys really don't need those until next December..." and "Aren't you sick of Christmas colors?" (Yes!) and "There's no harm in pushing those off for a bit. You can do them in July." (Yeah, right.)

So I'm throwing down the gauntlet and making these stockings my official goal for January.