Showing posts with label WIP Wednesday. Show all posts

Thursday, April 3, 2014

Mystery WIP...finished!

Yesterday I posted my WIP for the day, figuring that most people wouldn't know what it was.

I finished it last night, so I'm back to share here today, but first a little back story.

I'm currently halfway through my third pregnancy, and I'd like to introduce you to my best friend:
It's a Snoogle body pillow. This pillow and I have a lot of history--I've happily slept curled around it through two pregnancies, and it has experienced some wear and tear. When the (boring muslin) cover ripped last week, I looked into buying a new cover, but I found beige, navy, and some fairly boring prints, and all for more than $30. Blah. This got my wheels turning....

Yep, a patchwork Snoogle cover!

I admit that the entire time I was making it, I wondered if the idea was too hokey. Was I crossing the line into becoming a crazy quilting lady, transforming all aspects of my life into patchwork? (Hey, I don't have patchwork seat covers in my car yet, so I think I'm ok.)

But now that it's done, I LOVE it! It will make me smile for 20 more weeks.


The cover sewed up pretty quickly. I stretched out my existing cover on muslin and cut two patterns out. I sewed strips of fabric onto the muslin to give the cover a little added strength. One end of one side has an overlapping flap for removal, so it's easy enough to take off and wash.

Now if I can just convince my boys that it's mine and not theirs...their first words every morning are, "Can we snuggle in the snoogle?" Then they drag it out of my bed every morning to curl up in while they watch cartoons!


Sharing over at Quilt Story for Fabric Tuesday.

Wednesday, April 2, 2014

WIP Wednesday: What is it?

My WIP this week is a bit of a scrappy mystery (not to me, but I'm guessing to most of you!).


Any guesses what it will be? 
I'll be back to share once it's done (and I'm about halfway, so hopefully it won't be too long!).

Linking up with WIP Wednesday over at Freshly Pieced.


Thursday, November 14, 2013

WIP Wednesday

The last couple days, I've been spending my sewing time on three different projects which I'm linking up to WIP Wednesday.

First, my made fabric mini for the Miniature Challenge over at 15 Minutes Play:
The top is pieced; I'll trim it down to 12" square after I quilt it.

I've got all the cutting done for my chevron tree skirt for my November A Year of Lovely Finishes:
That means in theory that whenever I've got spare time, I can sew strips together!

 And I've got 25 blocks done on my wonky cross baby quilt. As you can see, I did end up adding in the green to my original mocha and denim and I'm glad I did--it just adds an extra pop. I'm going to make 5 more blocks and then start joining the blocks. I love how fast these blocks go!

Lots of progress this week...I'm liking it!


Wednesday, September 11, 2013

WIP Wednesday: Another Block Party of 1

These blocks weren't all made today; the photos for several of them have just been biding their time to be added to a post!

My August do.Good.stitches blocks for the Believe circle--easy blue and white stars!

My July do.Good.stitches blocks for the Believe circle--I really love how these blocks look when they come together as a quilt! You can find the pattern for this paper pieced block here.


Finally, I was in charge of selecting our August/September online activity for the Great Lakes Modern Quilt Guild. I'd had my eye on this awesome Improv Herringbone block tutorial for a while now, and this seemed like the perfect opportunity to try it out. I made the turquoise block first, and just for fun decided to see if I could make it without repeating a fabric. You can see the entire post here (and anyone is welcome to join in the online portion of our guild and participate in these block raffles, so if the improv herringbone block is calling your name, let me know!).

My WIP Wednesday: Wanting to up my chances to win all the improv herringbone blocks at our September meeting (each block you make gets you an entry in the drawing to win all the blocks!), I stitched up a second block today. Again, I challenged myself not to repeat a fabric. Hoping I can squeeze in the time to make one more block before our meeting!

Linking up to WIP Wednesday at Freshly Pieced.


Thursday, June 27, 2013

Curve should be a four-letter word

Tonight my studio was block central. And the curves almost did me in, wonky or not. 

Let me explain. I signed up on the wait list to join do. good stitches back in February or March. In May, I was invited to join the Believe group. (If you're not familiar with do. good stitches, click here. In a nutshell, quilters come together through Flickr to contribute 2 blocks each month for charity quilts. It's very cool and seems to be well-organized, as well as churn out a steady flow of charity quilts, which is fantastic.) Needless to say, I was excited! 

Here are May's blocks, which I never got around to posting. 


The June block request was for a wonky bullseye based on a block in the book "Fat Quarterly Shape Workshop for Quilters." Doing more curved piecing has been on my to-do list. Wonky curved piecing--even better, right?--it hides mistakes! Here are my blocks:


Nowhere in the directions for this month's blocks did I see the requirement that the block had to be flat, so I think I'm okay. This was tough! Add to that the color combo--a very cool gray, yellow and white palette was requested--but my stash is a little short on those colors, so I was afraid I wouldn't have enough! (Yes, it's a little ridiculous that someone who hosted a Shades of Gray fabric swap would be short on grays, but a) I used all of those up and b) they were only 5" squares!)

By the second block I was having more fun, and I definitely want to do some more curved piecing--will be looking for a class at one of my local quilt shops or perhaps Craftsy? I know there's room for improvement! If you tackle this block, here's my (learned-the-hard-way) advice: don't be stingy on fabric. Cut generous pieces for each curve and just deal with the waste/scraps. More wiggle room/room for error makes piecing these much more pleasant! I have seen a few of the other members' bullseye blocks on Flickr and I can't wait to see this quilt put together!

And the last blocks of the night, my Bowtie blocks for the Great Lakes Modern Quilt Guild. I volunteered to put together the online guild activities every other month when we don't meet. I posted this month's project last weekend and thought it might be nice to offer a visual aid, so here we go:

The assignment: Bowtie blocks using white solid/print/text backgrounds and warm colors. Confession time: I purposely picked warm colors because I gravitate toward cool colors and wanted to make myself work with something different. Thanks go the guild for unknowingly forcing me out of my color comfort zone! :) 
Can't wait to see everyone's at our meeting in a month! 

Back in April I showed my converging corners blocks for the guild meeting. Here's a quick floor picture of everyone's blocks together--looks great, doesn't it? One lucky person won these blocks and will be bringing back the quilt to show when she finishes it.


p.s. Linking up with WIP Wednesday at Freshly Pieced. 

Wednesday, May 22, 2013

WIP Wednesday: Texas Teardrops

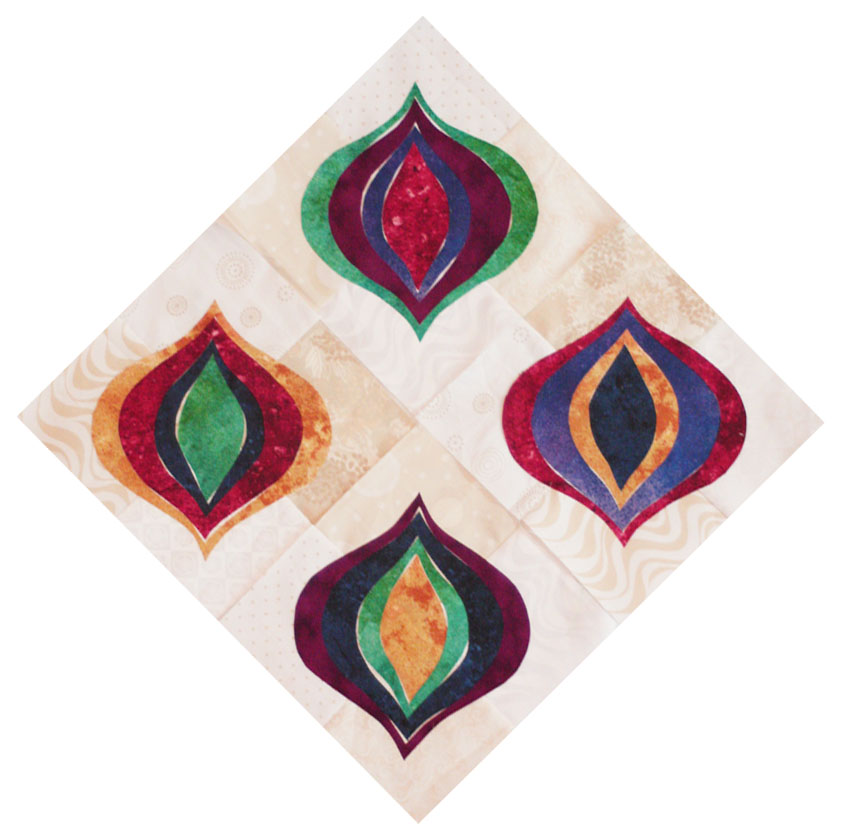
It's the third week in May and I just got started on the Texas Teardrops Quilt Along back from the beginning of April; so basically that means things are proceeding as usual around here!

I love Vicki's Texas Teardrops quilt--great pattern, gorgeous fabric choices, and fantastic quilting. But when she offered the Sew Along, I hesitated, because I don't do applique. (Similar to how I "don't do windows"... I know how, but,  um, I'd rather go to the dentist than do it.)

But I really did like the pattern!
So I decided to make it more appealing to sew by reducing it in size. My blocks measure 7" in size, and I'm making a table runner. Fewer blocks, smaller blocks. Do-able.

Here are my first four:

I picked textured tonals from Fabri-Quilt's Marblehead and Northcott's Stonehenge collections for the "teardrops" and used low-volume tonals from my stash for the background, something I've been itching to try on a project for a while now. 


And my original rough idea, which then morphed into doing low-volume four-patches. (Seeing this photo, I'm wondering if I should have stuck with squares rather than four-patches?)


Here's what I don't like about applique: The lines aren't straight, so you can't use a ruler, and you draw/trace/cut the same.line.over.and.over. Ugh.

But Vicki recommended using a smaller rotary cutter to cut out the fabric shapes (scary!), so I tried it. I was surprised that it was pretty easy and actually kind of fun. Not to mention fast!

Four blocks down, six (or more) to go...and I'm late to the party, but I'm having fun!

Of course, the next step is stitching the shapes down, which means tracing the same shapes over and over again, but I just like to think of that as good machine quilting practice!


Wednesday, April 3, 2013

WIP Wednesday: Zig Zaggin'

I love small quilts! They sew together quickly and you feel so accomplished. I spent some time today assembling my ombre dot quilt to make some progress for WIP Wednesday over at Freshly Pieced. 

(I went with the chevon layout--thanks for all the opinions, everyone!)
Then, since went so fast, I started quilting. 

So far I've simply quilted parallel lines 1/2" past the zig zag seams. 
What do you think? Leave it as is, or continue quilting zig zag lines? I'm undecided at the moment.

Love this orange on the back! 

Looking forward to finishing this!
If you want to make one too, check out the Sew Along over at Sew Fine Fabric. 


Wednesday, March 27, 2013

WIP Wednesday 42 blocks in 48 hours!

I could have had a flip book of quilt-in-progress photos to share as blocks kept going up on the design wall, and if I'd realized the direction these blocks were headed (as in 42 blocks made, start to finish, in 2 days), I would have done it. But instead you just get 3 photos, all with wildly different color because of varying lighting conditions (the third is most accurate). 

Here's my current WIP:

Tuesday afternoon, 3:30 pm

Tuesday evening, 11 pm

Wednesday afternoon, 2:30 pm
Blocks complete! 

Now I just need to finesse the layout and sew them together before Sunday, as this is my March Lovely Year of Finishes project. Under the wire, as usual. But bring it on, March 31...I'm going to finish in time!

What is it, you ask? 
(Besides a really cool pattern--Urban Lattice--which can be found for free here)
It's a couch snuggling wedding gift for some of our closest friends. The palette was a challenge--going partly on a hunch and then asking the male half of the couple--I knew that they are more into a warm color scheme, whereas I'm a blue/green girl. I bought a few quarter yards of reds, browns and blacks to supplement my stash and really like the look despite those pieced squares not being "my" colors.


How did these blocks come together so quickly? Three reasons.
1. A deadline is a real motivator.
2. Big blocks with only 4 seams each.
3. And the real reason: my Mom has been in town visiting and served as "sous chef" as she often does. Meaning my butt didn't leave my sewing chair. She cut and pressed and handed me blocks-in-progress  while I just pressed the pedal to the metal, stitching my little heart out.

Thanks Mom! Next time we'll do a quilt for you instead of me! 
:)


Wednesday, February 13, 2013

WIP Wednesday: Just playing around

The last couple days I've been sewing some blocks for one of my guild's charity projects. 

It's called Home of the Brave, and it's a movement dedicated to honoring fallen heroes of the wars in Iraq and Afghanistan by making and presenting Civil War era inspired homemade quilts to their families. Our guild's focus is Michigan, since that's where we are located. I took home the pre-cut package to make 15 blocks back in mid September, and here it is February. Oops! I'm determined to hand back the stitched blocks at our meeting next week.

I've got 7 X blocks completely done and the other 8 at various stages of completion. Ultimately, the blocks will be pieced together with sashing rows and a border. 

While I am all for the cause, I'll be honest that neither the fabrics or the pattern are really my style. So while I was sewing, I was brainstorming ways to try a more modern spin on the design later for myself.

Though I have to say that I do love the contemporary spin of this block on the January-February 2013 Love of Quilting cover!

Last Friday night, I was home alone (Thank you, concert that my husband wanted to go to and I didn't!) So I started experimenting.

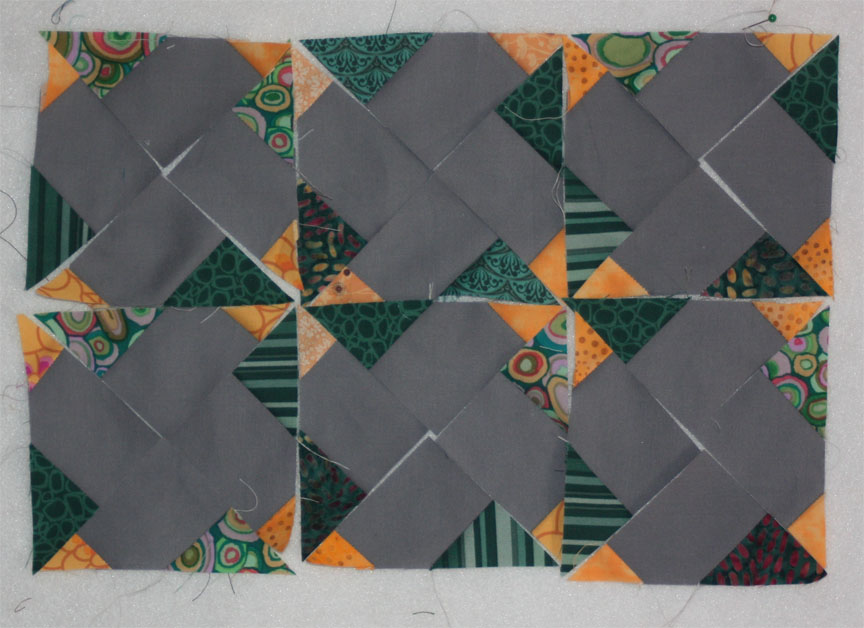
First I went down a complicated route. I wanted the triangles to be pieces, so I cut solid gray squares and adding snowball corners in two different sizes/colors. 

This created an interesting sort of repeating pinwheel that I kind of liked.


With two problems.
 First, because of the nature of the cutting, half the pinwheels are mirror images. Short of making two quilts spinning in opposite directions, I couldn't think of a good way to use all the pieces. 
Second, I didn't consider how small the pieces would start getting as I cut and pieced. The assembled pinwheel block below measures about 8". Those center gold "blades" are t.i.n.y. Too tiny. (And not consistent in size, but that's just a quality issue on my part.)
There is ALOT going on in this block, but I do kind of like it, so I'm thinking of redoing it slightly larger and making a pillow. Not sure if some straight line quilting would minimize the distracting seams in the solid gray sections or not...

Talk about over thinking some "play" time! 
I went back to the proverbial drawing board, simplified things, and came up with these blocks. I like 'em.

I'm still working on a final layout idea and surveying my stash to choose actual colors, but as I cut triangles, this is the type of look I'm going for. Each "solid square" you see below will actually be comprised of two different print triangles, for a scrappy look. Definitely a project I'll be laying on the design wall before sewing! 
What about you? Have you ever sat down just to play? 
And then done a complete about-face? 


Linking up with W.I.P. Wednesday over at Freshly Pieced and hoping to get my charity blocks finished before next Tuesday! 


Wednesday, November 28, 2012

Stocking Central

It's that time of year again...you know, the few weeks leading up to Christmas, when in addition to all the gift shopping, tree decorating, and cookie making, you finally settle down to start churning out stockings {insert your last-minute Christmas project here}. I admired all of the pre-December holiday efforts on blogs (Christmas in July, 100 Day Hustle, etc.). But when those started, I was busy with other projects; plus, the deadline just wasn't close enough to feel real.
The clock is ticking now, though!

I am the (self-)designated stocking maker in the family. About 6 years ago, I made these stockings for me and my husband (forgive the photo...evidently I'm so proud of them that I've never actually taken a photo of them hanging on a fireplace).

I made these stockings using velvets and silky fabrics that my grandma gave me. I love them, but nine stockings later, I've learned some dos and don'ts for stocking making, and most of the don'ts came from these.
And, the first year we used them, they weren't quite done yet (you're not surprised, are you?). So the cuffs were attached with pins. Which I forgot to warn my husband about before he reached in to see what Santa had brought. Oops! He's very careful now.

My sister-in-law saw these and asked if I would make stockings for her kids. Of course!
Her three kids blossomed to five, so that was two more stockings. I really need to get a photo of all 5! These were made the same way as mine; I traced my childhood stocking, pieced fabrics together to be larger than the template, used the cool stitches on my sewing machine to embellish, added a corduroy back (stiffer than faux velvet...a better choice for good hanging!), and then topped it off with an embroidered wool cuff.

Two years ago, my sister got married and requested stockings. Then my sister-in-law got married and asked for stockings too. So last year, I made my sister's, using the same technique:

And tried something different for my sister-in-law. I had been saving this free Denyse Schmidt pattern for a couple years, planning to use it for my own future kids.
I love how these turned out!

So, onto this year. I am making the more traditional stocking with the black cuff for my new nephew (so it matches his parents' stockings). And I am making the Denyse Schmidt stocking for my two boys out of this Ready, Set, Snow fabric, bought last November in a fit of optimism.
This year it's happening though. And a matching tree skirt.
The sewing starts today. Does having the fabric and a plan count as a WIP? I think it does, so I'm linking up to WIP Wednesday at Freshly Pieced. I'll be back with an update later this week!

One more thing: To raise the stakes a bit, I'm competing with my husband. We have a double-sided fireplace in our new house, and neither side has a mantel. He's working on that, I'm working on the stockings to hang on it. Who will finish first???