Showing posts with label fusible web. Show all posts

Thursday, October 10, 2024

Strippy Improv Halloween QAL Week 3 - Let's make more blocks!

 Welcome back for Week 3 of the Strippy Improv Halloween QAL! 


How are your blocks coming along? 

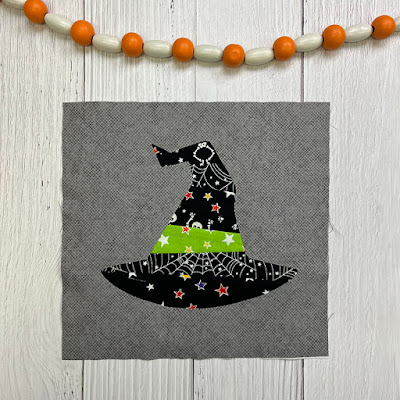
Here are my remaining two blocks - a ghost and a witch hat. 
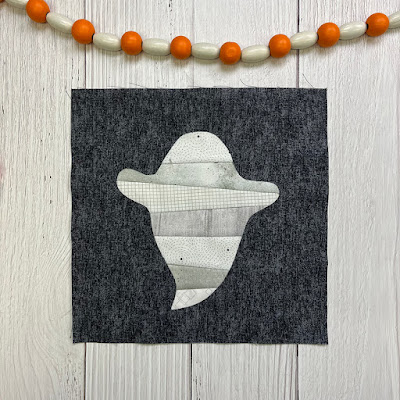
I had fun digging through my low-volume prints for my ghost!

The lime green accent will match the frames on two of the blocks. 

Scroll to the bottom to see my four blocks together!


Let's talk tips - here are a couple more things that I hope will be helpful as you make your blocks. 

First, block background placement. Play around with your block background before fusing it down to make sure you get the best combination of fabric, and also to make sure things like the stems show through correctly. 

For the witch hat, I wanted the green accent to be above the brim of the hat. I also picked my darkest black (the star print, which has the least white, so it "reads" as the darkest) for the bottom, so it makes the bottom of the hat seem dimensional, like you're looking up it. 
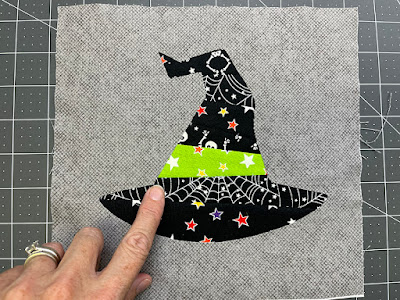
Make sure your green stem starts at the top of the pumpkin body. 


Here are two "don't do it this way" examples: 

The background needs to be adjusted up so the stem aligns with the green seam. 

The background needs to be adjusted down so the green doesn't show on the pumpkin. 

Play around with your background and make sure it's exactly how you want it before you fuse in place! 


Second, if you're concerned that your background fabric is too light (especially when you're using black strips for your piecing), I have a solution for you: Fusible Interfacing. 


Before adhering the fusible web to with the traced shape to your background square, adhere a piece of fusible interfacing (I use medium weight). This makes the fabric more opaque and reduces the likelihood that the strips will show through. 


Here are my four blocks together. 
 These blocks are going to be an adorable wall hanging!

Meet me back here on Thursday, October 17 where I'll be talking assembly! 

Here's the QAL schedule: 
Thursday 9/26: Fabric and block choices
Thursday 10/3: Make 2 blocks
Thursday 10/10: Make 2 blocks
Thursday 10/17: Assemble and finish!

I hope you'll join in the fun! I'll be posting here on the blog and also sharing posts on IG (@quiltyzest). If you're going to sew along, use the hashtag #strippyimprovhalloween to share your block and/or fabric choices!


Ready to join the fun? Order just the digital Strippy Improv Halloween pattern here. 
The pattern includes 9 block choices plus both a square wall hanging and table runner option.
Wednesday, July 5, 2023

Make Your Own Message T-Shirt!

Happy Summer!

Back in May, my middle son, Jojo, came to me with an idea for a t-shirt he wanted to make. He said that when he walked through the hallways at his middle school, he'd often put his hand up for high fives. He wanted to make a shirt that said "Free High Fives" that he could just point to in the hallway. 


So we got started on our t-shirt project! 
We used HeatnBond Lite Fusible Adhesive from Thermoweb to fuse the letters to the t-shirt. Jojo created a tutorial for how to make this shirt; you can find it on the Thermoweb blog. 


So of course, after Jojo's t-shirt was complete, his younger brother wanted in on action. He wanted a shirt that said "Free Hugs, All Day Every Day" but I talked him down to "Free Hugs 24/7" because the other had A LOT of letters to cut out and stitch around. Then I decided that the oldest needed a shirt as well. He's a teenager, so his shirt is pretty self explanatory, right? 


I love these shirts - a simple way to add a smile to people's day. :) 


To make your own, follow the tutorial on the Thermoweb blog. Click here to download the letters for the other two t-shirts. 


Wednesday, September 15, 2021

Strippy Improv Halloween Sneak Peek

Who's ready for Halloween? We haven't started talking costumes at my house yet (I'm still recovering from the back to school busy-ness!), but I know it's right around the corner. As are hidden bags of Halloween candy for me to snack on! :) 

When I created the Strippy Improv Holiday pattern last year, I knew I could have a lot of fun using the technique for other holidays--especially Halloween! 

I've been working on a spooky version and here's a sneak peek at the blocks. Aren't they fun?!

 I learned a lot about bat shapes as I worked on a template block--bats come in so many different varieties! I wanted one that didn't look like Batman (ha!) but also would fill a square block nicely. 


I love choosing white tonals and light grays for a haunting ghost block. Does he remind you of Casper? 


The back arch for the black cat is key!


The pumpkin is hands down my favorite. I think a wall hanging, table runner or pillow of just pumpkins would be fun too! 


The Strippy Improv Halloween pattern will include the templates for all four blocks (plus a few extra surprises!), as well as instructions for the strippy improv technique and both table runner and wall hanging finishing options. And wait until you see the fun fabric I have for borders!

If you want to receive a heads up when the pattern is released (week of Sept. 20th), sign up for my newsletter below and/or follow me on IG - scroll down for the links.


Thanks to Benartex for the fabric and Thermoweb for the HeatnBond Lite fusible webbing to make this project!


Here's a quick look at the Strippy Improv Holiday table runner:

The pattern is available in my Etsy shop.

If you're new here, welcome! I hope you'll stay and look around a bit. 
If you like what you've seen here, you can also find me:
To find all of my quilt patterns, visit my Etsy shop. 
Find me on IG here.
Find me on Facebook here.
Sign up for my newsletter in the right-hand sidebar or here. 
(You'll receive a free pattern for my Diamond Drama quilt (below) as a thank you!)