Showing posts with label Pillow Talk. Show all posts

Thursday, May 26, 2022

Pillow Talk: Rainbow Petal Pillow Tutorial


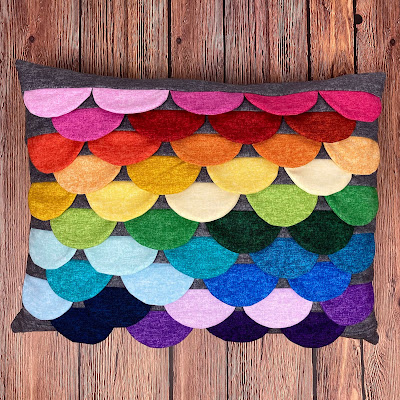
My latest Pillow Talk tutorial is up, and this is definitely the pillow I've been most excited about sharing! 
This pillow was inspired by the sequin pillows that are so popular, although thick seam allowances mean that this one doesn't "flip" directions. 


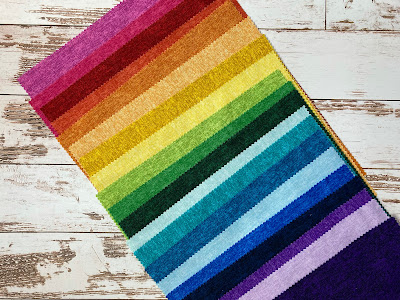
I used a 10" square pack of Cotton Shot fabrics from Benartex. It has 42 different rainbow shades in it; I selected 23 prints to use in my pillow. (If you count in the photo below, there are only 21; I added in two more as I assembled the pillow.)

The video tutorial on YouTube shows you how to make the pillow; here are the numbers to get you started:

You'll Need:
(23) 10" squares in a rainbow of colors (we'll use half of each square to make two petals, so if you're pulling from scraps, you'll need a total of (23) 4" x 8" pieces)
3/4 yard gray fabric
12"-long zipper

Download the half-circle template here

Cutting:
From the gray:
(1) 13" x 17" rectangle for backing
(2) 2" x 17" strips for top/bottom borders
(10) 1-1/2" x 17" strips 

Making the petals: 
The video shows two different ways to cut and sew the petals. You'll need at least 45 - but if you sew a few extra, you'll have some options when it comes to color placement to created the gradated rainbow look.


Hellooooo, rainbow!


The finished pillow:

This Rainbow Petal Pillow is my fourth tutorial in the Pillow Talk series.
Find the other tutorials here


If you're new here, welcome! I hope you'll stay and look around a bit. 
If you like what you've seen here, you can also find me:
To find all of my quilt patterns, visit my Etsy shop
Find me on IG here.
Find me on Facebook here.
Sign up for my newsletter in the right-hand sidebar or here
(You'll receive a free pattern for my Diamond Drama quilt (below) as a thank you!)

Thursday, March 31, 2022

Pillow Talk: Puff Pillow Tutorial


I'm sharing another Pillow Talk tutorial today on YouTube - for a puff pillow! All winter, I planned to make a puff quilt, and it's still in the works. But in the meantime, I knew I could create a quicker version - a large floor pillow that my boys would love. 

I used the Lift Off fabrics from Benartex for my puff pillow. Aren't those rocket ships fun? 

Look at that puffy texture!

You can find the full tutorial on YouTube, but I'm listing some of the numbers that will help you create this pillow here. 

You'll Need:
5 space-themed fat quarters for pillow front
1 yard backing fabric
1/3 yard binding fabric
2/3 yard muslin
Fiberfill

Cutting:
From each fat quarter:
(5) 5-1/2" squares

From the backing fabric:
(2) 18" x 24" pieces

From the binding fabric:
(3) 2-1/4" x WOF strips

From the muslin:
(25) 5" squares


Like I expected, this pillow was a success! My 7-year-old has already appropriated it. :) 

This Puff Pillow is my third tutorial in the Pillow Talk series. Find the other tutorials here


If you're new here, welcome! I hope you'll stay and look around a bit. 
If you like what you've seen here, you can also find me:
To find all of my quilt patterns, visit my Etsy shop
Find me on IG here.
Find me on Facebook here.
Sign up for my newsletter in the right-hand sidebar or here
(You'll receive a free pattern for my Diamond Drama quilt (below) as a thank you!)

Thursday, January 27, 2022

Pillow Talk: Pleated Pillow Tutorial


We can all use more throw pillows in our houses, right?! 
I'm starting a new tutorial series called Pillow Talk. Roughly once per month, I'll be sharing a video tutorial showing how to make a specific style of pillow. 


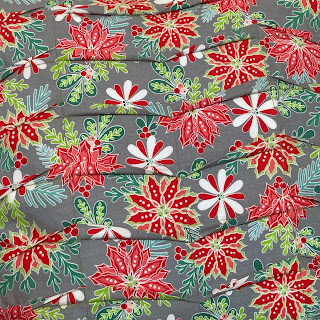
This month, I'm sharing how to stitch a pleated pillow. I just LOVE the texture that these pillows have, and it's so easy to create. 


Benartex has provided the fabric for these tutorials. For this project, I chose four prints from Cherry Guidry's Heart & Home collection from Benartex Fabrics*. They're wintry but fresh and bright, and I really like them. 

You can find the video tutorial here, on my YouTube channel (don't forget to subscribe!), but I've also included some of the numbers required for this project below for reference. 

You'll need (per pillow) 
  • 5/8 yard of two fabrics*
  • 1-yard package Thermoweb Fusible Interfacing*
  • 18" square pillow insert
  • 14" long zipper in a coordinating color
  • Fabric marking pen/pencil/etc.
*These supplies were provided by the companies indicated to create this tutorial. 


Cutting
From the pillow front fabric:
(1) 18-1/2" x 27" piece

From the pillow back fabric:
(1) 18" square (unless you want to make both sides pleated...then you'll need a second 18-1/2" x 27" piece)

From the fusible interfacing:
(1) 18" x 19" piece
(1) 18" square (unless you want to make both sides pleated...then you'll need a second 18" x 19" piece)


Fabric Marking Info
(Note: These instructions won't make sense on their own--you'll need to view the video for steps)
  • Measure 2-1/2" in from one short end of the front fabric piece and draw a stitching line.
  • Draw a second line (the folding line) 1/2" from the first line. 
  • Fold press and stitch pleat as directed in the video.
  • Measure 2" from the stitched line and mark your next stitching line. Measure 1/2" in from that and draw your next folding line.


I hope you enjoy trying this pillow making technique! 


If you're new here, welcome! I hope you'll stay and look around a bit. 
If you like what you've seen here, you can also find me:
To find all of my quilt patterns, visit my Etsy shop
Find me on IG here.
Find me on Facebook here.
Sign up for my newsletter in the right-hand sidebar or here
(You'll receive a free pattern for my Diamond Drama quilt (below) as a thank you!)