Showing posts with label Cherry Guidry. Show all posts

Thursday, January 27, 2022

Pillow Talk: Pleated Pillow Tutorial


We can all use more throw pillows in our houses, right?! 
I'm starting a new tutorial series called Pillow Talk. Roughly once per month, I'll be sharing a video tutorial showing how to make a specific style of pillow. 


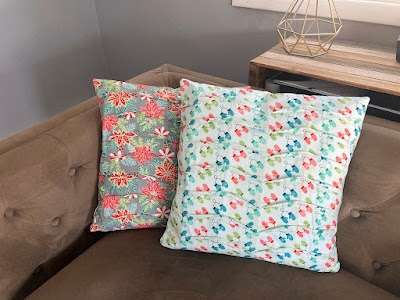
This month, I'm sharing how to stitch a pleated pillow. I just LOVE the texture that these pillows have, and it's so easy to create. 


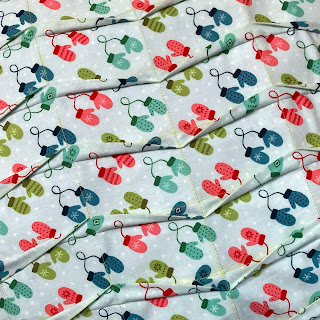
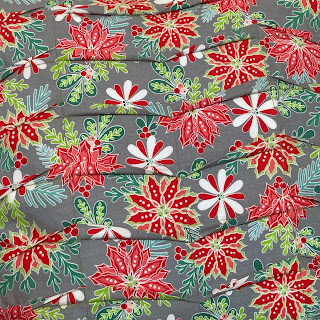
Benartex has provided the fabric for these tutorials. For this project, I chose four prints from Cherry Guidry's Heart & Home collection from Benartex Fabrics*. They're wintry but fresh and bright, and I really like them. 

You can find the video tutorial here, on my YouTube channel (don't forget to subscribe!), but I've also included some of the numbers required for this project below for reference. 

You'll need (per pillow) 
  • 5/8 yard of two fabrics*
  • 1-yard package Thermoweb Fusible Interfacing*
  • 18" square pillow insert
  • 14" long zipper in a coordinating color
  • Fabric marking pen/pencil/etc.
*These supplies were provided by the companies indicated to create this tutorial. 


Cutting
From the pillow front fabric:
(1) 18-1/2" x 27" piece

From the pillow back fabric:
(1) 18" square (unless you want to make both sides pleated...then you'll need a second 18-1/2" x 27" piece)

From the fusible interfacing:
(1) 18" x 19" piece
(1) 18" square (unless you want to make both sides pleated...then you'll need a second 18" x 19" piece)


Fabric Marking Info
(Note: These instructions won't make sense on their own--you'll need to view the video for steps)
  • Measure 2-1/2" in from one short end of the front fabric piece and draw a stitching line.
  • Draw a second line (the folding line) 1/2" from the first line. 
  • Fold press and stitch pleat as directed in the video.
  • Measure 2" from the stitched line and mark your next stitching line. Measure 1/2" in from that and draw your next folding line.


I hope you enjoy trying this pillow making technique! 


If you're new here, welcome! I hope you'll stay and look around a bit. 
If you like what you've seen here, you can also find me:
To find all of my quilt patterns, visit my Etsy shop
Find me on IG here.
Find me on Facebook here.
Sign up for my newsletter in the right-hand sidebar or here
(You'll receive a free pattern for my Diamond Drama quilt (below) as a thank you!)


Tuesday, March 17, 2020

Star Crossing QAL: More fabric inspiration!

It's almost time for week 2 of the Star Crossing QAL! Have you chosen your fabrics? 


If you're still deciding which fabrics to use, or even if you haven't and just like seeing what everyone else is up to, here's some more inspiration. 

Sharon Holland created a light and a dark version using her Spirited collection from Art Gallery Fabrics. She asked her IG followers to weigh in on which she should make. They're both gorgeous! (Followers chose the light version) Follow along as she makes the quilt here.


Two versions of Star Crossing featuring Playtime by Mister Domestic for Art Gallery Fabrics 


Two versions of Star Crossing featuring Gridwork by Christa Watson for Benartex


 Star Crossing featuring Choose to Shine by Cherry Guidry for Benartex


One last one: I don't have a digital mock up because it's scrappy, but here are the fabrics I'm using for the Star Crossing version I'm making during the quilt along. I'm using the low volume prints for the background, the solids for the start points, and the stripe for the center square and middle border.  I can't wait to see how it comes together!


What fabrics will you choose? 
Find all the QAL details here.
Purchase the Star Crossing pattern (20% off!) here.

Wednesday, July 26, 2017

Christmas in July Placemat Tutorial

Good morning! 

The sun is shining, today's forecast is 85 degrees, and I'm in a Christmas mood! I'm part of Benartex's Christmas in July blog hop today, and I'm sharing a placemat tutorial I made using Cherry Guidry's Mulberry Lane collection. 

These fabrics are adorable! I've always appreciated the addition of aqua into the more traditional red and green colorway because it creates such a fresh look. Here's a look at my completed placemat: 

 In these prints, I especially love all the different vehicles. I had fun quilting this as well--smaller projects are so much easier to maneuver! I followed the circles on the print below, filling in the white space with pebbles. 

Isn't this a fun stripe? 

My original plan was to make a tree using flying geese units. But it was just too straight and not quite right for the style of these fabrics. Paper piecing allowed me to create a wonky tree instead, and I'm really happy with how it turned out!

Head over to Benartex's blog to check out my tutorial. 
Leave a comment below telling me your favorite holiday decoration for a chance to win a fat quarter bundle of Mulberry Lane fabrics. This giveaway is open through Sunday, July 30th at 11:59 pm EDT. 

Thanks for stopping by! 


Follow along with Benartex's Christmas in July Blog Hop!
Wednesday: Mulberry Lane Placemats by Lisa Ruble
Thursday: Nordic Holiday Star Quilt by Debby Kratovil
Friday: A Moose for Christmas Pillow by Cynthia Brunz
Saturday: Winter Story Wall Hanging by Benartex blog design team