Showing posts with label applique. Show all posts

Wednesday, October 4, 2023

Leaves & Webs: 2-in-1 Reversible Placemats

Happy fall! 
I admit that I have 2 plastic totes packed with Halloween and fall decorations (and that doesn't count our outside Halloween decorations!). But I can't resist making more projects every year - I love this season! 

This year, I decided to make Two-in-One Reversible Placemats. They work for both fall AND Halloween, but they'll take up less space wherever you store your decorations! 


I've got a thing for fall leaves, so that's naturally what I chose for fall, browsing through my scraps to find the "best" leaf colors. And spider webs - how fun are they?! Here are the supplies i used. I'm a Thermoweb designer, so the tutorial for this project is featured on their blog. 

A quick note about the construction of these placemats - I opted to use an orange flange as the accent border. The flange gets quilted down, but I do like the little add-on of dimension it creates. 


Another look at the Leaf side of the placemats:


And the Web side: 

 Head over to Thermoweb's blog to find the tutorial!

Friday, December 23, 2022

Flurry Pillows + Zipper Tutorial

It's snowflake season! The timing on this post is perfect, because we are currently in the middle of a snowstorm. I'm sharing my Flurry Pillows tutorial over on Thermoweb's blog today. 


Click here to see the tutorial. Below, I'm sharing a little more in-depth zipper tutorial. I used to make only envelope pillows, but a few years ago, I tried adding a zipper to a pillow I made and haven't looked back - I like the results so much better! 

Teal Square Pillow details:
Start with (2) 17" squares of background fabric and (2) 17" squares of Fusible Fleece. Follow the tutorial directions to make front and back, squaring each side up to 16-1/2" after quilting. 

After your pillow front and back are assembled and squared up, it's zipper time!
Step 1 Place the pillow front and back right sides together. Increase your stitch length for basting. Stitch along what will be the bottom edge of the pillow with this long stitch, using a generous 1/4" (sometimes I even go 1/2") seam allowance.


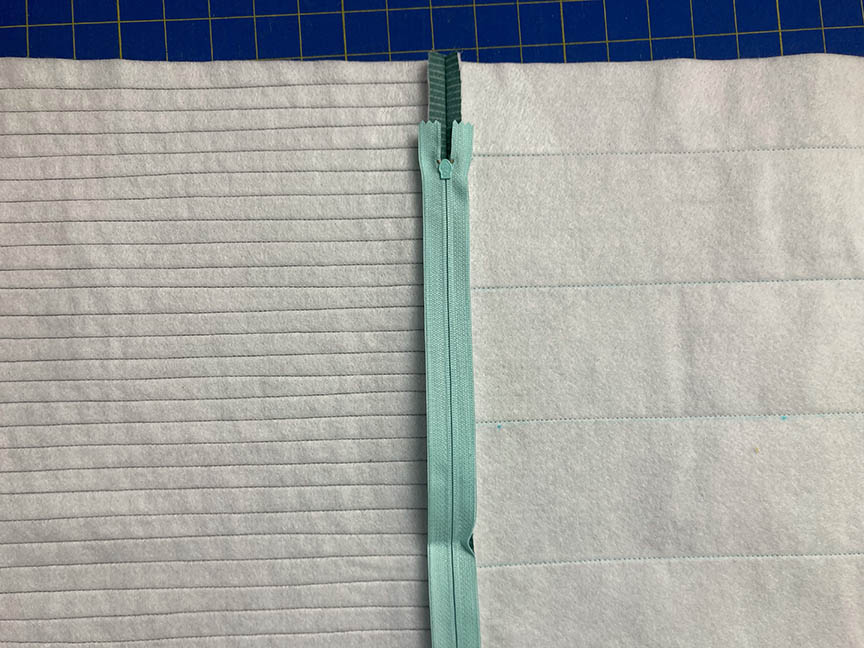
Step 2 Press the seam open. Layer the zipper on top the seam, right side down. Center along the pillow. The zipper teeth should align with your seam line.

Step 3 Using a zipper foot on your machine, stitch along both long sides of the zipper, as well as the short ends. Hint: Make sure you switch your machine back to a normal stitch length - I often forget and start sewing my zipper on with a basting stitch!

Here's a close-up of the top end of the zipper - I've stitched above the metal end. 

Step 4 Use a seam ripper to open the basting stitch along the zipper. Do not open the stitches all the way across the pillow bottom - just between the stitches that hold the zipper in place. 

Step 5 Open the zipper and then fold the pillow front and back right sides together, matching raw edges. Pin along raw edges. Make sure your zipper is open. Did I mention that yet? It's important. Stitch around the remaining (3) sides of the pillow, backstitching at the beginning and end. Clip corners carefully to reduce bulk.

Step 6 Turn the pillow cover right side out (through that open zipper!) and poke the corners out. 

Step 7 Insert your pillow form (in this case, a 16" square pillow) and enjoy! 

We'll be enjoying these snowflakes on our snowy day! 


Thursday, August 18, 2022

Cake? Yes please!

I love cake. Especially chocolate cake! My current favorite is this dark chocolate cheesecake. I highly recommend it - sooo delicious! 

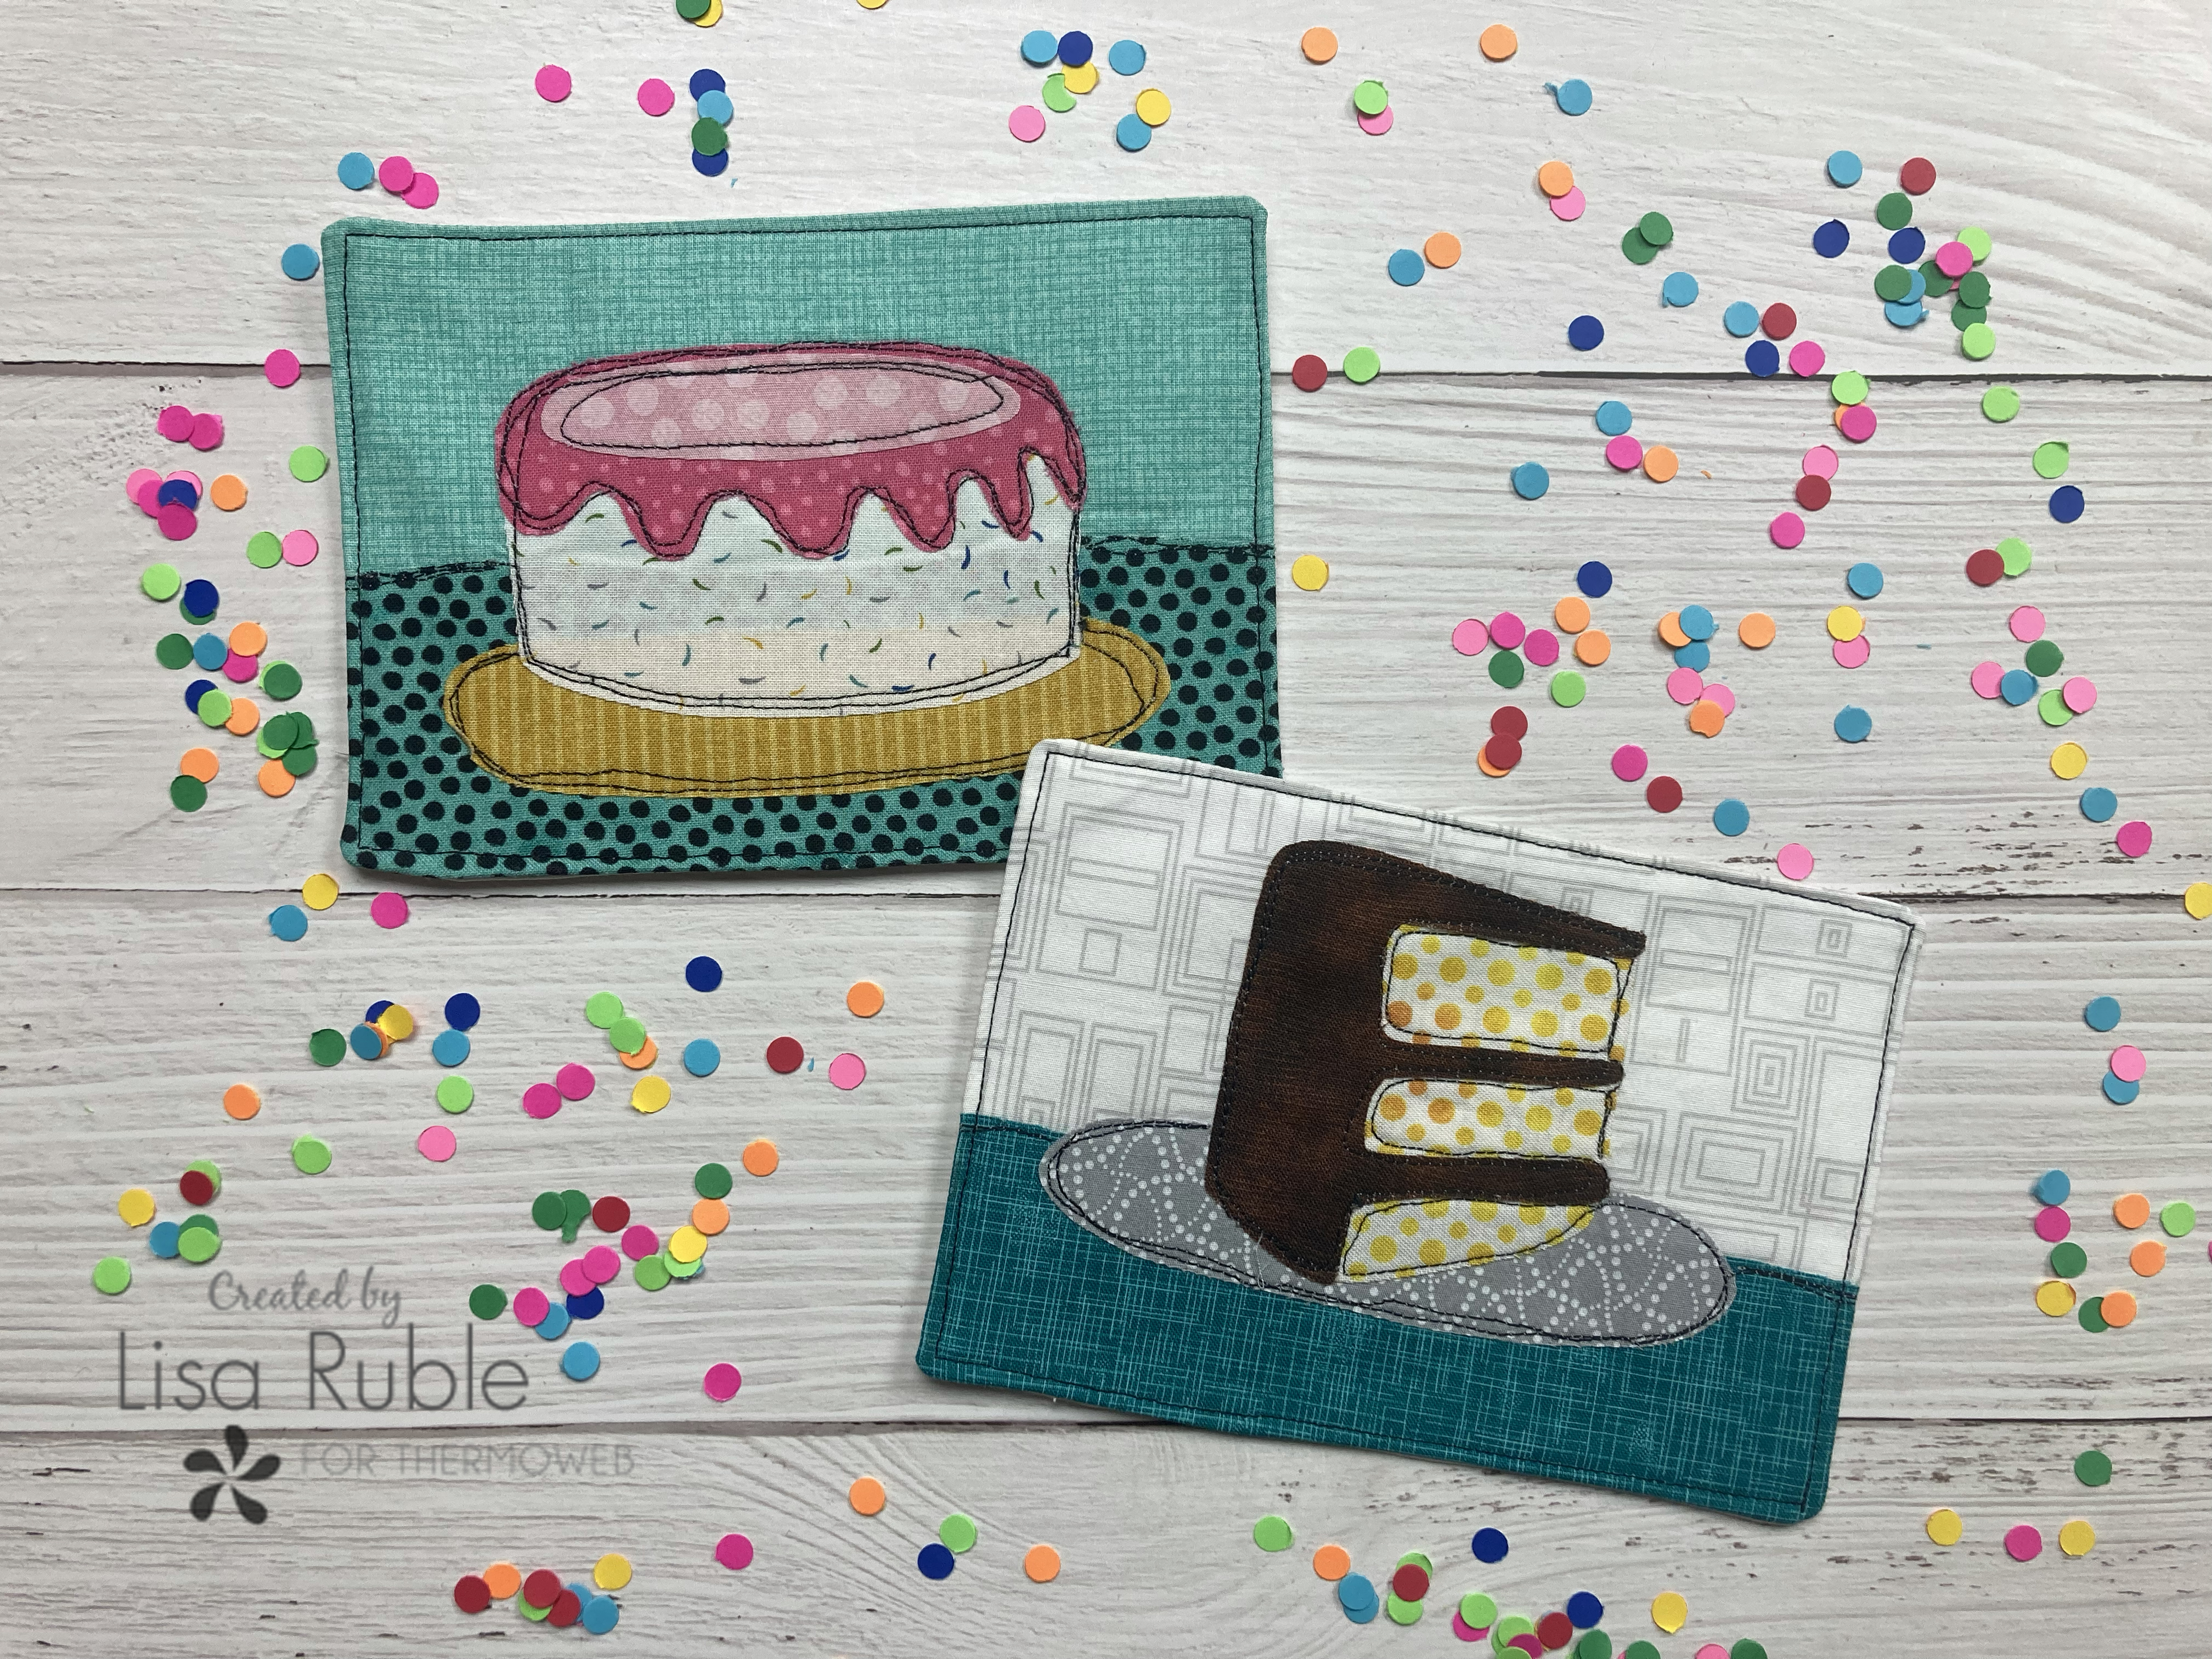
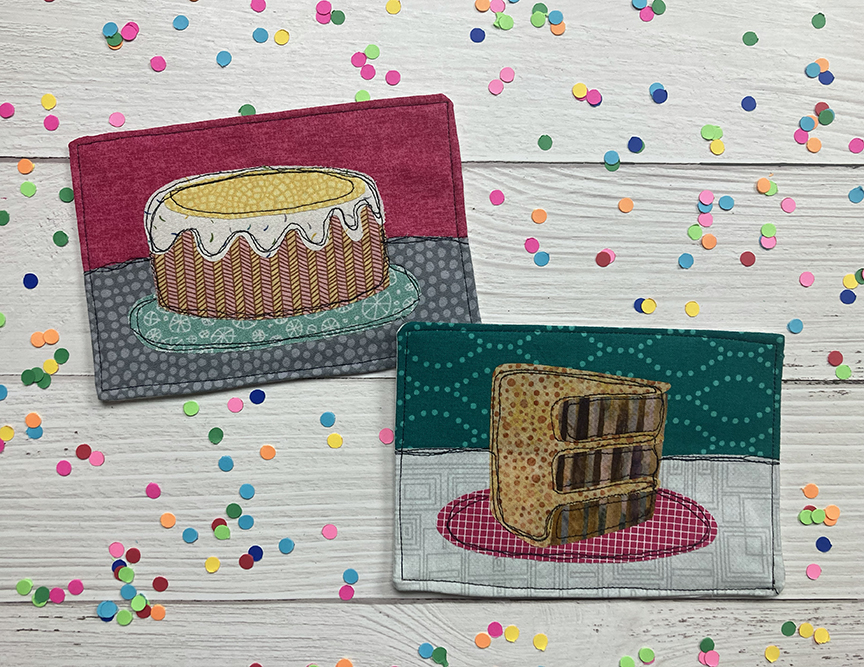
So when Thermoweb suggested a cake theme, of course I was all in! I decided to make little cake postcards. They could be used as actual mail-able postcards, or as birthday cards, or just for a fun little gift! My Cake Love Postcards tutorial is now live on the Thermoweb blog.


These projects go together so quickly because it's all applique. What took the most time - seriously - was narrowing down the fabric choices. I had fun browsing through my stash to find "chocolate" or "vanilla" or frosting fabrics. I used HeatnBond Lite Iron-On Adhesive, HeatnBond EZ Print Transfer Sheets and HeatnBond Lightweight Non-Woven Fusible Interfacing to make these cuties.

I loved the stripe for this cake and the sprinkle frosting.


Confetti cake with pink frosting


I envision this one as a chocolate caramel cake. 


Yellow cake with a chocolate frosting.

Which flavor appeals to you? 


Head over to the Thermoweb blog to find the full tutorial!

Monday, July 4, 2022

Firecracker Mini Quilt - 3 Block Assembly

Happy 4th of July! My Firecracker Mini Quilt tutorial is up on the Thermoweb blog. I made that version with four blocks all stitched together. I've also created a version with three blocks and sashing and border, and I'm sharing that assembly here. 


The 3 Block version:


Cutting:
From the white:
(4) 2" x 6-1/2" pieces 
(2) 2" x 24-1/2" strips

From the blues and reds:
A total of 85" of 2-1/4" wide strips for binding


Assemble the Quilt
Step 1: Lay out the 3 blocks alternating with (4) 2" x 6-1/2" white pieces. 


Step 2: Sew the blocks and white pieces together. Sew the (2) 2" x 24-1/2" lengths to the long sides of the quilt. 

Step 3: Layer the backing right side down, batting, and quilt top right side up. Baste layers together and quilt as desired. Use short sections of the (6) 2-1/4" x 21" red and blue strips to bind the quilt. 


Block close-ups: 


Monday, May 2, 2022

Jungle Baby projects

Today over on Thermoweb's blog, I'm sharing my jungle animals appliques. These cuties have a long history - I originally designed a quilt for my oldest son's nursery using them, back in 2008 (scroll down to see). I've long wanted to turn that baby quilt into a pattern, and so I've created two different layouts for the appliques. (Pattern coming soon!) 
Which do you like better? 


Close-ups: 
I had a lot of fun quilting these two quilts. 


And here's the original version: 


My mom and I each stitched two patchwork animals. They are adorable and I will keep them forever, but I will probably never stitch anything like these again! I prefer 2-D sewing projects. :) 


I also used the applique shapes with a little Mod Podge on canvases to create wall art. 

All of this nursery decor has been packed away for many years, so it was fun to have this little walk down memory lane! 

Here's the bright plaid applique version I started as part of my tutorial. How do you think I should finish it? Pillow? Wall hanging? The start of a new baby quilt? 


Wednesday, April 20, 2022

Trinity Rainbow Banners

This past winter, my church, Trinity Lutheran in Kalamazoo, asked me to create some new banners to hang in the sanctuary. I put together some designs, and we decided on what you see below. I'm thrilled with how they turned out!

 
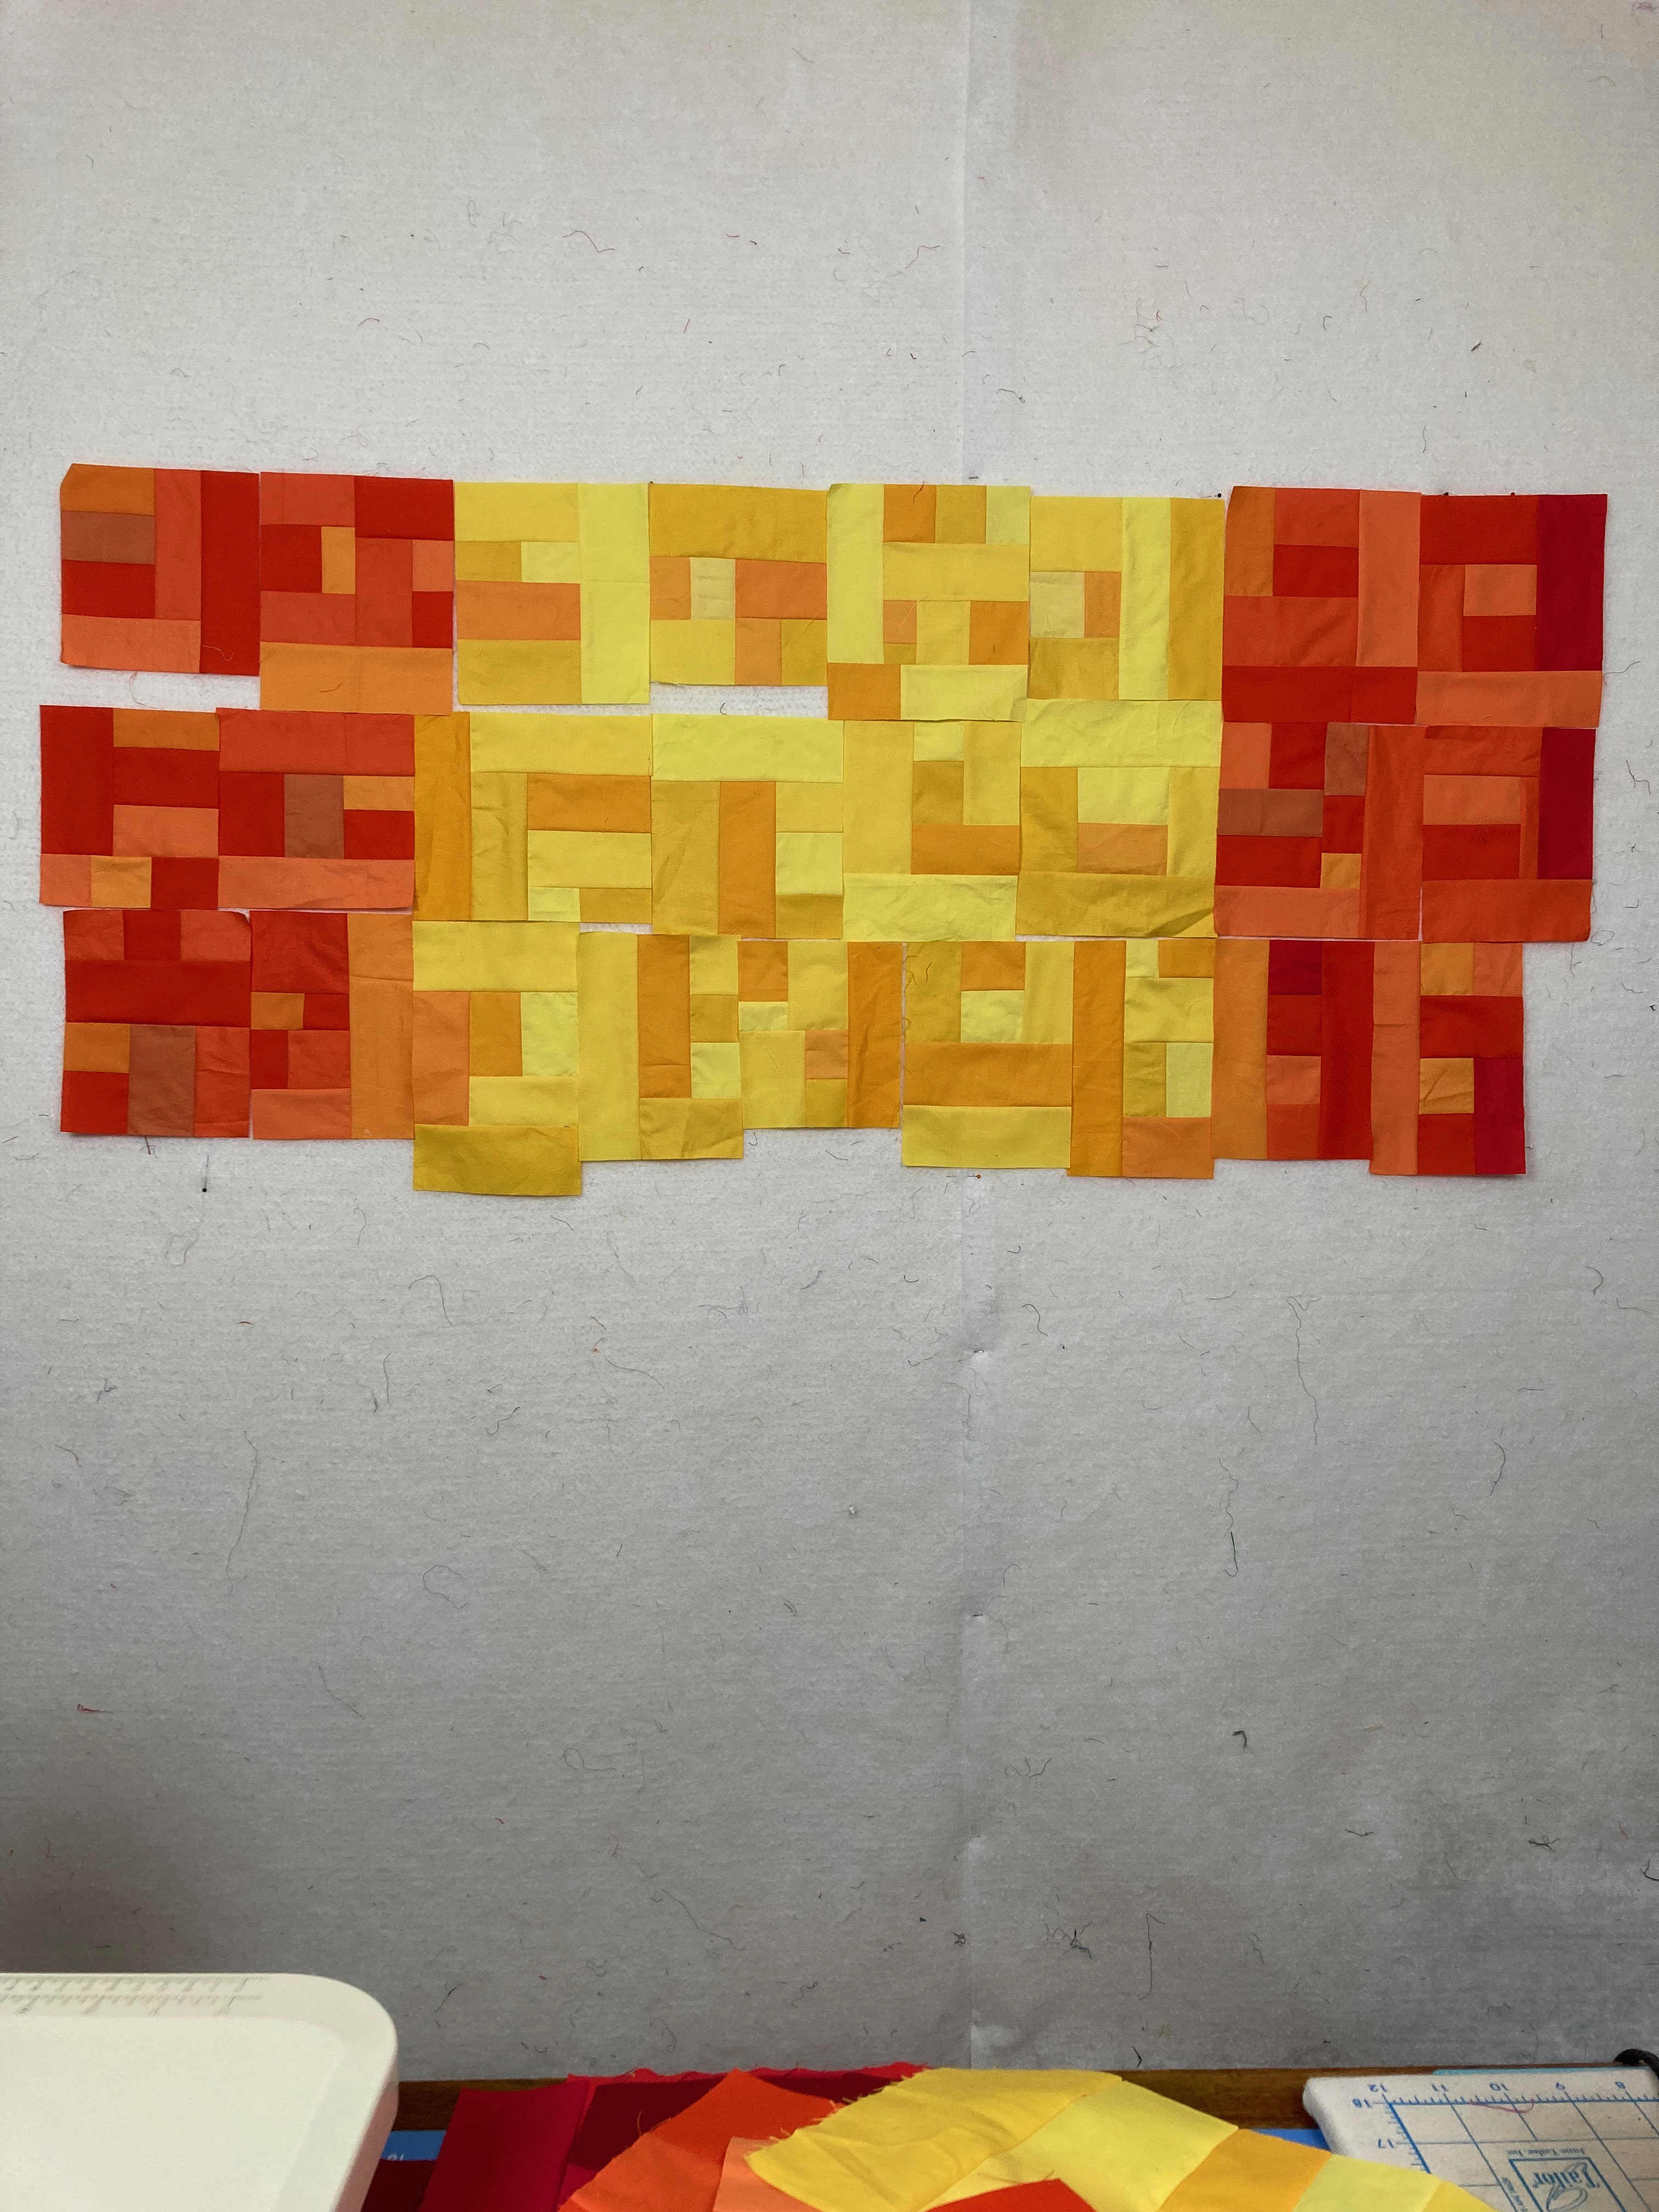
This style of quilt is based on the Rainbow Cross quilt I made for Castle Church back in 2019, so I knew just how to get started: lots of improv pieced slabs in a rainbow of colors.  If you want to see a tutorial on assembly line slab piecing, click here.


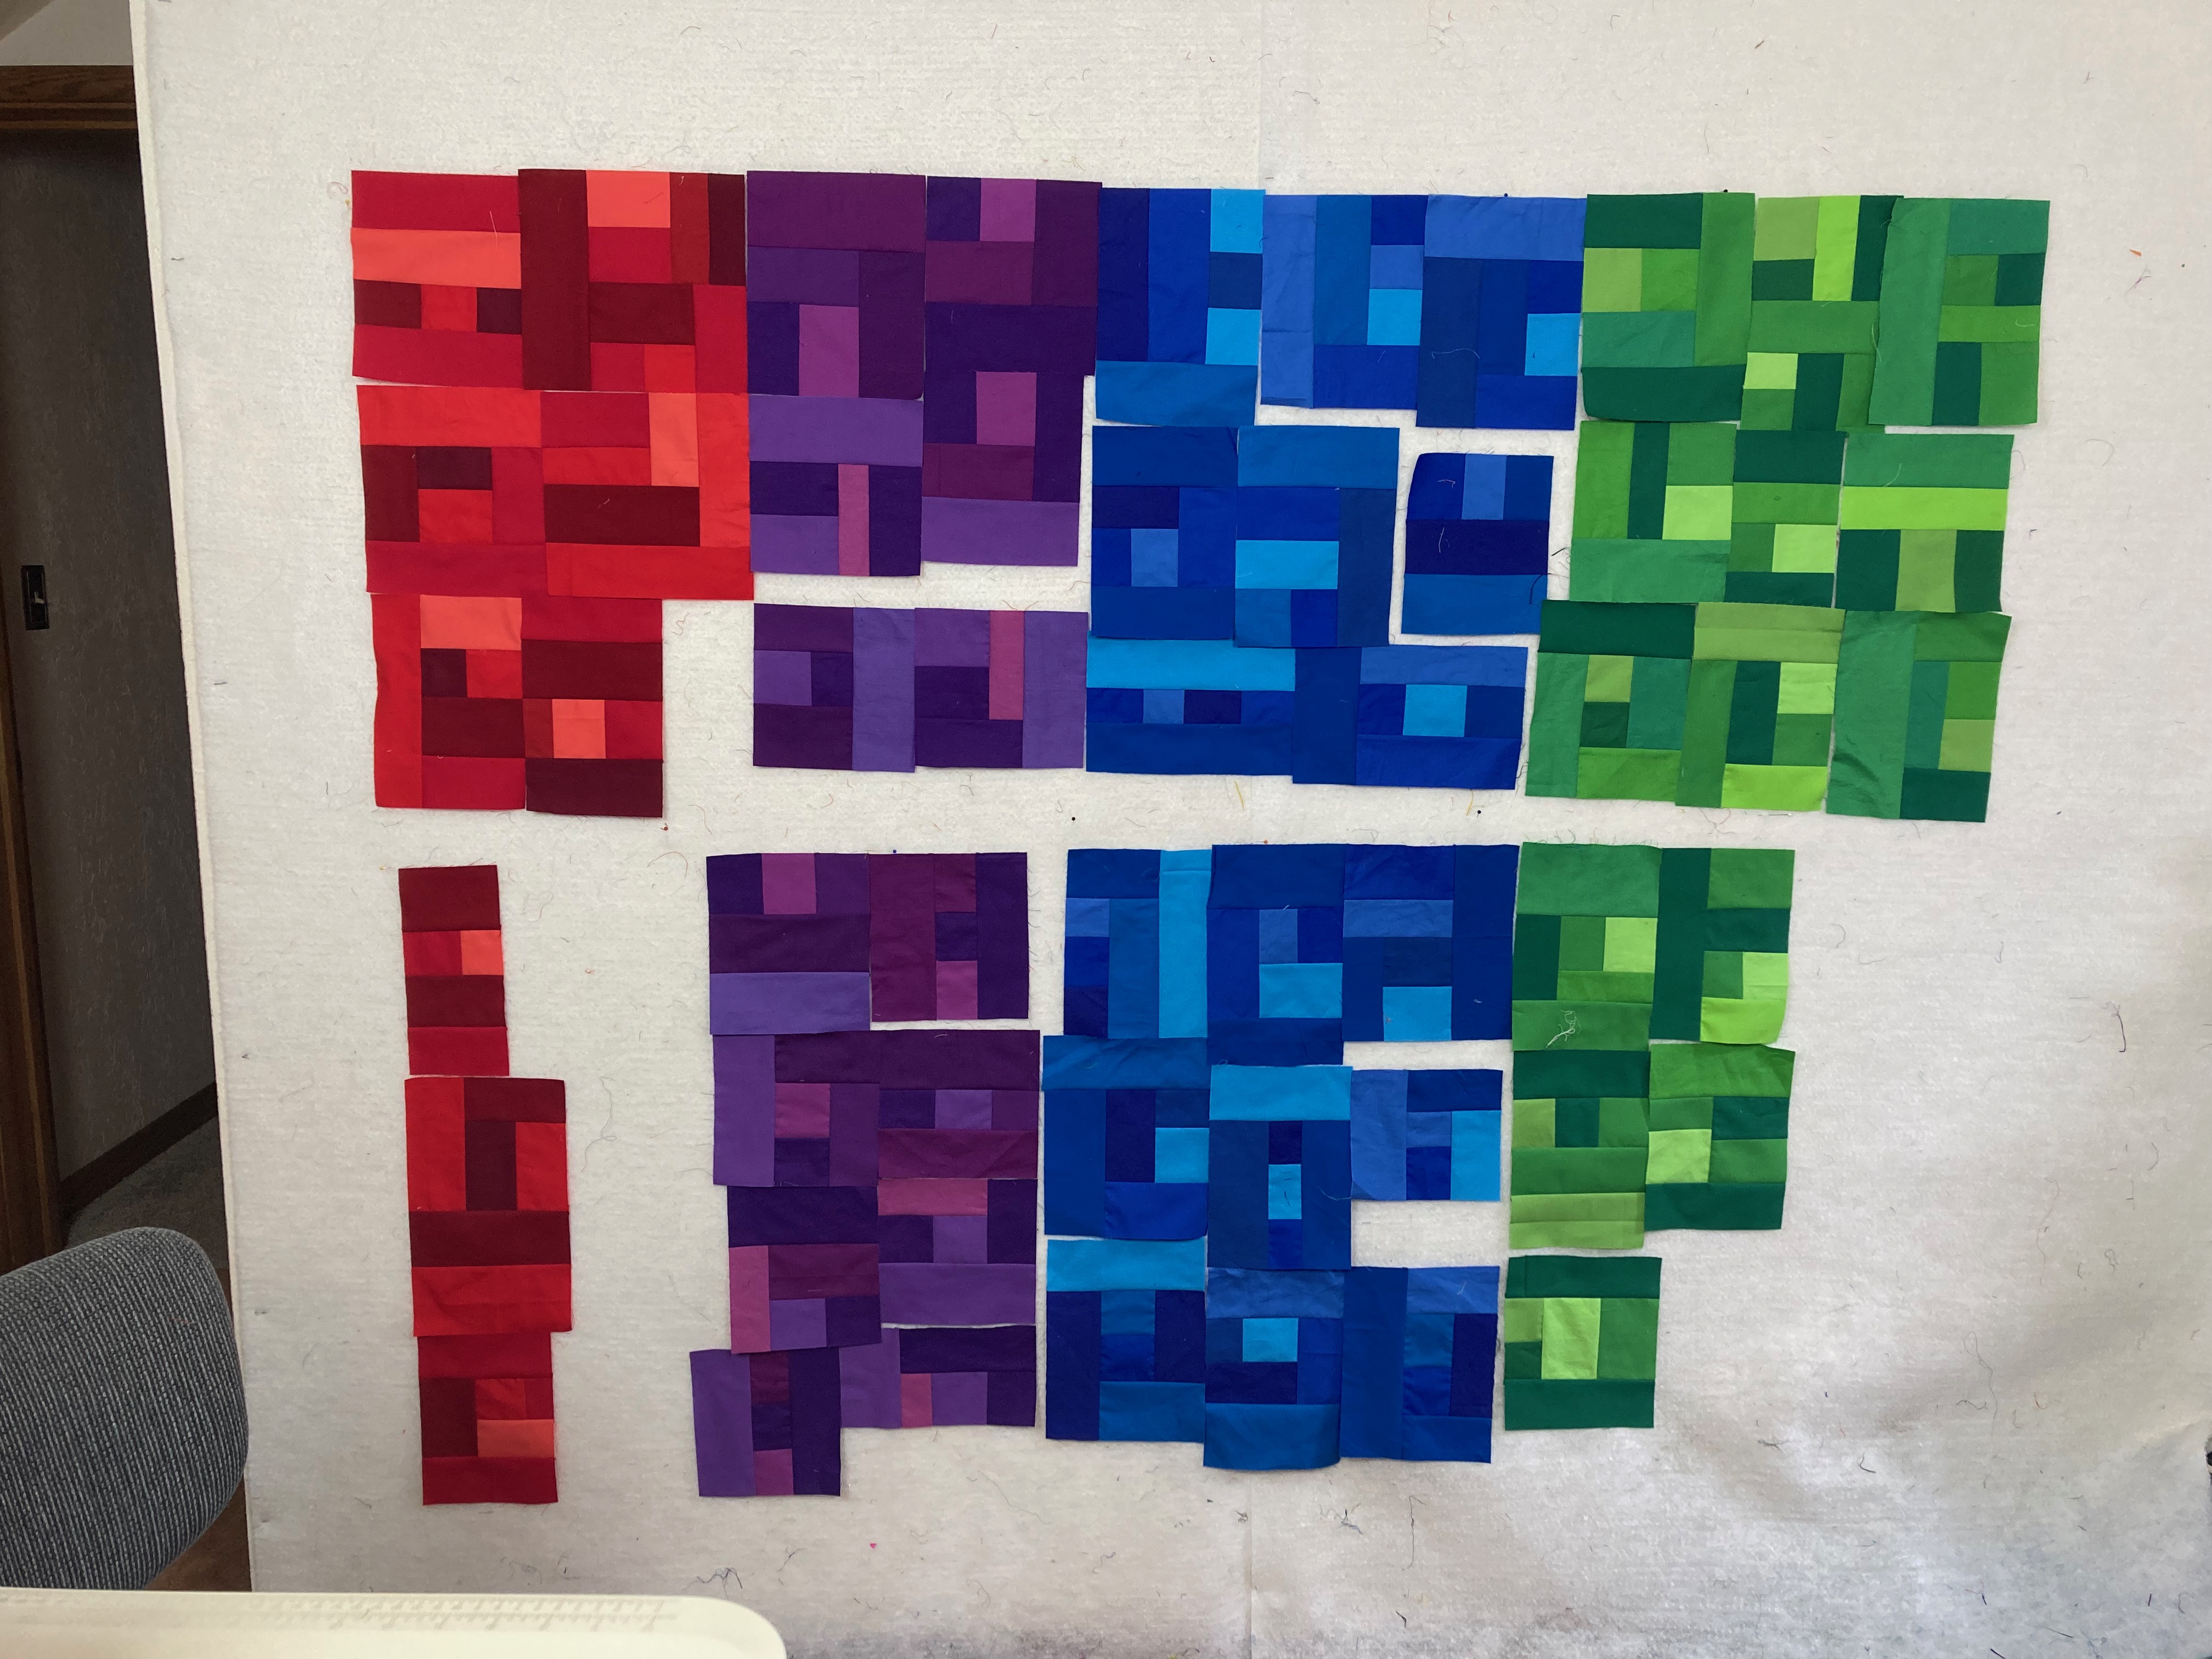
Once I had slabs constructed, I started laying them out on my design wall. I assemble them into horizontal rows, and then join the rows. The random patchwork helps to "hide" the appearance of the rows so that it looks more cohesive. 

I did the same with the red, purple, blue and green section. The different here is here is that I had to make two, and I wanted them to have a fairly similar amount of each color, so I built both on the wall at the same time so I could compare them. 

The finished pieces:

When I made the Rainbow Cross quilt, I put together a time-lapse video of arranging the quilt on my design wall. You can watch it here. 

Diane Oakes machine quilted all three panels, beautifully as usual. Look at that gorgeous texture! 

The finishing touch was adding the celtic knot on the center panel. I used Thermoweb HeatnBond Lite Fusible Adhesive to apply the shape with raw edge fusible applique, and then I zigzag stitched the edges to secure them. 

I didn't want the "line" of a binding around the edge, so I used a facing technique. It had been a while since I'd done a facing, so I followed this excellent tutorial. 

The results, outside int the sun before hanging: 
The vibrancy makes my heart sing!


I was honored to create these banners and enjoy seeing them hang in the church.


If you're new here, welcome! I hope you'll stay and look around a bit. 
If you like what you've seen here, you can also find me:
To find all of my quilt patterns, visit my Etsy shop. 
Find me on IG here.
Find me on Facebook here.
Sign up for my newsletter in the right-hand sidebar or here. 
(You'll receive a free pattern for my Diamond Drama quilt (below) as a thank you!)


Thursday, April 14, 2022

Modern Tulips Flange Binding Tutorial

Happy spring! Today I'm sharing a tutorial for this Modern Tulips wall quilt over on the Thermoweb blog. This project is made using raw edge applique, and then I quilted it with freehand wavy lines. I finished the project off with a flange binding so I could have that little pop of pink! I'm sharing how to add the flange binding below. 

But first, I wanted to show a few other color variations I played with. 
I really liked the gradated effect in my original design, so I tried two grayscale versions. Black and gray tulips aren't super typical, but I like how they pop off the bright background!

I also auditioned some multicolor versions. I like the idea of using different shades of the same color to add a little interest and dimension to the bloom. The white background totally changes the look, doesn't it?


Back to the flange binding! 

You'll Need:
(2) 1-1/2" x WOF strips for the main color (black for me)
(2) 1-3/4" x WOF strips for the accent color (pink for me)

Make the Binding:
Step 1 Join the black strips into a long strip using a diagonal seam. Repeat with the pink strips.

Step 2 Sew the black and pink strips together. Press seam toward the narrower strip (black).

Step 3 Press the strip in half, matching raw edges on the long side. This will create a thin line of pink on the black side of your binding strip.

Step 4 Sew the binding strip to the back side of the quilt, with the accent color facing up. Miter corners as you work around the quilt.


Step 5 When you join the ends of the binding strip, align the seam between the strips. Put a pin in place to mark the spot where they align, and make sure you stitch though that spot as you join the strips.

Step 6 Double check to see how your seams lined up before trimming off the seam allowance. If they don't align, you can rip out the stitches and try again. When you're satisfied with the join, trim the seam allowance and finish stitching the binding to the back side of the quilt. 

Step 7 Press the binding away from the back of the quilt. Press to the front, miter corners, and secure binding in place with binding clips. 

Step 8 Stitch on the pink flange with matching thread to secure the binding in place.

 And you're done! Hang up your wall quilt and enjoy! Don't forget - you can find the full Modern Tulips Wall Quilt here.

______________________________________________________________________________

Love tulips? Check out my Tulip Row quilt pattern here. 


If you're new here, welcome! I hope you'll stay and look around a bit. 
If you like what you've seen here, you can also find me:
To find all of my quilt patterns, visit my Etsy shop. 
Find me on IG here.
Find me on Facebook here.
Sign up for my newsletter in the right-hand sidebar or here. 
(You'll receive a free pattern for my Diamond Drama quilt (below) as a thank you!)