Showing posts with label baby quilt. Show all posts

Monday, May 1, 2023

Doodle Baby Fringe Quilt Tutorial

Are you like me? Do you have the best intentions of making quilts for new babies in your life? And suddenly those babies are walking, or off to preschool, and the quilt still hasn't happened?  

When Benartex sent me the Doodle Baby flannel fabrics as part of their Ambassador program, I knew exactly what I wanted to make: a quick and easy baby quilt. 

That's what I'm sharing today - a tutorial for a flannel baby quilt that doesn't require quilting. It goes together very quickly - it took me longer to cut the fringe than to sew the quilt!  Keep reading to learn how to make this quilt yourself. And if you'd prefer a video tutorial, click here.

First, check out these Doodle Baby flannel fabrics, designed by Jessica Flick. Aren't they sweet? I love the little hand-drawn animals, the text print, the stripes...and the color palette.  

Let's get to the tutorial!

You'll Need: 
3/8 yard each of (8) medium flannel prints
5/8 yard each of (2) white and (2) gray flannel prints
That's it! 

Cutting:
Tip: Fabric yardage comes folded in half, with wrong sides together. As you cut, keep the squares paired up wrong sides together. You'll be sewing layered pairs together, and these are already matched up and ready to go!
From each of (7) medium flannel prints:
(4) 9" squares (so 2 sets of paired squares from each)

From the remaining medium flannel print:
(2) 9" squares (so 1 set of paired squares)

From each of the (2) white and (2) gray flannel prints:
(30) 5" squares (so 15 sets of paired squares from each)


Making the Quilt:
Step 1 With a matching pair of 5" squares wrong sides together, draw diagonal lines from corner to corner in both directions. 


Tip: Marking squares is fine, but a real timesaver for this quilt (and other projects) is a Vivilux laser. It attaches to your sewing machine, and then you align the laser line with the needle. As you feed squares, align the corners with the laser line. Straight sewing lines, and no marking needed! 

Step 2 Sew each pair of 5" squares diagonally in both directions, either using marked lines or a laser. I highly recommend chain piecing as you stitch these squares. Make (60) 5" square stitched pairs. Do the same with the pairs of medium print 9" squares as well to make (15) 9" square stitched pairs. 

Step 3 To make the four-patch, lay out (2) gray stitched pair squares and (2) white stitched pair squares as shown. 

Step 4 Layer the top gray and white squares back sides together and stitch using a 1/2" seam allowance. Do the same for the second set of gray and white squares. Finger press the seams (on the front side!) open.

Step 5 Layer the two gray/white units back sides together, matching center seams. Pin units together, making sure the seam allowances are folded open on both sides (this reduces bulk). Stitch using a 1/2" seam allowance. 

Step 6 Your four-patch block will look like this. Finger press the horizontal seam open. Make a total of (15) four-patch blocks, arranging the fabrics in each in the same way. Blocks measure 9" square.

Step 7 Lay out the (15) four-patch blocks and the (15) medium print blocks into (6) rows of (5) blocks each. Sew the blocks into rows using a 1/2" seam allowance on the front and making sure seams are folded open. Note orientation of the four-patch blocks.


Blocks stitched into rows

Step 8 Sew the rows together, matching seams. Stitch around the outer edge of the quilt using a 1/2" seam allowance. 

Step 9 Clip all of the seams, cutting less than 1/4" apart for maximum fringing and fraying. Cut carefully to make sure you don't cut through the stitch line. Don't forget to cut around the outer edges of the quilt. 

Step 10 After you've clipped all of the seams, wash and dry the quilt. This will change those clipped edges into a wonderful frayed fringe. That's it - you're done! 

A little close-up of the fringing effect


These quilts are so cozy and great gifts! I especially love that the backing is part of the blocks and the assembly, and no quilting is required beyond stitch across each square - it's that easy!
Don't forget - you can also find the video version of this tutorial here!


If you're new here, welcome! I hope you'll stay and look around a bit. 
If you like what you've seen here, you can also find me:
To find all of my quilt patterns, visit my Etsy shop. 
Find me on IG here.
Sign up for my newsletter in the right-hand sidebar or here. 
(You'll receive a free pattern for my Diamond Drama quilt (below) as a thank you!)


Monday, May 2, 2022

Jungle Baby projects

Today over on Thermoweb's blog, I'm sharing my jungle animals appliques. These cuties have a long history - I originally designed a quilt for my oldest son's nursery using them, back in 2008 (scroll down to see). I've long wanted to turn that baby quilt into a pattern, and so I've created two different layouts for the appliques. (Pattern coming soon!) 
Which do you like better? 


Close-ups: 
I had a lot of fun quilting these two quilts. 


And here's the original version: 


My mom and I each stitched two patchwork animals. They are adorable and I will keep them forever, but I will probably never stitch anything like these again! I prefer 2-D sewing projects. :) 


I also used the applique shapes with a little Mod Podge on canvases to create wall art. 

All of this nursery decor has been packed away for many years, so it was fun to have this little walk down memory lane! 

Here's the bright plaid applique version I started as part of my tutorial. How do you think I should finish it? Pillow? Wall hanging? The start of a new baby quilt? 


Monday, April 11, 2022

Nursery Blog Hop: Rhombi quilt + baby block tutorial + pattern sale~


I'm excited to be part of Michael Miller's Nursery Blog Hop! 
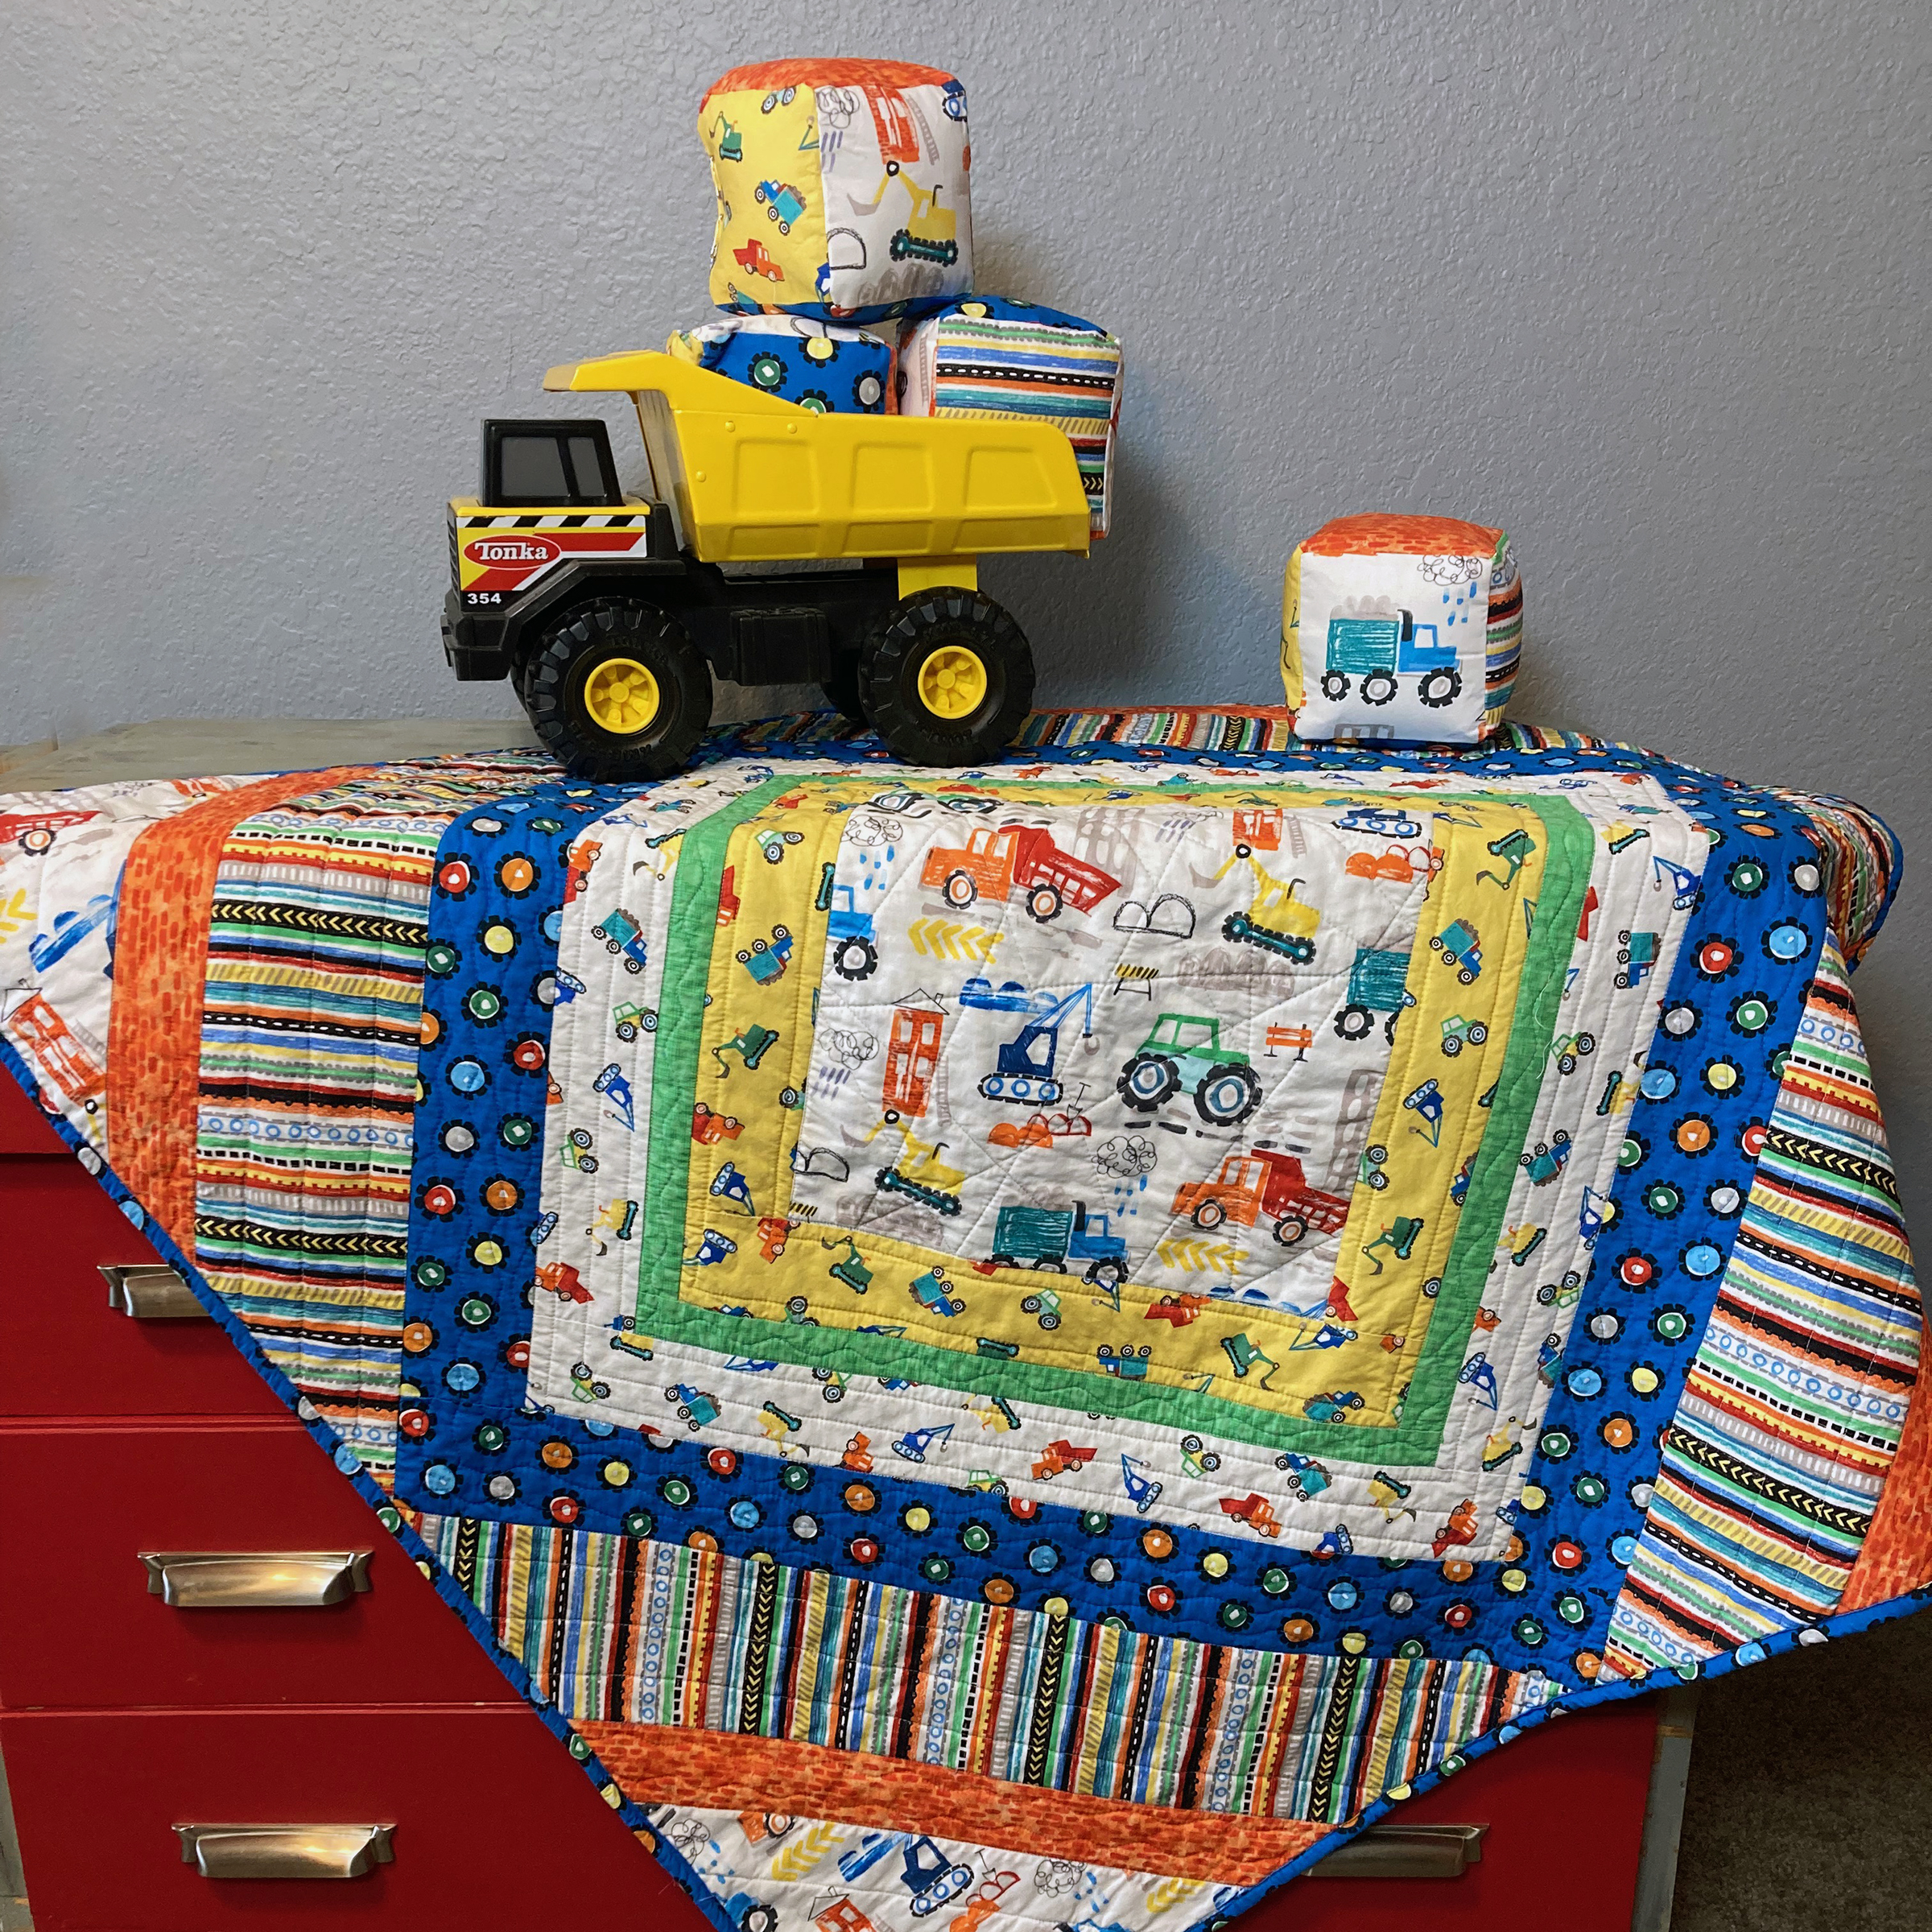
I have three boys at home, and while none are babies anymore (the youngest is 7), construction-themed fabric is right in my wheelhouse. When I saw the Diggers and Dumpers collection, I knew it would be perfect in my Rhombi quilt pattern. (10% off through 4/14!) 

How cute are these prints? I love the bright primary colors.


Purchase the Rhombi quilt pattern here. (10% off through 4/14)


My Rhombi quilt pattern highlights a large focal print--in this case, the construction equipment in the center and corners. Add in a few brightly colored prints (I especially love using a stripe), and this quilt sews up so quickly! I stitched this quilt top in one afternoon. The finished quilt measures 45" square.


I couldn't resist making baby blocks with the remaining fabric. That large focal print was just begging to be fussy cut for block sides! Keep scrolling for the tutorial to sew the baby blocks. 


And the perfect finishing touch? That cozy Minky on the back. My boys are fighting over who gets to use this quilt. 

Baby Block Tutorial
With prints these fun, who can resist sewing some stackable stuffed blocks? Adding a layer of interfacing helps the blocks to keep their shape. 

Here's how:

You'll Need: (to make 4 blocks)
1/2 yard focal print to fussy cut
1/4 yard each four coordinating prints
Fiberfill
Fabric marking pen

Cutting:
From the focal print:
Fussy cut (8) 5-1/2" squares, each centering a motif

From the four coordinating prints:
(4) 5-1/2" squares from each print

From the Interfacing:
(24) 5-1/2" squares

Make the Blocks:
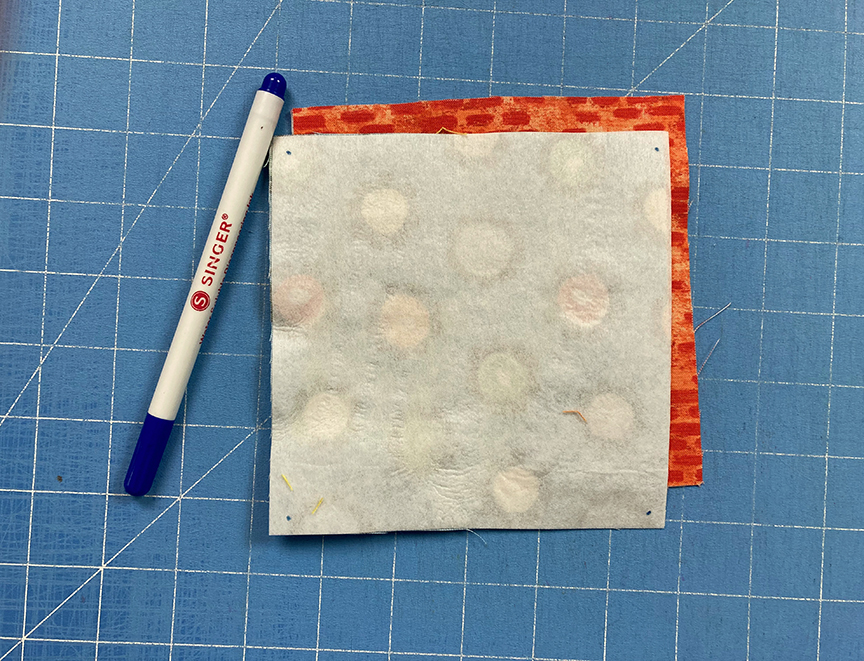
Step 1 Following manufacturer's directions, fuse an interfacing square to the wrong side of each fabric square. 


Step 2 Using a fabric marking pen, mark a dot 1/4" from each corner of each square. These will be your starting and stopping points for stitching. 

Step 3 Join six squares together as shown, starting and stopping on the corner dots. Back stitch at starting and stopping points to secure the stitches. The four squares in a horizontal row will become the "tube" and the top and bottom squares will become the top and bottom of the block. 

Step 4 Pin raw edges together to start forming a block shape, making sure to align corner dots. 

Step 5 Stitch pinned edges from dot to dot, creating an open box shape as shown. Don't forget to backstitch at starting and stopping points!
Step 6 Pin and sew the remaining edges, leaving a 3" opening along the last side for turning. 

Step 7 Turn the block right side out and using a turning tool to poke corners out as much as possible. Stuff firmly with fiberfill and handstitch the opening closed. Tip: Use a thimble to help push the needle through the interfacing. 


I really enjoyed sewing a couple cute projects using these fun fabrics! 

If you're new here, welcome! I hope you'll stay and look around a bit. 
If you like what you've seen here, you can also find me:
To find all of my quilt patterns, visit my Etsy shop. 
Find me on IG here.
Find me on Facebook here.
Sign up for my newsletter in the right-hand sidebar or here. 
(You'll receive a free pattern for my Diamond Drama quilt (below) as a thank you!)


Friday, November 6, 2020

NEW Opposite Directions Pattern!

I'm excited to be releasing my Opposite Directions pattern today! 
This pattern was a long time in the making. It started out with this version several years ago. I used just three fabrics--two gradated prints and the background color. 
 

I always knew that I wanted to create a few additional versions--a rainbow one, of course! I chose four shades of blue for the background and ran a rainbow of tonals across each row. 


Opposite Directions: Which way does it go? My friends were game to take a fun photo playing tug of war with the finished quilt. :)


I also wanted to make a smaller version of the quilt. With the right prints, this pattern is perfect for a baby quilt. I discovered the Pine Lullaby Rediscovered collection from Art Gallery Fabrics and knew I'd found the perfect fit. 


White and black outdoorsy prints with cute little critters, all of which popped off a two-tone green background.


Hello, baby!


And this background fabric! Be still, my heart!


Those arrows are calling your name, aren't they?


Opposite Directions is now available in my Etsy shop. Grab your copy today!
Buy the Opposite Directions pattern

Visit my Etsy shop here
Find me on Facebook
Find me on IG @lisaerin1121
Sign up for my newsletter in the righthand sidebar


Wednesday, November 6, 2019

OMG: Baby Quilt

I'm behind on a few baby quilts and trying to catch up! 
My One Monthly Goal over at Elm Street Quilts for November is to make a pink version of this Leafy Cool quilt for a friend's soon-to-be baby girl. 
The baby is due in November, so this gift might actually be on time! 

I can't wait to get started! 

Wednesday, January 31, 2018

OMG: Hearts Galore!

My heart quilt is complete! I even washed it to get that great crinkle look before I send it off. My January goal for One Monthly Goal over at Elm Street Quilts was to assemble, quilt and bind this baby quilt. 

I made the hearts using a tutorial from Cluck Cluck Sew and a charm pack from Amy Gibson's Meriwether collection from Windham Fabrics. After I finished the hearts, my goal was to make the quilt bigger. So I added sashing strips with pink sashing squares and then four different borders. The green was a happy accident--I just happened to have it and it matched the green in the prints! The quilt measures about 33" square. 


I browsed online for some quilting inspiration and went with a diagonal crosshatch.I like how it looks (and it disguises the slightly-less-than-straight border issues I had). I finished the quilt with a pink flange to add a little extra color. 

The other happy accident with this quilt is the backing. I headed to my local quilt shop, hoping to find something flowery and fun that would coordinate. I'd gotten the charm pack back in May and hadn't grabbed any Meriwether yardage at the time. Imagine my delight when the quilt shop had this small green print! 

I love quilted texture shots...

A closer look at a few of the heart blocks. When I initially cut the charm squares in half, I cut quickly and blindly and somehow managed to cut each directional print in half the "wrong" way. Oh well...
One last confession: Besides liking the crinkly effect, I had to wash the quilt because I cut my finger with a thread scissors as I was adding the binding. I stubbornly chose not to get a bandaid before continuing, and yep! I bled on the white solid outer border in two different places. Dumb. 
But happily it came out...

Sending this quilt off to a sweet little baby in Ohio!