Showing posts with label blog hop. Show all posts

Sunday, October 6, 2024

Bee Haven Project Hop

 I am so excited to be part of the Bee Haven Project Hop! Bee Haven is the new collection by Rachel Rossi for Benartex, and I have been in love with these prints from the first time I saw them! (psst...keep reading to the bottom for a chance to win!)


I love the color palette - Twilight, Plum, Gold and Aqua - the colors just speak to me. And the prints - those large daisies are so fun, and then there's the hexagon print, cool butterfly patterns (what great tonals!), and so much more! And check out the panel - isn't it gorgeous?!?!


I knew right away that I wanted to use these fabrics to create a wall hanging version of my Twister pattern. I could use those large floral prints in the block centers and create two different colored blocks that would show off all those coordinates. 


This block is my favorite. 

Or maybe this one...? I can't decide! 

The colors all work together so beautifully!

I took the quilt to the Historic Bridge Park near my house, which features a variety of old train bridges. The colors were perfect to help me show off both Bee Haven and Twister. These blocks finish at 19", so four of them make a nice sized wall hanging (or table topper) and 12 of them make a great lap quilt. Find the Twister pattern here


Make sure to check out the other incredible designers participating in this Project Hop!


Jennifer Worthen’s Centrum quilt

Kaye Collins and her Diamond Lil Quilt

Tiffany Hayes and her Bee Maze Quilt 

Rachel Rossi’s free Slaphappy quilt pattern


You can see all of the projects in one place over on Rachel’s Blog too, check out all the hop goodies here!


Looking for Bee Haven fabrics? Ask for it at your local quilt shop or find a stockist near you using the store locator!


Thank you to Benartex and all of these fabulous designers for generously donating prizes for this event! It was such a blast!


We will be giving away THREE prizes to contestants on Instagram:

Prize 1: Bee Haven Fat Quarter Bundle, Breezy Pattern (Rachel Rossi), Bee Maze Pattern (PDF from Tiffany), Trellis Twist Pattern (Rachel Rossi)

Prize 2: Bee Haven Strip-Pie (the Benartex version of a Jelly Roll), On the Way to Cape May (Rachel Rossi), Diamond Lil (PDF pattern from Kaye), Slaphappy Pattern (Rachel Rossi)

Prize 3: Bee Haven 10x10 precut bundle (Layer Cake), Dresdens in Bloom Pattern (Rachel Rossi), Twister Pattern (PDF from Lisa), Centrum Pattern (PDF pattern from Jenn)


How to enter (on Instagram):

To be entered to win, you must:

  1. Comment on your post

  2. Tag a friend (more tags = more entries)

  3. Follow all designers on the hop and Benartex
    (@quiltyzest, @ohkayequilting, @needleinahayesstack, @slightlybiasedquilts, @designsbyrr, @benartex)


3 winners will be randomly chosen at 11:59PM on October 12. Winners will be notified via Instagram.


Tuesday, May 9, 2023

Summer Twilight Blog Hop


When Tammy Silvers asked me to play with the batiks in her new Summer Twilight collection from Island Batik, I was happy to! Teals, blues, greens and fuchsia - such a great color palette! I especially love the sparkly star shapes and the dotted mounds. 


I recolored four of my quilt patterns in Tammy's fabrics. Take a look: 

Sew a Garden - Nine rows of piecing fun! 


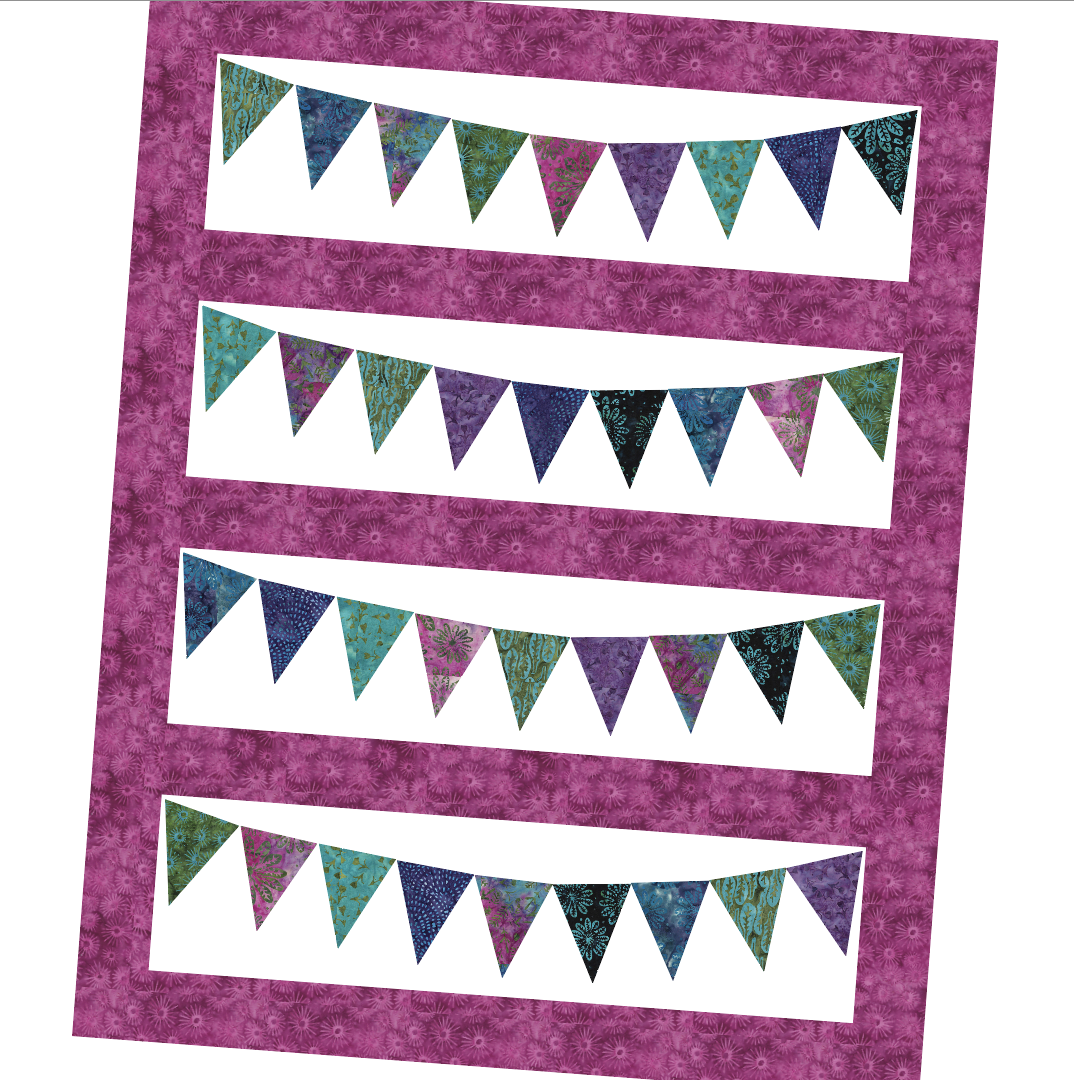
Pennant Party - Appliqued pennants with the option of creating 3D pennants that flap!


On the Go - One-seam blocks! Available in baby and lap quilt sizes


Rhombi - A variation on a log cabin block

I'm not the only one playing with the Summer Twilight fabrics - check out what these other talented designers have done as well! 
May 11 Laura Piland


Wednesday, September 21, 2022

Harvest & Halloween Blog Hop


Hi and welcome if you're new here! I'm Lisa Swenson Ruble of Quilty Zest (formerly Love to Color My World...rebranding is quite the process!) 

This time of year, I'm all about Halloween, specifically Halloween quilts and candy. When I saw some of the fun orange and black prints from Michael Miller Fabrics, I knew they'd be perfect for a version of my Strippy Improv Halloween quilt! The witch-on-a-broomstick fabric reminds me of the tv show Bewitched! And those spider webs...


I used those fabrics to create four of my favorite blocks in my Strippy Improv Halloween pattern. (The pattern has 9 different block options...so much Halloween, so little time!). 

 Here's a close-up of each block. I chose to do straight line quilting because I wanted texture without taking away from the design. I think I succeeded! 

Witch hat

Pumpkin

Ghost

Black cat


This technique uses a bit of improv piecing, and then the magic comes from reverse applique. 

I'm starting a Quilt Along on September 22nd - I hope you'll join me and sew your own Strippy Improv Halloween quilt! You can finish it before October 31st! Find more details about the Quilt Along here

Grab the pattern here!

Purchase the pattern here.


 **************************************************************************
Make sure you catch the rest of the Harvest & Halloween hop! 


 **************************************************************************
If you're new here, welcome! I hope you'll stay and look around a bit. 
If you like what you've seen here, you can also find me:
To find all of my quilt patterns, visit my Etsy shop
Find me on IG here.
Sign up for my newsletter in the right-hand sidebar or here
(You'll receive a free pattern for my Diamond Drama quilt (below) as a thank you!)


Wednesday, June 29, 2022

Wonky Spirals meets Savannah!

Hello there! I'm excited to be part of Tammy Silvers' Savannah Blog Hop today. Tammy's Savannah collection with Island Batik was inspired by the architecture and ironwork details of one of her favorite Georgia cities, and you'll love how that translates into fabric.


I fell in love with the colors and motifs in her Savannah fabric line when I first saw them, and now that I have the fabrics in hand, I can guarantee that they're even more mouth watering in person. 


Let's get right to the quilt, shall we? 
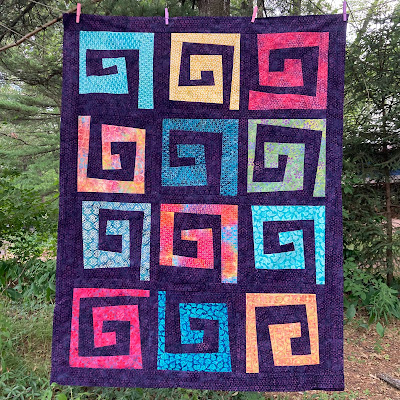
I chose to use a dark background and sew my Wonky Spirals quilt, using all the lighter, brighter colors as spirals that would pop with the contrast. 
Get the pattern here.

The Wonky Spirals pattern uses improv log cabin techniques, and each block turns out unique, which I love. Adding sashing and borders in the background color makes the spirals look like they're floating. 

This rainbow-y print is one of my favorites!

Aren't those colors vibrant?!


Just for fun, I played around with the fabrics and a few other patterns.
Here's my Ebb & Flow quilt, using a lighter background.


Frequency, with a dark background:

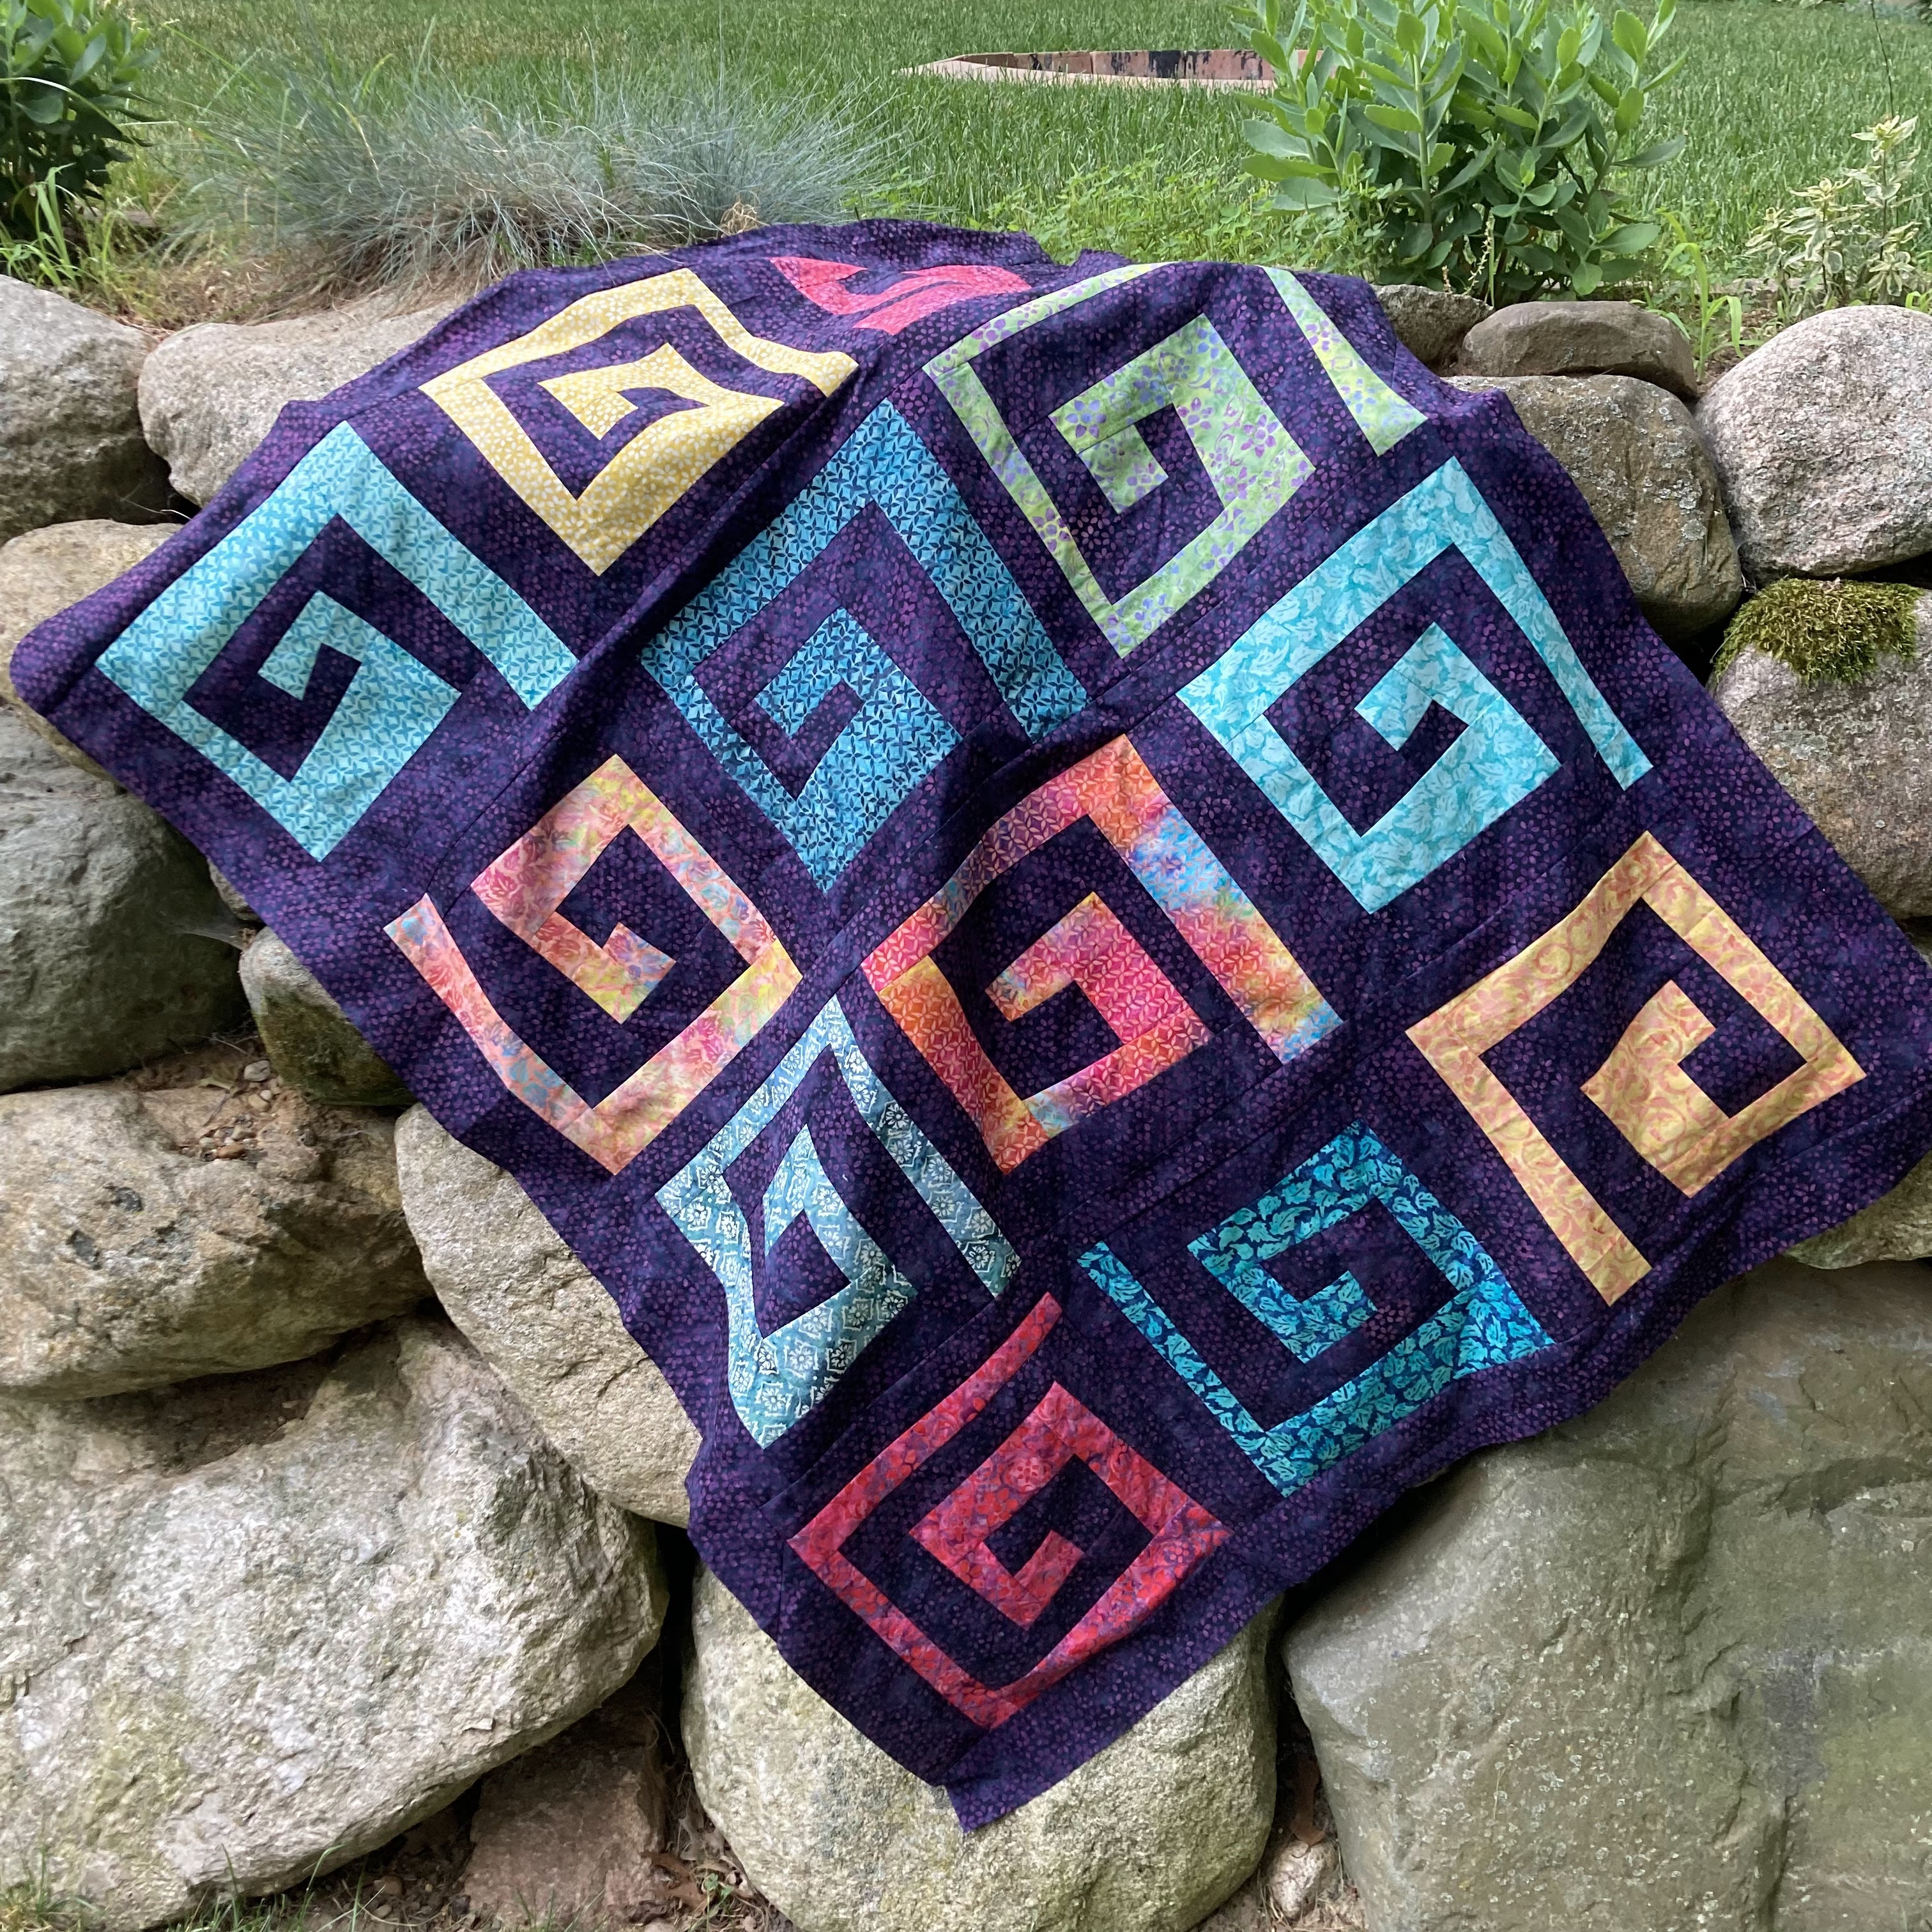
And Twister. This quilt feels like rainbow sherbet to me. :)


If any of these quilts shown using Savannah caught your eye, head over to my Etsy shop to grab the pattern! Save 15% using code SAVANNAH15 through Saturday, July 2nd.

Make sure you visit all the other stops on this blog hop - there's so much quilty inspiration! 


**************************************************************************
If you're new here, welcome! I hope you'll stay and look around a bit. 
If you like what you've seen here, you can also find me:
To find all of my quilt patterns, visit my Etsy shop
Find me on IG here.
Sign up for my newsletter in the right-hand sidebar or here
(You'll receive a free pattern for my Diamond Drama quilt (below) as a thank you!)

Monday, April 11, 2022

Nursery Blog Hop: Rhombi quilt + baby block tutorial + pattern sale~


I'm excited to be part of Michael Miller's Nursery Blog Hop! 
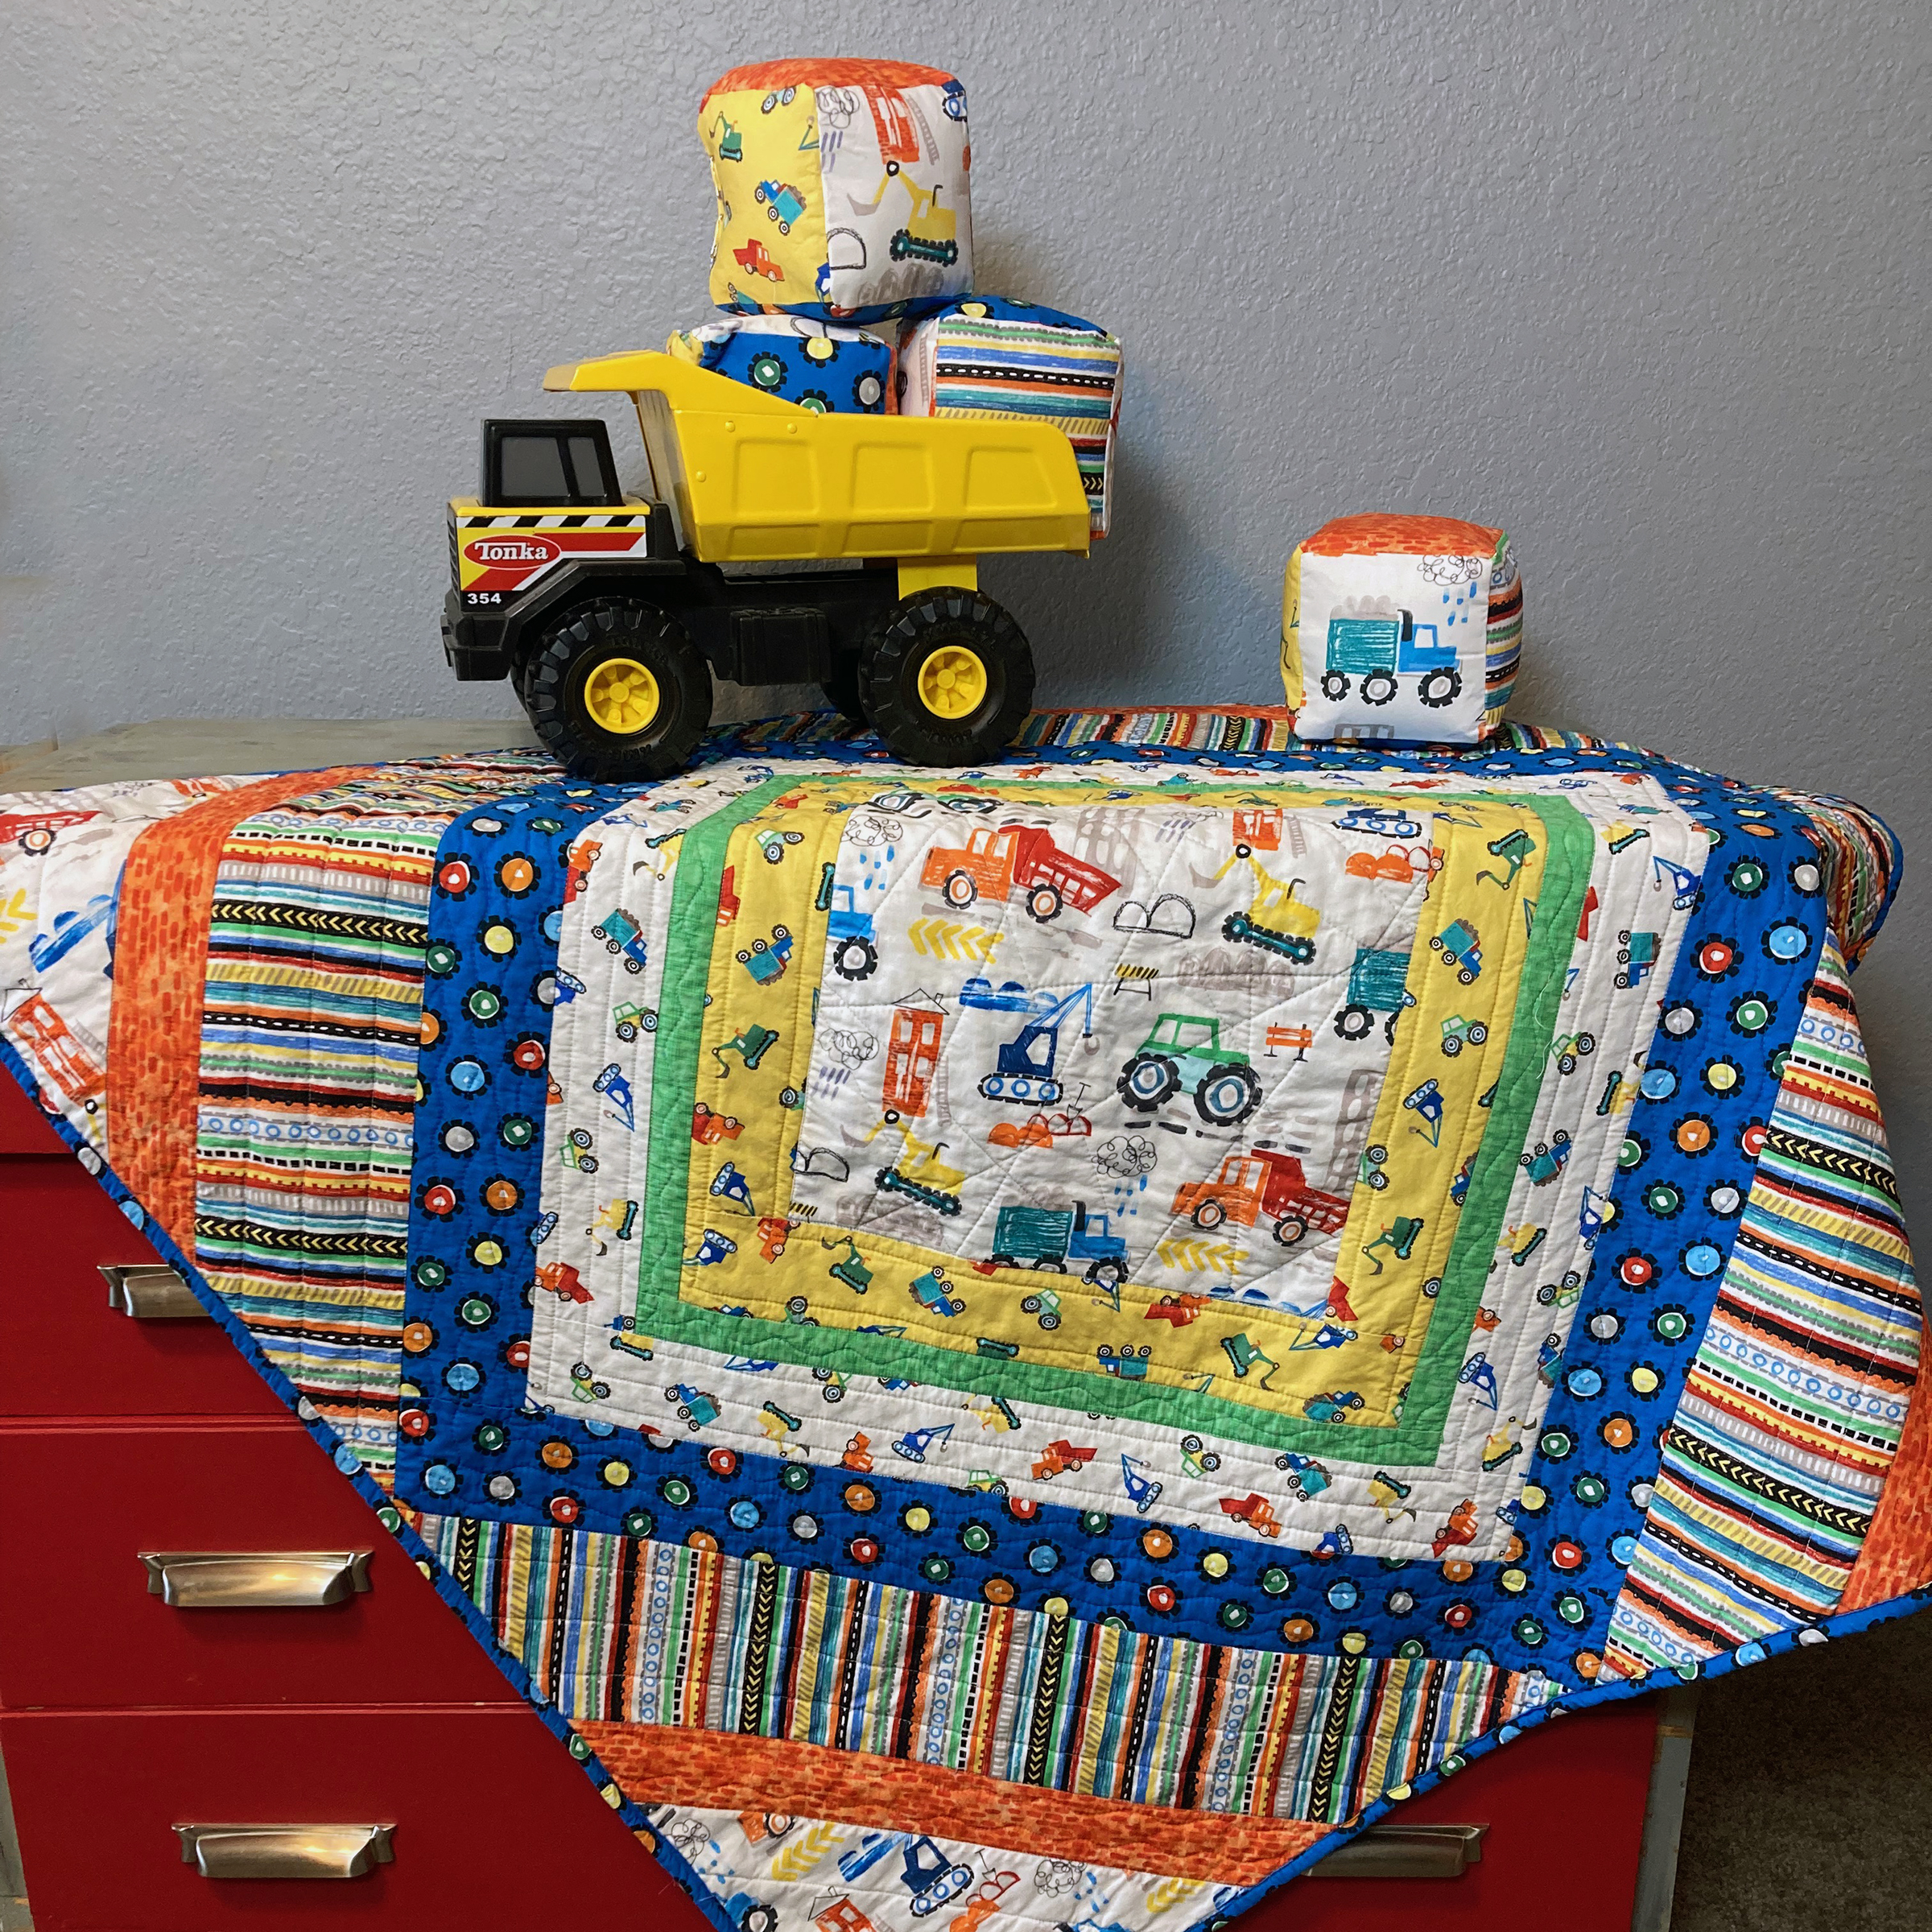
I have three boys at home, and while none are babies anymore (the youngest is 7), construction-themed fabric is right in my wheelhouse. When I saw the Diggers and Dumpers collection, I knew it would be perfect in my Rhombi quilt pattern. (10% off through 4/14!) 

How cute are these prints? I love the bright primary colors.


Purchase the Rhombi quilt pattern here. (10% off through 4/14)


My Rhombi quilt pattern highlights a large focal print--in this case, the construction equipment in the center and corners. Add in a few brightly colored prints (I especially love using a stripe), and this quilt sews up so quickly! I stitched this quilt top in one afternoon. The finished quilt measures 45" square.


I couldn't resist making baby blocks with the remaining fabric. That large focal print was just begging to be fussy cut for block sides! Keep scrolling for the tutorial to sew the baby blocks. 


And the perfect finishing touch? That cozy Minky on the back. My boys are fighting over who gets to use this quilt. 

Baby Block Tutorial
With prints these fun, who can resist sewing some stackable stuffed blocks? Adding a layer of interfacing helps the blocks to keep their shape. 

Here's how:

You'll Need: (to make 4 blocks)
1/2 yard focal print to fussy cut
1/4 yard each four coordinating prints
Fiberfill
Fabric marking pen

Cutting:
From the focal print:
Fussy cut (8) 5-1/2" squares, each centering a motif

From the four coordinating prints:
(4) 5-1/2" squares from each print

From the Interfacing:
(24) 5-1/2" squares

Make the Blocks:
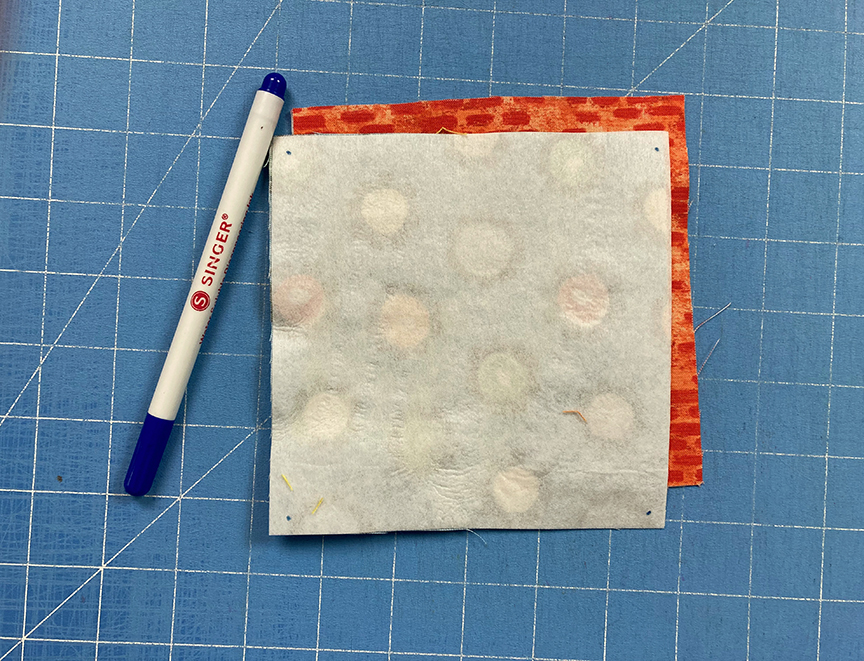
Step 1 Following manufacturer's directions, fuse an interfacing square to the wrong side of each fabric square. 


Step 2 Using a fabric marking pen, mark a dot 1/4" from each corner of each square. These will be your starting and stopping points for stitching. 

Step 3 Join six squares together as shown, starting and stopping on the corner dots. Back stitch at starting and stopping points to secure the stitches. The four squares in a horizontal row will become the "tube" and the top and bottom squares will become the top and bottom of the block. 

Step 4 Pin raw edges together to start forming a block shape, making sure to align corner dots. 

Step 5 Stitch pinned edges from dot to dot, creating an open box shape as shown. Don't forget to backstitch at starting and stopping points!
Step 6 Pin and sew the remaining edges, leaving a 3" opening along the last side for turning. 

Step 7 Turn the block right side out and using a turning tool to poke corners out as much as possible. Stuff firmly with fiberfill and handstitch the opening closed. Tip: Use a thimble to help push the needle through the interfacing. 


I really enjoyed sewing a couple cute projects using these fun fabrics! 

If you're new here, welcome! I hope you'll stay and look around a bit. 
If you like what you've seen here, you can also find me:
To find all of my quilt patterns, visit my Etsy shop
Find me on IG here.
Find me on Facebook here.
Sign up for my newsletter in the right-hand sidebar or here
(You'll receive a free pattern for my Diamond Drama quilt (below) as a thank you!)


Saturday, November 20, 2021

UFOvember: Rework!

When you make "quick corners" (on snowball blocks or flying geese, for example), do you save the trimmed off triangle pairs? Unless they're really tiny, I can't bear to throw them out, but they just sit in piles. And piles. And piles.

Star Bows leftover triangles

Opposite Directions lap-size leftover HSTs

So when Bobbie from Geeky Bobbin posted about her UFOvember plan, I knew it was time to pull out a pile of those neglected triangle pairs and rework them into a finished project! I even had the perfect time to work on it--our fall Great Lakes Modern Quilt Guild retreat!


I grabbed the leftover triangles from my Opposite Directions baby quilt (shown below) with a very loose plan in mind. Because the original quilt measured just 39" x 51", I knew I'd need to supplement with additional fabric to make another baby quilt. 

Opposite Directions quilt pattern

These leftover fabric triangles from my quilt are from Art Gallery Fabrics' Pine Lullaby Rediscovered collection, plus two colors of Pure Solids.


First:
Make HSTs. I chain piece these, which speeds the process along. Head over to IG and see my reel showing how I sew these as efficiently as possible. 

**One tip for chain piecing (and not just HSTs): Use your seam ripper to cut apart the threads between each stitched unit. Faster and easier than scissors!**


Then I trim them to a specific size. I find that it's easier to go slightly smaller with these HSTs made from loose triangles; that way you don't have to worry if your stretchy long triangle edges match up perfectly because you've got more wiggle room for trimming. 


Second:
Play around with layouts. I had leftover fabric from this quilt that I loved, so I knew I wanted to work it in (which also would allow me to make a larger quilt!). I started out by laying out all my HSTs just to get a visual on the size I was starting with (not very big, in this case...these HSTs are 2.5" square, so right here I' looking at approximately 22" x 34"). 


Then I switched to experimenting with layouts on the computer, because for me, it's faster. And I was on a mission to get this quilt done during my retreat! :)

My Design Ideas

1. This was my original idea. Those adorable critter heads were the backing fabric for my original quilt, and I thought it would be fun to fussy cut them and randomly insert larger squares into my HST pattern. 
But...it needed borders to be bigger, and I didn't have enough fabric for borders. Let's keep looking.


2. I'd also been thinking stars, making the HSTs into a scrappy low volume background, and still using the critter focal squares. I like this, but honestly, it was more work than I wanted to do. I wanted simple and striking.


3. Here's a star variation where the stars don't pop- using just HSTs and critter focal squares. I liked this design s as well, but that first design kept tugging on me. 


4. Ultimately, here's where I ended up - with my original design, but using leftovers of the white/black prints for the focal squares so I could use the critter fabric for a border. A good compromise, I think!


Third:
Start sewing! Since I was at a quilt retreat, I focused and stitched, and assembled this quilt over a two-day period. I joined HSTs into pieced sections around the focal squares, and then into larger rows.


The finished quilt top:


Fourth:
Bask in the great feeling that you used up some long-neglected triangles and created a quilt top. Now it's time to quilt and bind it before it lingers in a different UFO pile! :) 

And bonus - I'll be saving those rejected layout ideas for future HST project finishes!


Looking for more UFOvember inspiration? Check out a full month's worth of ideas!

  • November 1 - The Geeky Bobbin - http://geekybobbin.com
  • November 2 - Strawberry Creek Quilts - http://www.strawberrycreekquilts.com
  • November 3 - Katie Mae Quilts - http://katiemaequilts.com
  • November 4 - Pretty Piney Quilts - https://prettypiney.com/blog
  • November 5 - Mary Go Round Quilts - http://www.marygoroundquilts.com
  • November 6 - Exhausted Octopus - https://exhaustedoctopus.com/blog/
  • November 7 - Just Get It Done Quilts - https://www.justgetitdonequilts.com/blog
  • November 8 - By Hilary Jordan - https://byhilaryjordan.com/
  • November 9 - Sew Hooked on Treasures - http://sewhookedontreasures.com
  • November 10 - Sunflower Stitcheries and Quilting - http://www.sunflowerstitcheries.com
  • November 11 - Blue Heron Quilting - https://www.blueheronquilting.shop/blog
  • November 12 - Carrington Creates - https://cbear7774.wixsite.com/thatsthewayitseams
  • November 13 - Sarah Goer Quilts - https://www.sarahgoerquilts.com
  • November 14 - Better Done Quilts - https://betterdonequilts.com/
  • November 15 - Ashli Montgomery | Virginia'dele Smith - http://www.meandcoach.com
  • November 16 - Puppy Girl Designs - http://puppygirldesigns.com
  • November 17 - Lovingly, Lissa - http://lovinglylissa.com
  • November 18 - Art East Quilting Co - http://www.arteastquiltingco.com
  • November 19 - rjbosscher - http://www.rjbosscher.com
  • November 20 - Love to Color My World - http://lovetocolormyworld.blogspot.com/
  • November 21 - LynsAvenue - http://lynsavenue.com
  • November 22 - Quiltfox Design - https://www.quiltfox-design.com
  • November 23 - Maeberry Square - https://www.maeberrysquare.com
  • November 24 - Karen Bolan Designs - https://www.karenbolan.com/blog
  • November 25 - Tina1802 - http://www.tina1802.com
  • November 26 - Lazy Cozy Quilts - http://www.lazycozyquilts.com
  • November 27 - True Blue Quilts - http://www.truebluequilts.com
  • November 28 - The Scrappy Camper - http://www.thescrappycamper.com
  • November 29 - Sarah Ruiz Quilts - http://sarahruiz.com
  • November 30 - Lyric Art - http://LyricKinard.com

    If you're new here, welcome! I hope you'll stay and look around a bit. 
    If you like what you've seen here, you can also find me:
    To find all of my quilt patterns, visit my Etsy shop<<--use code BIRTHDAY21 for 15% off through 11/22!
    Find me on IG here.
    Find me on Facebook here.
    Sign up for my newsletter in the right-hand sidebar or here
    (You'll receive a free pattern for my Diamond Drama quilt (below) as a thank you!)