Showing posts with label baby blocks. Show all posts

Monday, April 11, 2022

Nursery Blog Hop: Rhombi quilt + baby block tutorial + pattern sale~


I'm excited to be part of Michael Miller's Nursery Blog Hop! 
I have three boys at home, and while none are babies anymore (the youngest is 7), construction-themed fabric is right in my wheelhouse. When I saw the Diggers and Dumpers collection, I knew it would be perfect in my Rhombi quilt pattern. (10% off through 4/14!) 

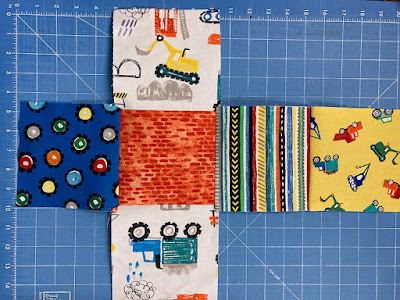
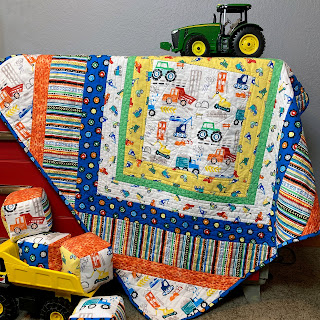
How cute are these prints? I love the bright primary colors.


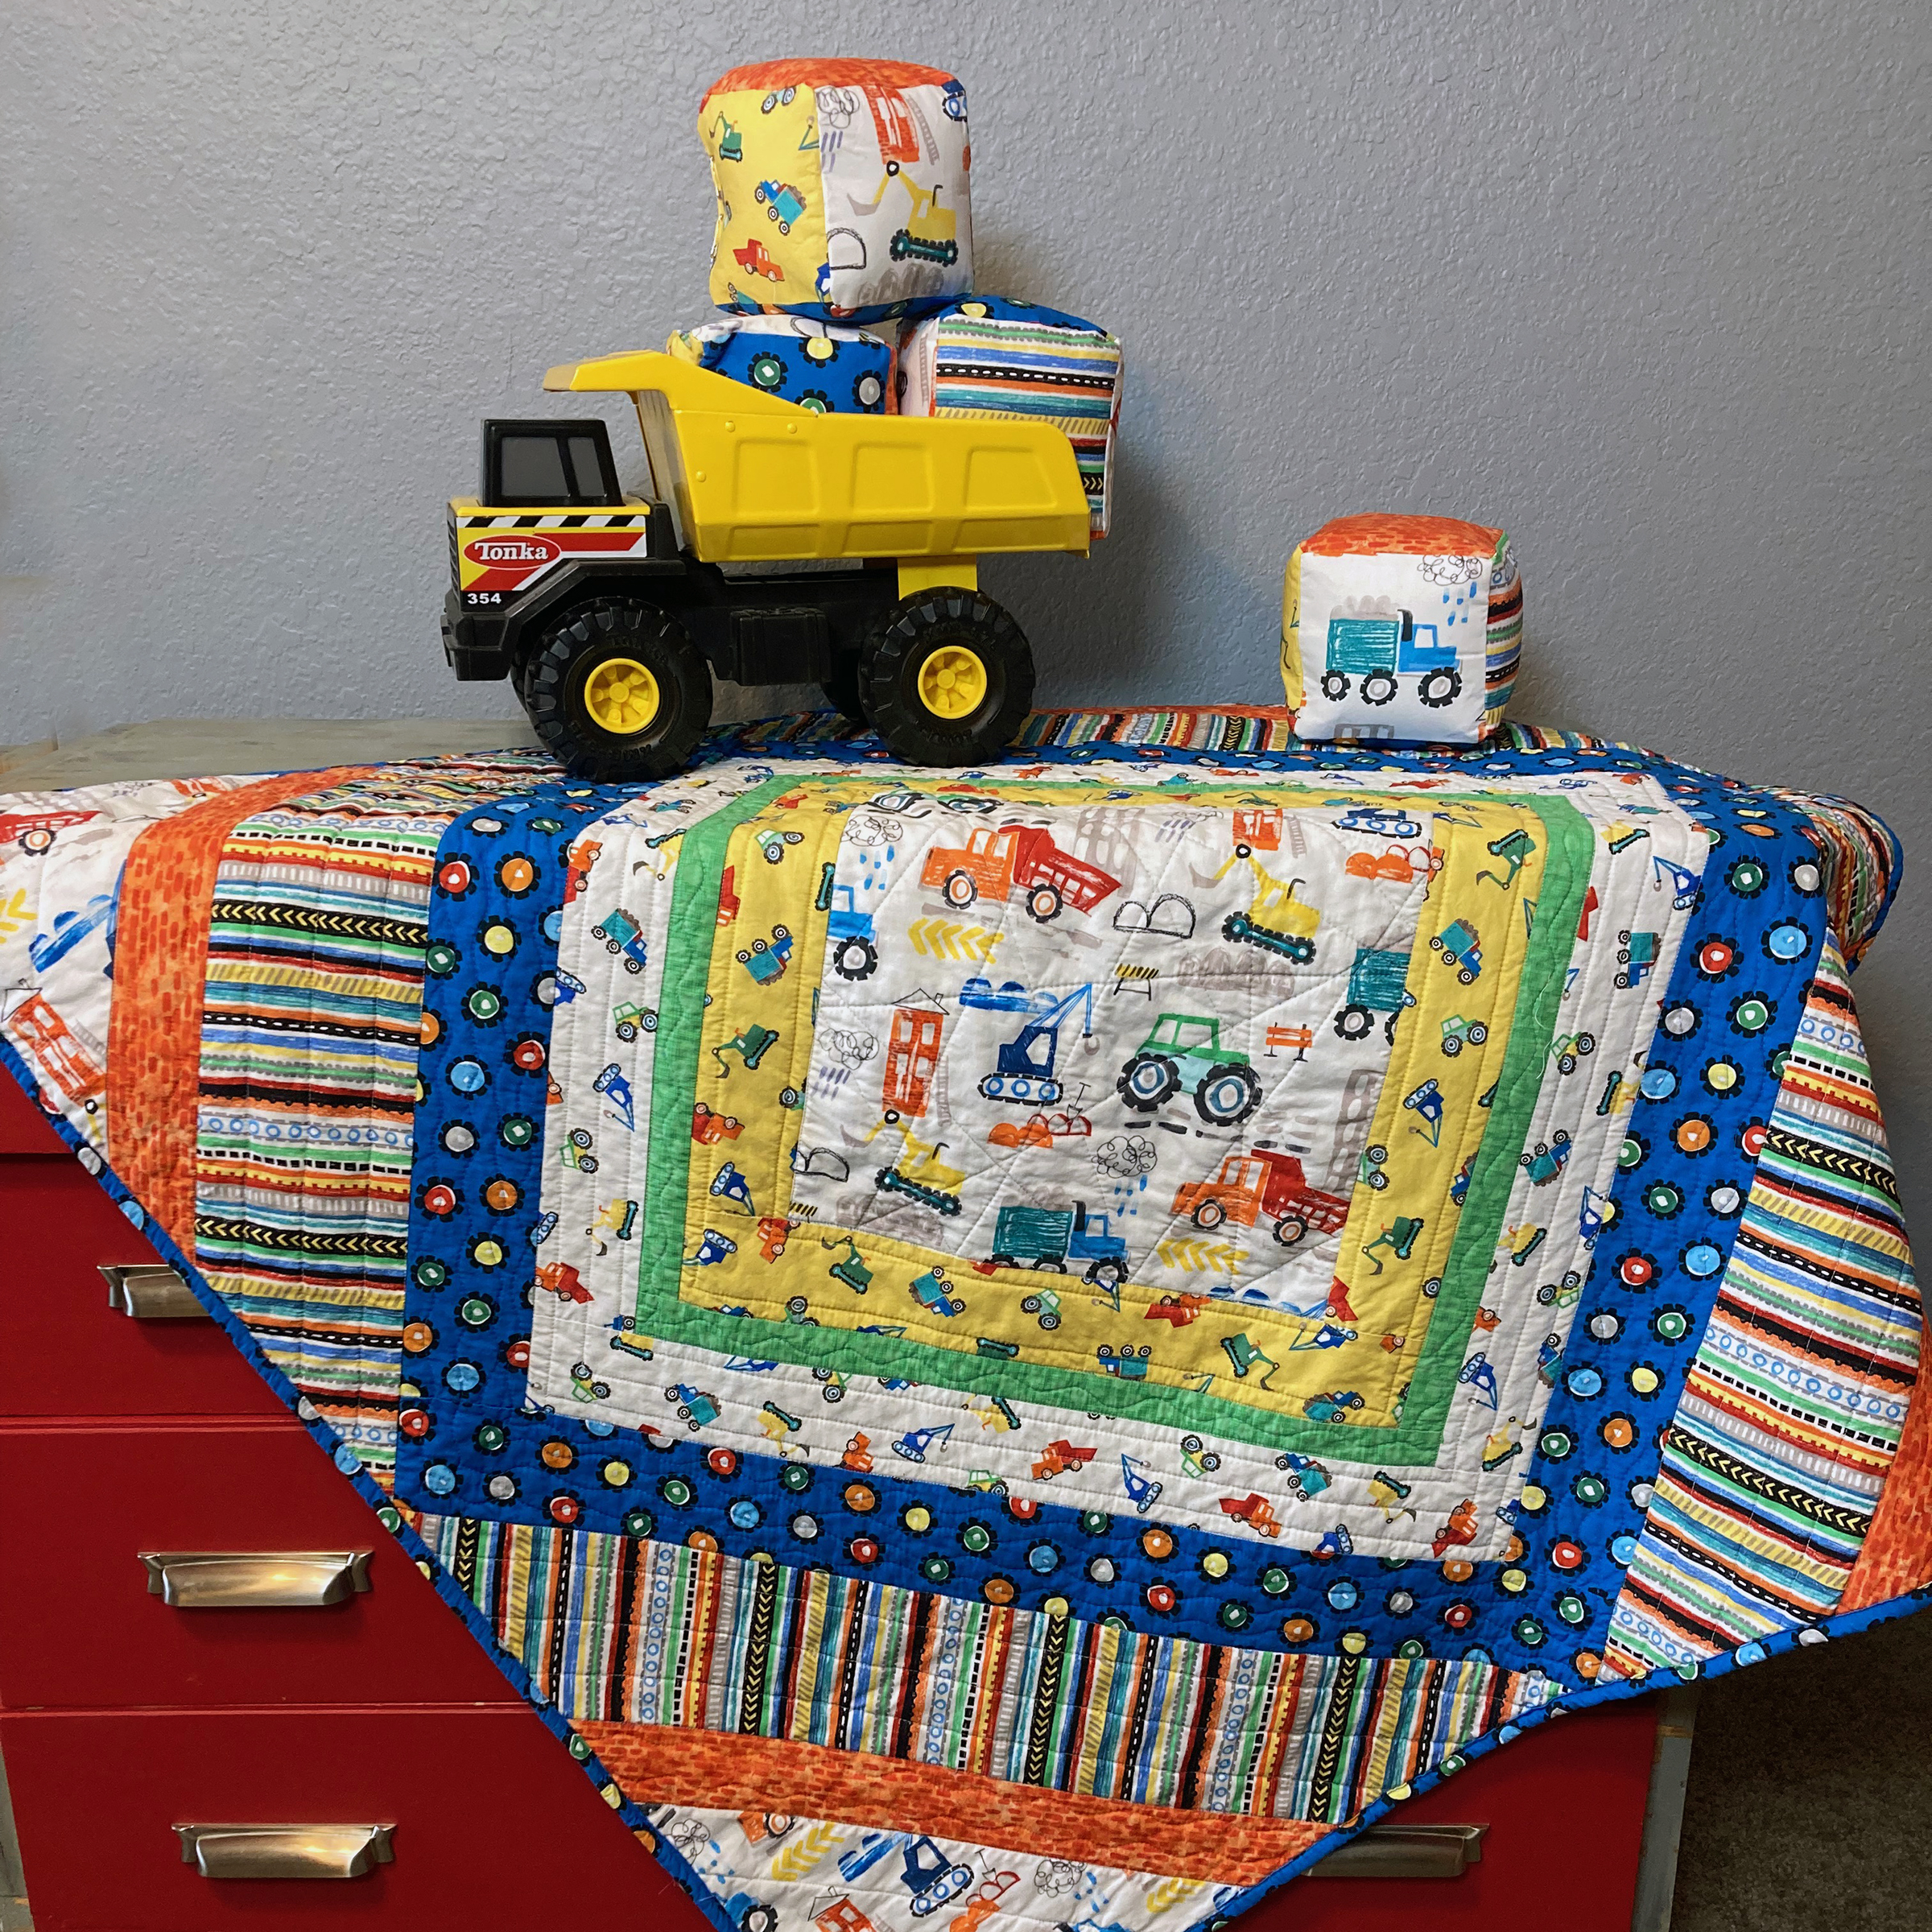
Purchase the Rhombi quilt pattern here. (10% off through 4/14)


My Rhombi quilt pattern highlights a large focal print--in this case, the construction equipment in the center and corners. Add in a few brightly colored prints (I especially love using a stripe), and this quilt sews up so quickly! I stitched this quilt top in one afternoon. The finished quilt measures 45" square.


I couldn't resist making baby blocks with the remaining fabric. That large focal print was just begging to be fussy cut for block sides! Keep scrolling for the tutorial to sew the baby blocks. 


And the perfect finishing touch? That cozy Minky on the back. My boys are fighting over who gets to use this quilt. 

Baby Block Tutorial
With prints these fun, who can resist sewing some stackable stuffed blocks? Adding a layer of interfacing helps the blocks to keep their shape. 

Here's how:

You'll Need: (to make 4 blocks)
1/2 yard focal print to fussy cut
1/4 yard each four coordinating prints
Fiberfill
Fabric marking pen

Cutting:
From the focal print:
Fussy cut (8) 5-1/2" squares, each centering a motif

From the four coordinating prints:
(4) 5-1/2" squares from each print

From the Interfacing:
(24) 5-1/2" squares

Make the Blocks:
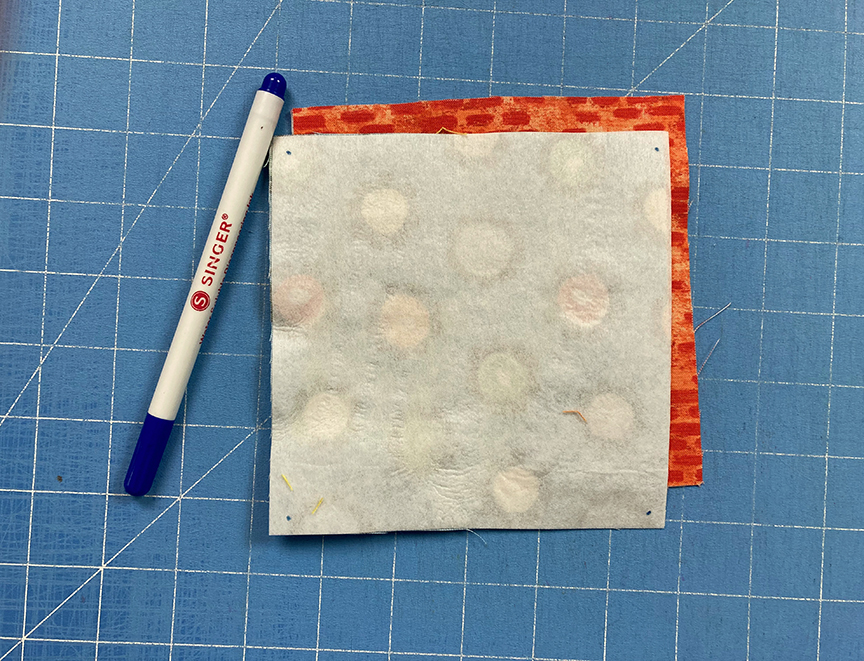
Step 1 Following manufacturer's directions, fuse an interfacing square to the wrong side of each fabric square. 


Step 2 Using a fabric marking pen, mark a dot 1/4" from each corner of each square. These will be your starting and stopping points for stitching. 

Step 3 Join six squares together as shown, starting and stopping on the corner dots. Back stitch at starting and stopping points to secure the stitches. The four squares in a horizontal row will become the "tube" and the top and bottom squares will become the top and bottom of the block. 

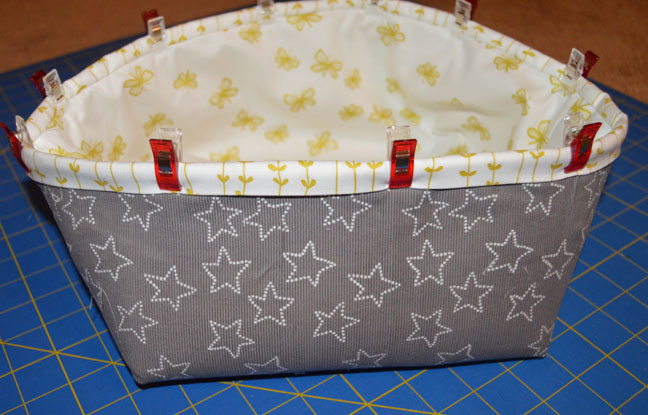
Step 4 Pin raw edges together to start forming a block shape, making sure to align corner dots. 

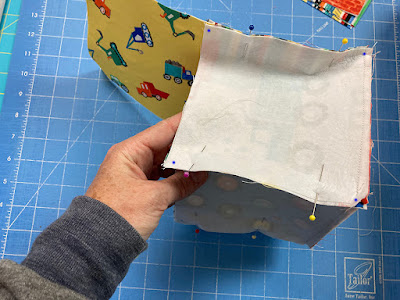
Step 5 Stitch pinned edges from dot to dot, creating an open box shape as shown. Don't forget to backstitch at starting and stopping points!
Step 6 Pin and sew the remaining edges, leaving a 3" opening along the last side for turning. 

Step 7 Turn the block right side out and using a turning tool to poke corners out as much as possible. Stuff firmly with fiberfill and handstitch the opening closed. Tip: Use a thimble to help push the needle through the interfacing. 


I really enjoyed sewing a couple cute projects using these fun fabrics! 

If you're new here, welcome! I hope you'll stay and look around a bit. 
If you like what you've seen here, you can also find me:
To find all of my quilt patterns, visit my Etsy shop
Find me on IG here.
Find me on Facebook here.
Sign up for my newsletter in the right-hand sidebar or here
(You'll receive a free pattern for my Diamond Drama quilt (below) as a thank you!)


Monday, August 24, 2015

Baby Blocks in a Box Tutorial

Happy Monday! It's hard to believe school (and fall) are both right around the corner...
although we still have two weeks of summer vacation left here in Michigan!

I'm starting out the week with a tutorial as part of Windham's Lotta Jansdotter blog hop


My oldest son is six and my youngest just turned one last week, so babies have been on my brain for, oh, about 7 years now. :)

When I saw the Stella fabrics by Lotta Jansdotter, I knew I wanted to make something baby related. I love the gray and citron addition to the basic blue and pink. Plus, some of the prints are corduroy! I decided to take advantage of the corduroy and make textured baby blocks. And, because toys are constantly spread out all over my house, I also made a "box" to store the blocks in. Both the box and blocks are super easy to make, and I think the box concept could have plenty of other uses, as well. Enjoy! 

The fabrics: Stella by Lotta Jansdotter for Windham
(Those bottom four are corduroy!!)


You'll Need:
1/2 yard gray star corduroy (for outer box and blocks)
3 additional corduroy fat quarters (for blocks)
4 cotton fat quarters (1 for box lining, 1 for box binding, and 2 for blocks)
2/3 yard Pellon Flex-Foam
1 yard medium weight fusible interfacing
Fiberfill

Cutting:
From the gray star corduroy:
One 18" square
Four 4-1/2" squares

From each of the additional 3 corduroy fat quarters:
Four 4-1/2" squares

From 2 cotton fat quarters:
Four 4-1/2" squares

From the lining fat quarter:
One 18" square

From the binding fat quarter:
Two 2-3/4" x 21" strips

From the Flex-Foam:
One 18" square

From the fusible interfacing:
Twenty-four 4-1/2" squares


Making the Box:
Step 1: Layer the 18" Flex-Foam square on the wrong side of the 18" gray stars square and pin in place. Fold in half with right sides of corduroy touching and pin the sides. Sew both short sides using a 1/4" seam allowance.

Step 2: Cut 4-1/4" squares from the bottom (folded edge).

Step 3: Fold so the side seam touches the middle of the bottom on each side as shown and pin. Stitch with a 1/4" seam allowance to box the corners. 

Step 4: Turn the outer box right side out. Repeat steps 1-3 using the 18" lining square (without Flex-Foam).
Step 5: Position the lining inside the outer box with wrong sides facing. Line up the raw edges along the top. 
Step 6: Sew the two 2-3/4' x 21" binding strips short ends together. Prepare your binding and sew to the inside of the box (through all layers). 

Step 7: Press the folded edge of the binding over the top edge of the box and pin or use Wonder Clips to secure. Topstitch the binding to the outside of the box. Your box is done!

Making the Blocks:
Step 1: Press interfacing to the wrong side of each 4-1/2" square. 

Step 2: Sew four squares together in a row, starting and stopping 1/4" from the edge and then join the ends to make a "tube."
Step 3: Position a 4-1/2" square on top and pin to secure. Sew to the sides, pivoting at each corner to stitch along the next side. 

Here's what your block should look like now:

Step 4: Pin the remaining square to the opposite end and stitch in place, leaving one side open. 

Step 5: Turn block right side out, stuff with fiberfill, and slipstitch the opening closed. Make four blocks. 

Tuck the blocks into the box and you're done! Babies will love the variety of texture the corduroy provides! 


Windham is offering a giveaway of a bundle of the Stella collection! Visit the Windham Facebook page or blog and tell them you like these Stella fabrics. Then leave a comment below letting me know if you've ever sewed a baby gift for a chance to win the Stella bundle. Giveaway open through Thursday, August 27th at 11:59 pm EST.