Showing posts with label Valentine's Day. Show all posts

Tuesday, February 14, 2023

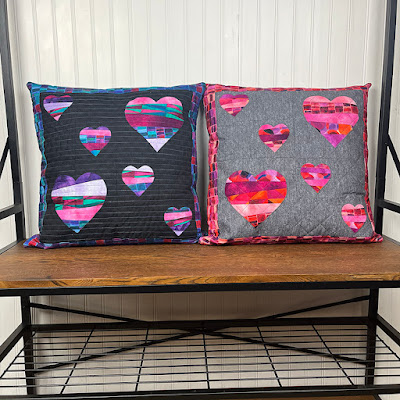
Valentine's Day Strippy Improv Heart Pillows

Happy Valentine's Day! 
I used my most recent fabric from the Benartex Brand Ambassador program and my Strippy Improv Hearts pattern to create these throw pillows. 

 First, let's admire the fabrics. These prints are from Benartex's Watercolor Geometry collection. I love the palette, the shading, the shapes. These were so much fun to play with!


I picked out the red, pink and purple prints, and added in a few tonals from the New Hue basics collection to round things out. That heart just yells "valentine," doesn't it?!

And this version has a little more purple in it. Still valentine-y, but less traditional.


I chose dark backgrounds for both pillows so that the jewel-toned hearts would pop. 


You can make these heart pillows - or a heart baby quilt or lap quilt - using my Strippy Improv Hearts pattern, available here.

Hope your Valentine's Day is filled with delicious chocolate and beautiful fabric! 

Looking for more Valentine inspiration? Check out my Heart Projects Round-Up here.

Friday, January 28, 2022

6 Valentine's Day Mini Quilt Tutorials

It's hearts and chocolate season! Valentine's Day is coming and you still have time to sew a heart-themed project! I've collected my favorites to share with you - most are tutorials available on my blog; a couple are patterns to purchase. I'm also hosting a giveaway on IG, so head over to check it out.

Enjoy and Happy. Valentine's Day!


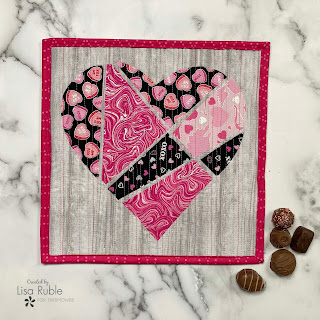
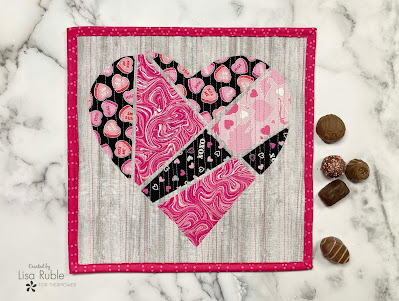
Puzzle Heart Mini Quilt
This no-sew heart is made using HeatnBond fusible applique and random rotary cuts. 


Two each blocks for a fabric version of the classic XOXO make up a fun wall hanging. I used Christa Watson's Gridwork collection.


I used an existing heart block pattern and a variety of Valentine colored solids to make this modern mini quilt. 


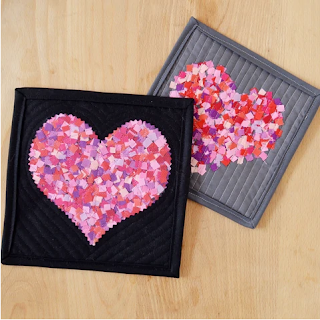
These mini quilts bring the idea of tiny fabric scraps to a whole new level! I originally created this tutorial for PBS Fabrics.


Flip Flop Heart Mini Quilt
Pick your favorite prints plus a contrasting solid to make these easy applique quilt. I originally designed this tutorial for PBS Fabrics. 


This is still a favorite of mine--a fabric tic tac toe board with Xs, Os and hearts.


Plus two quilt patterns:

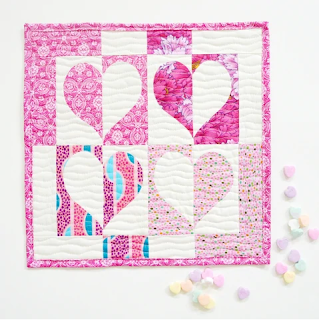
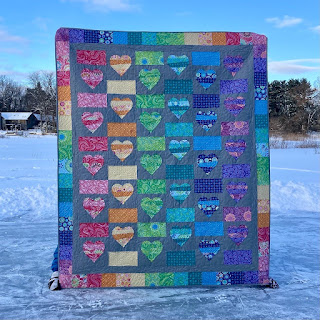
This quilt pattern includes the lap-size quilt you see here, plus instructions to make a baby quilt and a throw pillow.


After I designed my It's a Swirl quilt, I saw some chocolate fabrics and realized how much theseswirls looked like a box of fancy chocolates! These instructions are included in the pattern. The version shown below uses Benartex's Chocolicious collection.


If you're new here, welcome! I hope you'll stay and look around a bit. 
If you like what you've seen here, you can also find me:
To find all of my quilt patterns, visit my Etsy shop. 
Find me on IG here.
Find me on Facebook here.
Sign up for my newsletter in the right-hand sidebar or here. 
(You'll receive a free pattern for my Diamond Drama quilt (below) as a thank you!)

Friday, January 21, 2022

It's Valentine Central here...

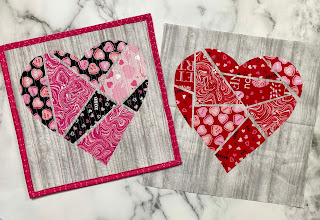
 Today I'm sharing a fun Puzzle Heart Mini Quilt tutorial on the Thermoweb blog. This is a no-sew block made with HeatnBond Lite Fusible Adhesive and it's all about the cutting (sort of like last week's placemats...I'm sensing a theme here...). Although you will need to sew to finish it into a mini quilt.

Puzzle Heart Mini Quilt

Find the tutorial here. 

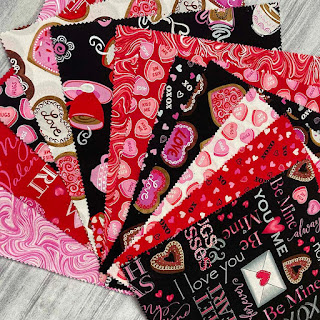
I just want to gush about the fabric a little more. These Hugs & Kisses prints from Benartex are soooo cute! They sent me a layer cake to play with, and the 10" square size is perfect for making these blocks. And I'm thinking maybe I'll use the leftovers for some pillows.


I couldn't decide which fabrics to use, so I made a red heart too!


Make a Table Runner!

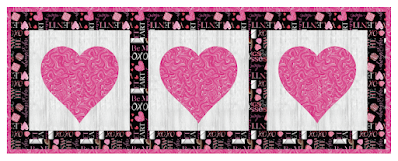
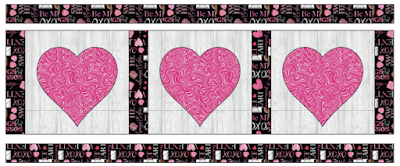
Once you make one of these blocks, you'll still have the pieces left for three more. Plus, they're kind of addicting to make. So I'm going to give you some information to transform three blocks into an easy runner. Just for fun, I popped in one of the bigger prints from Hugs & Kisses for the border fabric. 


You'll Need:

  • (3) 11-1/2" square heart blocks (see tutorial here)
  • 1/2 yard border fabric
  • 3/8 yard binding fabric
  • 2/3 yard backing fabric
  • 19" x 45" piece of batting

Cutting:

From the border fabric:
(2) 2-1/2" x 41" border strips
(4) 2-1/2" x 11-1/2" sashing strips

From the binding fabric:
(4) 2-1/4" x WOF strips


Assemble the Table Runner

Note: Depending on how often you plan to wash your runner, you may want to stitch down the raw edge appliques before assembling the runner. 

Step 1 Sew together (4) 2-1/2" x 11-1/2" sashing strips alternating with (3) heart blocks. 

Step 2 Sew the 2-1/2" x 41-1/2" border strips to opposite long sides of the runner. 


Step 3 Layer the backing fabric, batting and runner top. Baste layers together and quilt as desired. 

Step 4 Use the (4) 2-1/4" x WOF binding strips to bind the runner.

Enjoy!


Friday, February 14, 2020

Hearts Aplenty Mini Quilt

Here's one more Valentine's Day show and tell. 
I originally created this for Paintbrush Studio Fabrics, using their Painter's Palette Solids.

This quilt measures just 18-1/2" square--a cute heart-filled table topper or wall hanging. 

Painter's Palette Solids used: (background) Honeycomb; hearts (top row, from l-r) Clematis, Claret, Bubblegum; (middle row, l-r): Real Red, Lipstick, Fuchsia; (bottom row): Pale Pink, Raspberry, Claret

I used this heart block tutorial from Alison of Cluck, Cluck Sew. She offers the block in multiple sizes; I used the 4" finished square size. 

 Here's a finished heart: 

I made nine hearts--eight in shades of red, pink and purple, and one in reverse: 

Laying out hearts with 1-1/2" x 4-1/2" Honeycomb vertical sashing and 1-1/2" x 14-1/2" horizontal sashing:

Assembling the quilt center: 


Adding 2-1/2" wide borders. I added colored inserts on each side just for fun:

Straight line quilting:


Ready for the binding--with a flange-style edge for a pop or color:

Love these hearts!

Simple straight line piecing enhances the design:


A valentine decoration, ready to go in just an afternoon!

Happy Valentine's Day!

Need more valentine inspiration?
Find my Valentine Tic Tac Toe board tutorial here.
Find my XOXO mini quilt tutorial here.

Friday, February 7, 2020

XOXO Quilt Tutorial

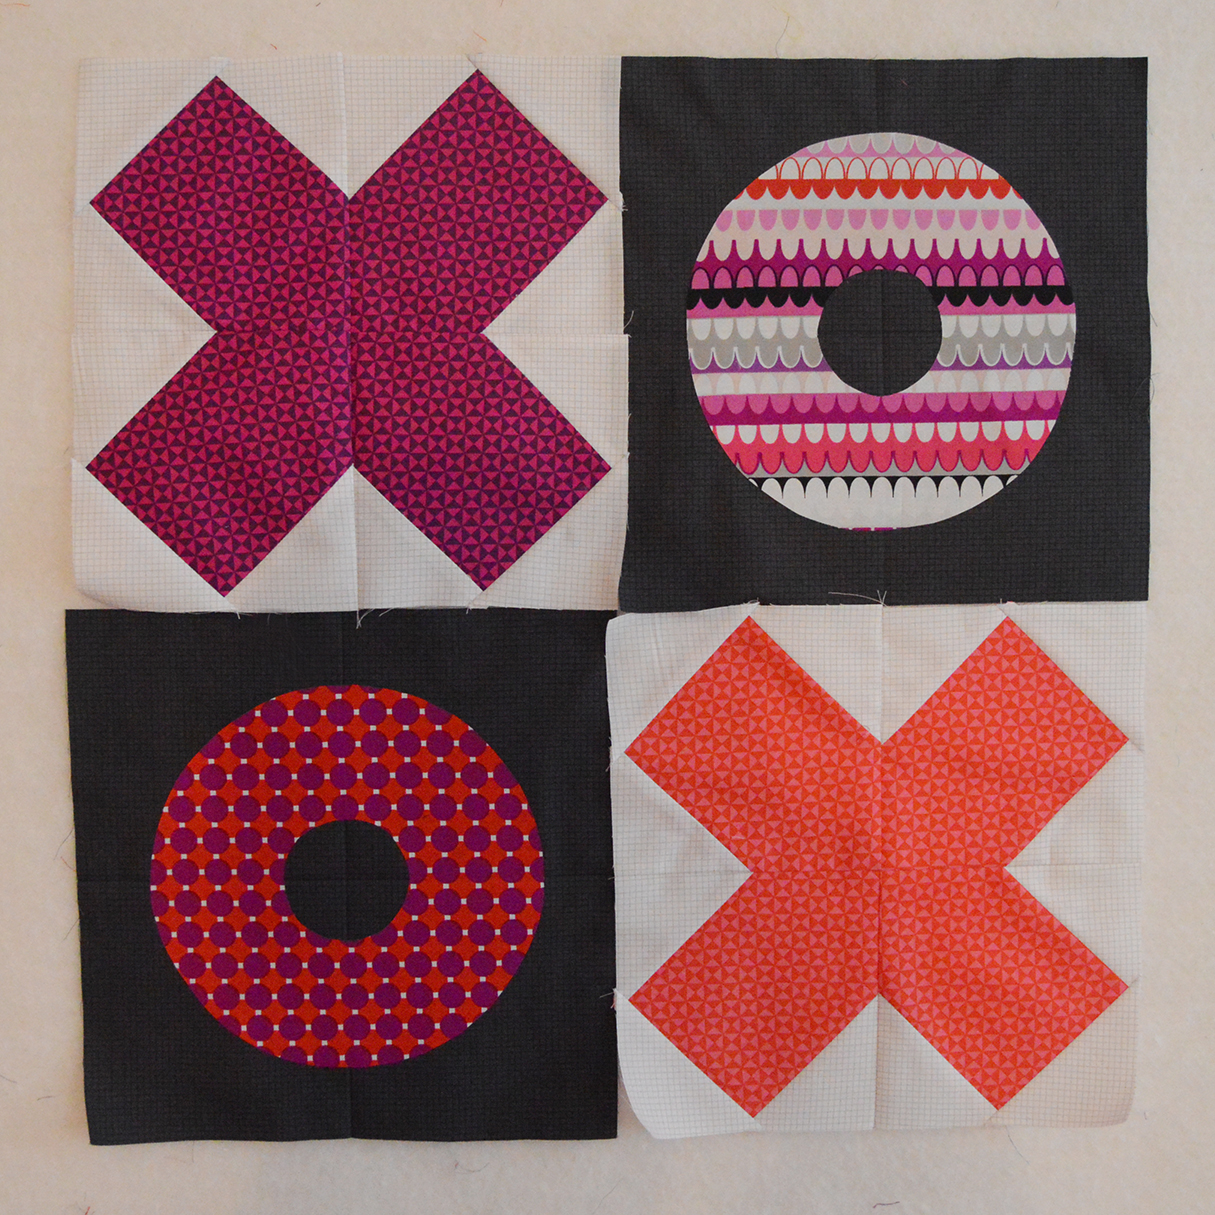
I had leftover fabric from Christa Watson's Gridwork collection after making my Ebb & Flow quilt (scroll to the bottom to see it!), and with Valentine's Day around the corner, I couldn't resist creating a cute tutorial to share with you. 

This 23" square XOXO quilt is the perfect size for a door; you could also use it as a table topper or wall quilt. 


I picked my favorite pink, red and purple prints from Christa's collection, plus the black and white grid prints for background. Don't they match beautifully with my cutting board and rotary cutter? :)

Let's get started!

You'll Need:
  • 1 fat quarter each of Purple Hourglass, Red/Purple Circle Grid and Fuchsia/Multi Arches prints
  • 1/2 yard each Red Hourglass, White Square Grid and Black Square Grid
  • 3/4 yard backing fabric
  • 25" square of batting
  • Fusible webbing


Cutting:
From the Purple Hourglass print:
(4) 5-1/2" squares

From the Red Hourglass print:
(4) 5-1/2" squares
(3) 2-1/4" x WOF strips for binding

From each of the Circle Grid and Arches prints:
(1) 9" square

From the White Square Grid:
(24) 3" squares
(2) 2" x 10-1/2" pieces
(2) 2" x 12" pieces

From the Black Square Grid:
(2) 10-1/2" squares
(2) 2" x 10-1/2" pieces
(2) 2" x 12" pieces

Download the "O" template here.

Make the Quilt:
1. Draw diagonal lines on the wrong side of (3) 3" White Grid squares. Position (2) marked squares right sides together on (1) 5" Purple Hourglass square as shown. Sew on the drawn lines, trim seam allowance to 1/4" and press open.


2. Position the third marked square right sides together on the unit from step 1 as shown. Sew on the drawn line, trim seam allowance to 1/4" and press open to make one quarter block unit.


3. Repeat steps 1 and 2 to make a total of (4) quarter block units. Lay out the unit as shown. Sew them together in pairs and then join the rows to make one 10-1/2" square "X" block. Tip: Pin at the purple/white seam so that your points match. 


4. Repeat to make a second "X" block using the Red Hourglass squares.


5. Trace the "O" shape onto the paper side of fusible web. Cut out roughly around the shape and fuse onto the wrong side of the Red/Purple Circle Grid square. Cut out on the drawn lines (don't forget to cut out the center!). Tip: Loosen the edge of the fusible web paper before cutting the shape out. This prevents fraying as you separate the paper from the finished cut shape.


6. Fold (1) 10-1/2" Black Grid square in half in both directions and press to locate the center. Fuse the "O" onto the square, using the pressed lines to center it.


7. Repeat steps 5 and 6 to make a second "O" block using the Fuchsia/Multi print for the "O". 


8. Lay out the (2) "X" and "O" blocks as shown. Sew the blocks into rows and join the rows to complete the quilt center. 


9. Sew (1) each 2" x 10-1/2" Black Grid and White Grid pieces short ends together. Make (2). Sew (1) each 2" x 12" Black Grid and White Grid pieces short ends together. Make (2). 

10. Sew the shorter pieced strips to the sides of the quilt center, matching the center seams. Sew the longer pieced strips to the to and bottom, matching the center seams. 


11. Layer the quilt top with batting and backing, baste, and quilt as desired. I used a wavy line computerized stitch on my domestic machine. Trim backing and batting even with the quilt top. 

12. Use the (3) 2-1/4" x WOF Red Hourglass strips to bind the quilt. Add a hanging sleeve if desired. 


Happy Valentine's Day!


I also used Christa's Gridwork prints to make a version of my Ebb & Flow quilt. You can make this quilt with 2-1/2" precut strips. Purchase the Ebb & Flow pattern here. 

Thursday, February 6, 2020

Valentine Tic Tac Toe Board Tutorial

I admit it--I love Valentine's Day. Mostly because of the chocolate. 
It's also a fun excuse to sew up a few small projects. 
I've dusted off this Tic Tac Toe board tutorial because it's quick and easy, and still one of my favorites.
Enjoy!


While I made this project with Valentine's Day in mind (you know, XOXO = hugs and kisses), in reality, you could use it all year round. 


I also added a pocket on the back to store the game pieces (in a house with three kids, storage is constantly top of mind!)


You'll Need:
1/2 yard of a gray print
1 fat quarter each of 2 bright prints
1/4 yard (or fat quarter) of a bright print for binding
1/4 yard heavy-weight sew-in stabilizer
14" square of batting
1 spool of fuchsia large rick rack
Fabric marking pen
Coordinating and contrasting thread

Making the Game Board:
1. From the gray print cut one 13" square, one 12-1/2" square, and one 12-1/2" x 16" piece.

2. Layer the 13" square right side up on the batting square.  Pin to secure for quilting and then use a ruler and fabric marking pen to draw a straight line across the square, near the center.


3. Use this marked line as a guide for your first line of straight line quilting. I sewed with my walking foot and then lined the walking foot edge up to the stitched line to space the next line. Here's the finished result:


4. Trim the quilted fabric to measure 12-1/2" square. Measure in 4-1/4" from one edge and draw a line with a fabric marking pen for placing the rick rack. Measure in 4-1/4" from the opposite edge and draw another line. Turn the square 90 degrees and repeat. Cut two 13" lengths of rick rack and pin in place on marked lines. Stitch down the middle of each to secure.

5. Cut, position and sew two more pieces of rick rack. Now your game board top is complete.


6. Fold the 12-1/2" x 15" gray piece in half so it measures 12-1/2" x 7-1/2". Lay it on the 12-1/2" gray square (with square facing right side up), matching raw edges. This will be the backing and the pocket to hold the Xs and Os. Use a ruler to find the middle of pocket (6-1/4" from edge) and mark a line down the pocket. Stitch on this line through all layers to divide the pocket in half.

7. Layer this pocket/backing with the pocket side down and then add the quilted top, rick rack side up, to complete your quilt sandwich. Pin all edges to secure, making sure pocket fabric lays flat. (You could also sew a basting stitch to secure the pocket to the backing before making the sandwich, but I liked the idea of killing two birds with one stone and simply catching these well-pinned edges in while I added the binding.)

8. Make 60" of binding from your binding fabric. Position it on the top of the quilt sandwich and stitch in place like you would any binding. Trim excess rick rack if needed. Hand sew (or stitch by machine...your choice) the binding to the back side. Your game board is done!

Making the Xs and Os:
1. Click here to download the pdf with the X and O template pieces. Cut out each template piece. 

2. From each of the bright prints, cut two 4" x 15" pieces. From the heavy-weight stabilizer, cut two 3-3/4" x 14-1/2" pieces. 

3. Sandwich a stabilizer piece between two matching bright pieces and use basting spray to fuse pieces together. (Fabric should be right sides out.)


4. Trace the X shape onto the fused sandwich five times. Cut out each shape carefully.


5. Set your machine's zigzag stitch to a shorter, very dense stitch size. I chose to use a contrasting thread color just for fun. Zigzag stitch around the entire outer edge of the X. Repeat with all five X shapes. 


6. Repeat steps 2-5 to make the five O shapes. 

Tip: To cut the center out of the O shape, gently fold the circle in half and cut a slit.

Insert the scissors in the slit and cut on the drawn line.


You're done! Store the X and O pieces in the two pockets on the game board back when not in use.


Wishing you a Valentine's Day filled with Xs and Os! (hugs and kisses!)

I couldn't resist also making heart shapes to replace the Os. You'll find the template for the heart on the same page as the Xs and Os.


Looking for more Valentine's Day quilt ideas?
featuring Benartex's Cherish collection


I created this Flip Flop Heart Mini Quilt tutorial
featuring Paintbrush Studio's Dianthus collection


Or try this Confetti Hearts tutorial
featuring Paintbrush Studio's Painter's Palette Solids collection