Showing posts with label table runner. Show all posts

Wednesday, November 8, 2023

Venetian Marble Strip Runner


Hello! I'm here today sharing my Q4 Benartex Ambassador project - a jewel-toned table runner made from pre-cut strips! 


I chose the Venetian Marble prints because I've always loved the look of fancy scrapbook paper with marbleized effects and I thought it looked just as pretty on fabric! Here's what the Strippie (2-1/2" precut strip) pack looks like: 

Of course, I arranged them into a full rainbow!


I paired these colorful strips with black solid to create a stained glass effect. The black really makes the colors pop! 


The piecing creates a herringbone effect, accentuated by the pointed ends on the runner. 


The hardest part was narrowing down which strip colors to use!

How can you make this runner?!?
The tutorial for creating this table runner is available on my Subscribers Only page. For access, sign up for my newsletter here. If you're already a newsletter subscriber, you'll find the link in the latest newsletter (bookmark it for easy access!).


 **************************************************************************
If you're new here, welcome! I hope you'll stay and look around a bit. 
If you like what you've seen here, you can also find me:
To find all of my quilt patterns, visit my Etsy shop
Find me on IG here.
Sign up for my newsletter in the right-hand sidebar or here
(You'll receive a free pattern for my Diamond Drama quilt (below) as a thank you!)


Thursday, April 28, 2022

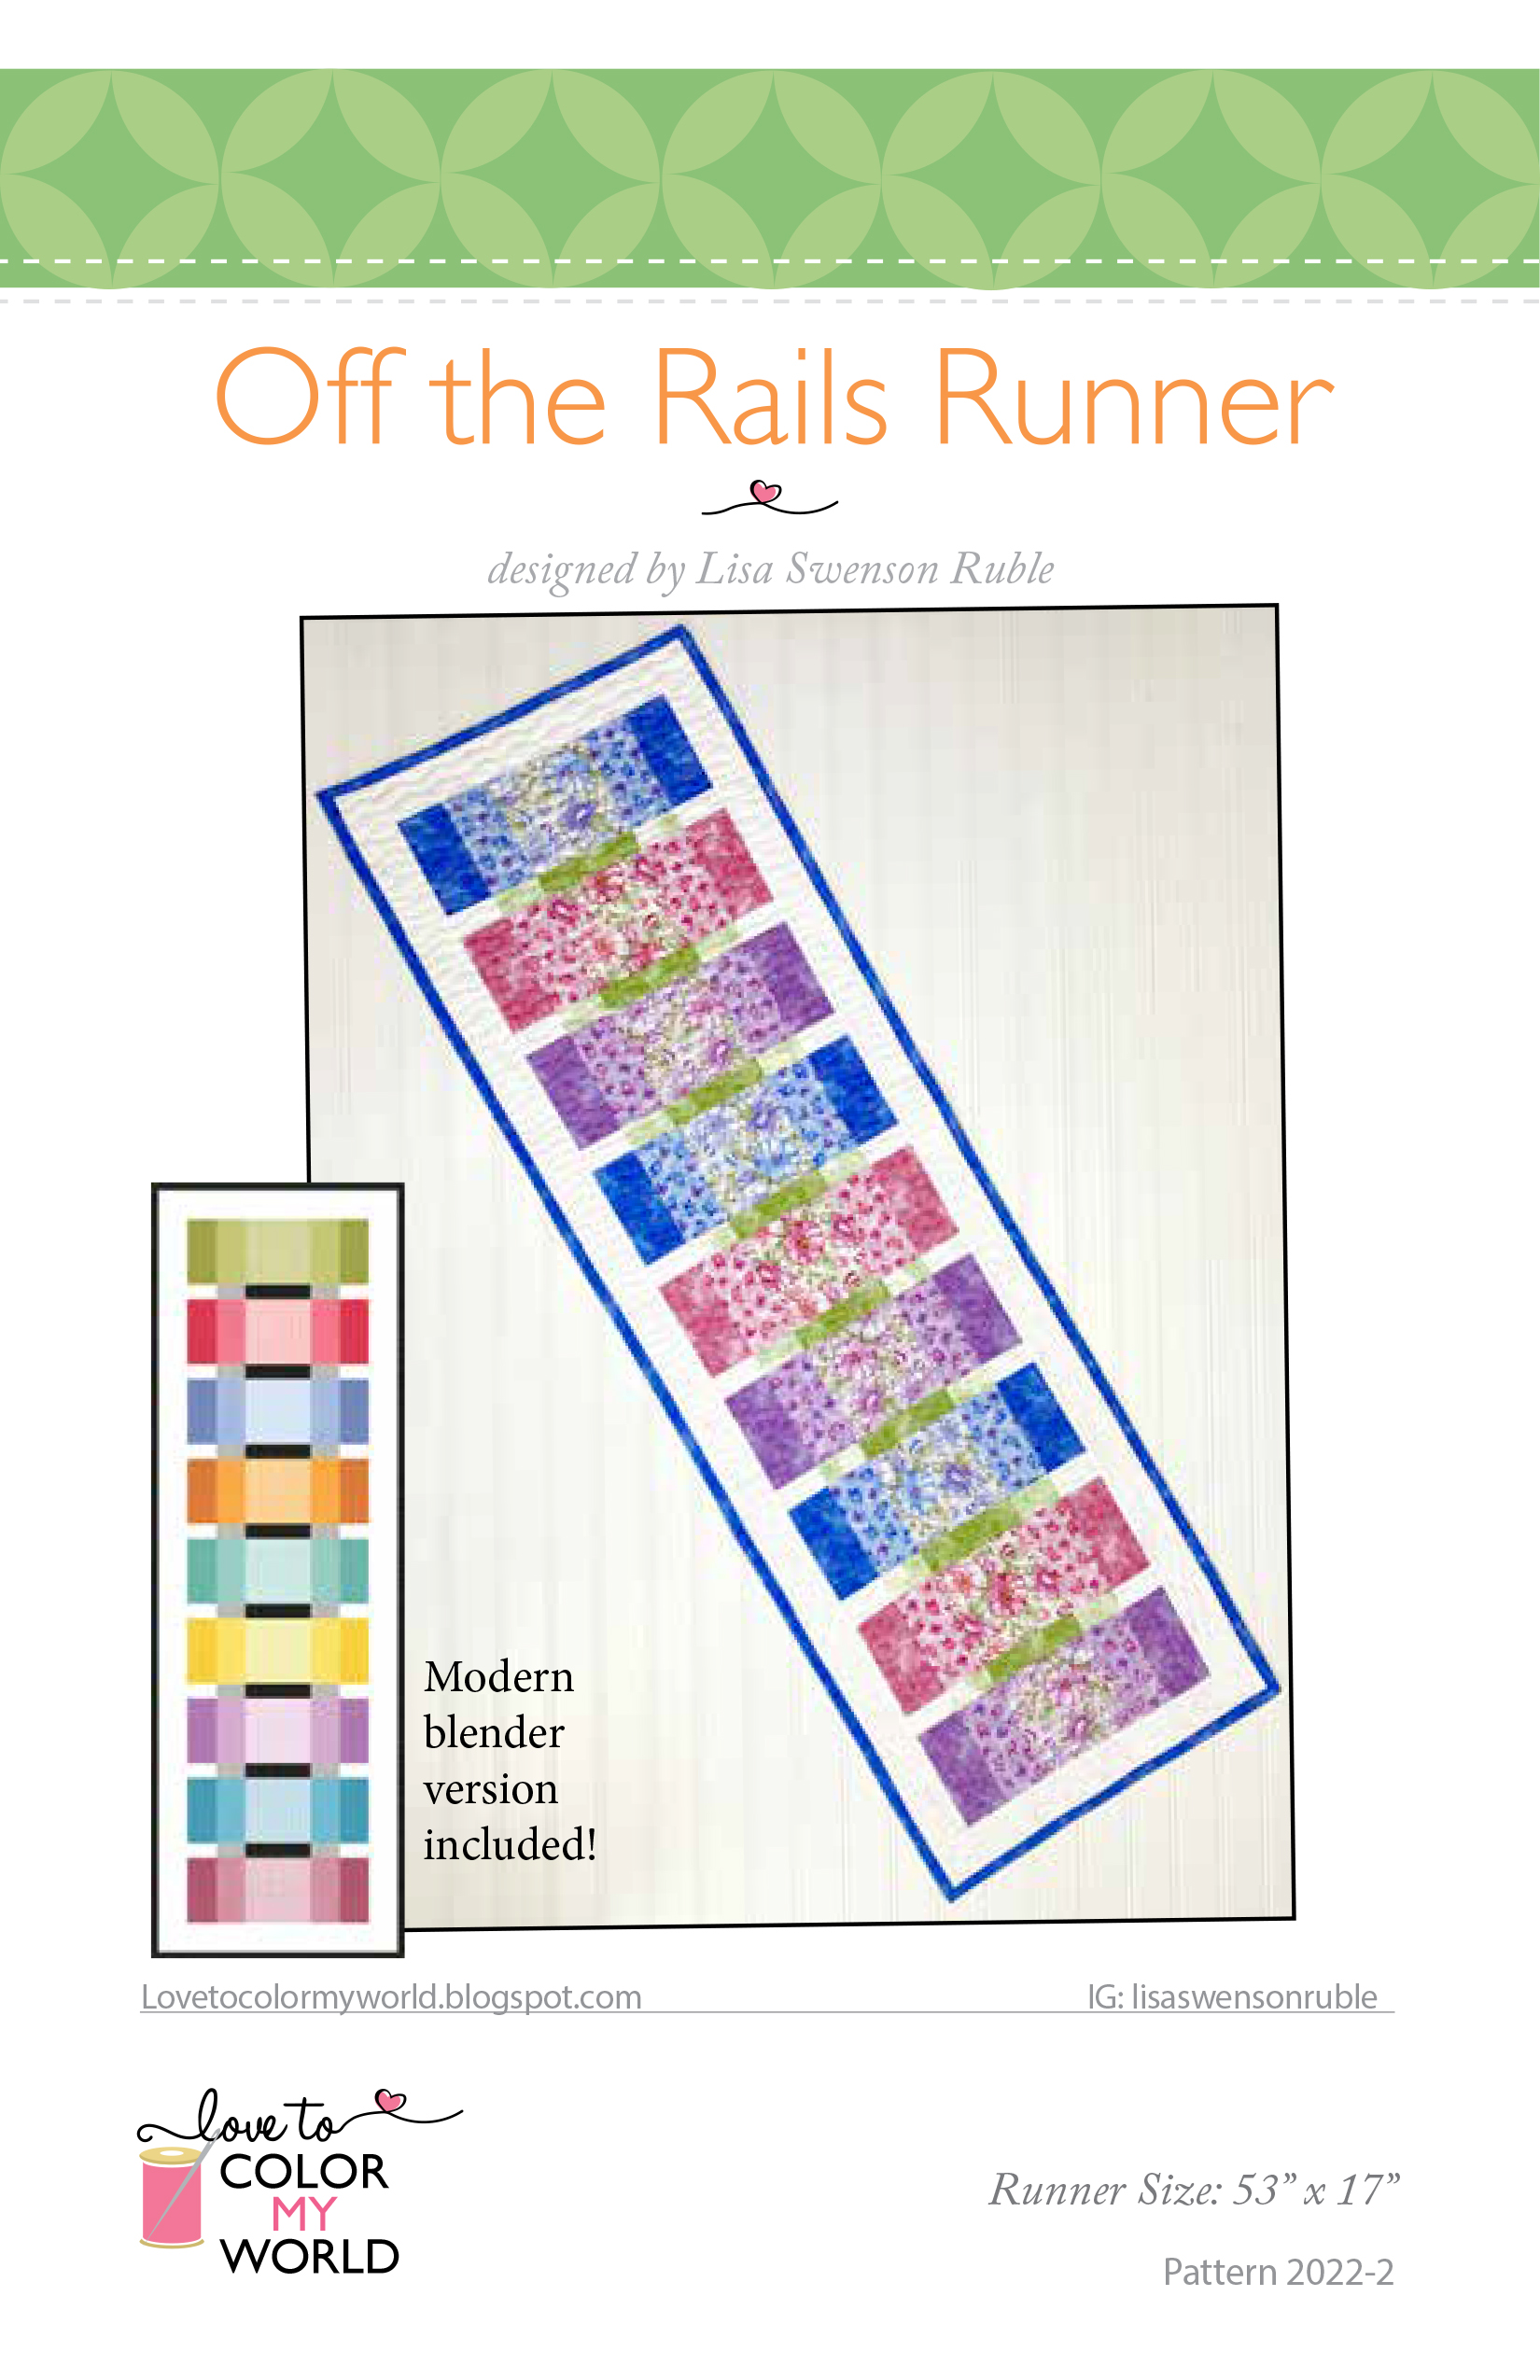
Off the Rails Table Runner

Welcome to my stop on Benartex's Judy's Bloom hop! I'm the first to admit that I don't typically gravitate toward soft floral prints, but when I saw the Judy's Bloom collection by Eleanor Burns for Benartex, I knew exactly what I'd use them for. I really love the watercolor effect of these fabrics. 


 I have long admired the look of watercolor-style quilts, and I thought these fabrics would work really well in that blended type of effect. 

The result? My latest pattern, the Off the Rails Runner.
(Keep reading for details about the FQ bundle giveaway of Judy's Bloom, plus a discount code for the pattern. Mother's Day is around the corner...hint hint)

The light, medium and dark prints blend beautifully into each other. 


This pattern works well with tonal prints in varying shades as well. For this Modern Blender version, I used the Color Weave basics collection, also from Benartex. The key is to have a light, medium and dark of each color. 


Aren't these colors gorgeous?


To celebrate my pattern launch, I'm offering a 25% off discount code through 5/1. Head to my Etsy shop and use code JUDY25 at checkout. 
Purchase the pattern here.

And the giveaway! Benartex has generously offered a FQ bundle of Judy's Bloom fabrics for me to give away. To enter, leave a comment below letting me know which colorway of the fabrics you prefer. (Note: Make sure I have a way to contact you!). For a second entry, head over to my IG account (@lisaswensonruble), follow me, and leave a comment letting me know you did on the Off the Rails runner post. Giveaway ends Sunday, 5/1/22, at 11:59 pm EDT. US entries only, please. 

And don't miss the rest of the hop:
Tuesday
Thursday
Sandra at MMM Quilts
Friday 
Tammy at Tamarinis

If you're new here, welcome! I hope you'll stay and look around a bit. 
If you like what you've seen here, you can also find me:
To find all of my quilt patterns, visit my Etsy shop
Find me on IG here.
Find me on Facebook here.
Sign up for my newsletter in the right-hand sidebar or here
(You'll receive a free pattern for my Diamond Drama quilt (below) as a thank you!)


Friday, January 21, 2022

It's Valentine Central here...

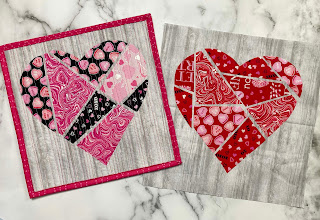
 Today I'm sharing a fun Puzzle Heart Mini Quilt tutorial on the Thermoweb blog. This is a no-sew block made with HeatnBond Lite Fusible Adhesive and it's all about the cutting (sort of like last week's placemats...I'm sensing a theme here...). Although you will need to sew to finish it into a mini quilt.
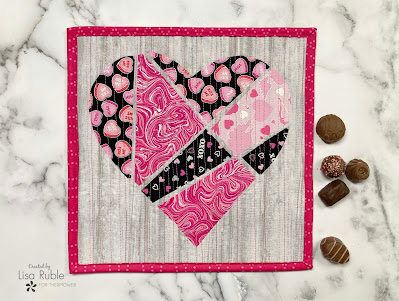
Puzzle Heart Mini Quilt

Find the tutorial here

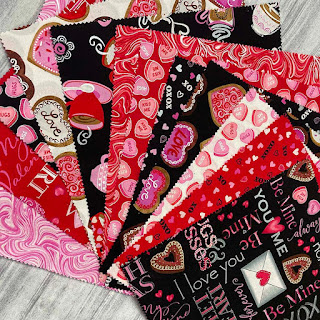
I just want to gush about the fabric a little more. These Hugs & Kisses prints from Benartex are soooo cute! They sent me a layer cake to play with, and the 10" square size is perfect for making these blocks. And I'm thinking maybe I'll use the leftovers for some pillows.


I couldn't decide which fabrics to use, so I made a red heart too!


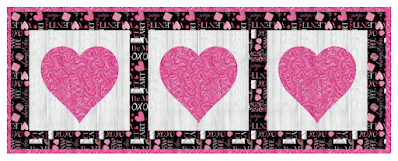
Make a Table Runner!

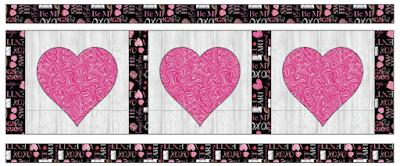
Once you make one of these blocks, you'll still have the pieces left for three more. Plus, they're kind of addicting to make. So I'm going to give you some information to transform three blocks into an easy runner. Just for fun, I popped in one of the bigger prints from Hugs & Kisses for the border fabric. 


You'll Need:

  • (3) 11-1/2" square heart blocks (see tutorial here)
  • 1/2 yard border fabric
  • 3/8 yard binding fabric
  • 2/3 yard backing fabric
  • 19" x 45" piece of batting

Cutting:

From the border fabric:
(2) 2-1/2" x 41" border strips
(4) 2-1/2" x 11-1/2" sashing strips

From the binding fabric:
(4) 2-1/4" x WOF strips


Assemble the Table Runner

Note: Depending on how often you plan to wash your runner, you may want to stitch down the raw edge appliques before assembling the runner. 

Step 1 Sew together (4) 2-1/2" x 11-1/2" sashing strips alternating with (3) heart blocks. 

Step 2 Sew the 2-1/2" x 41-1/2" border strips to opposite long sides of the runner. 


Step 3 Layer the backing fabric, batting and runner top. Baste layers together and quilt as desired. 

Step 4 Use the (4) 2-1/4" x WOF binding strips to bind the runner.

Enjoy!


Friday, December 31, 2021

A Table Runner 4 Years in the Making

My last finish for 2021 was 4 years in the making and I'm so glad I completed and gifted it! 


Back in 2017, we visited my sister-in-law's house for the week of Thanksgiving. 6 adults and 9 kids and basically a "free" week to have some fun. I don't live near any of my nieces and nephews, so my chances to be the "fun project aunt" aren't frequent. I came prepared, with supplies to decorate cookies and make some applique quilt blocks. 

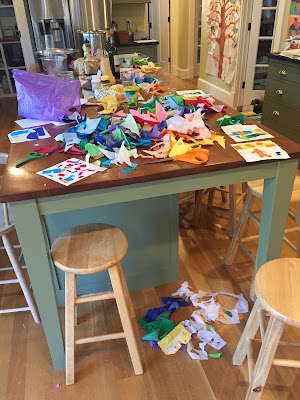
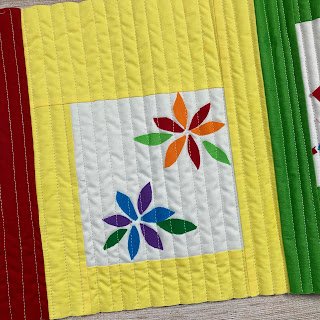
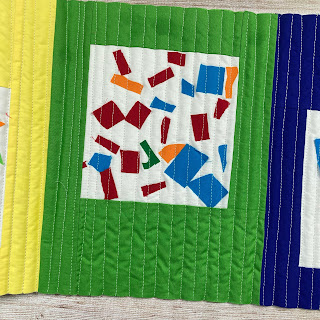
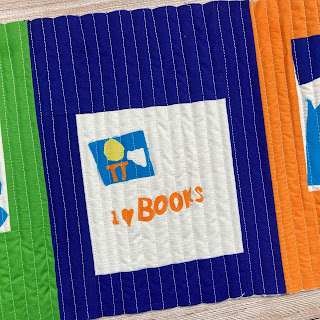
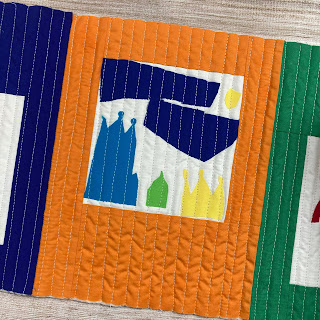
Here's the workstation (aka kitchen island) for our quilting activity. I had a lot of fused fabric scraps in solid colors, and I gave each kid a scissors and a white background square. The kids' ages ranged from approximately 3 to 11. 


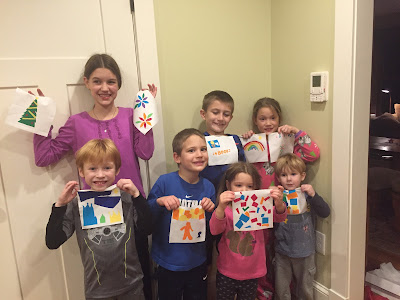
Here are all the kids with their finished blocks. It was fun to see how creative they got; especially the older kids who had a little more scissors skills. 


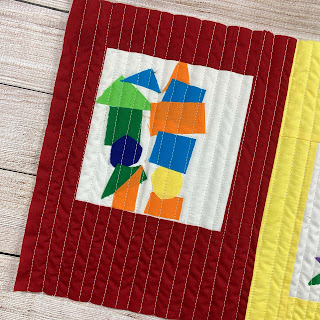
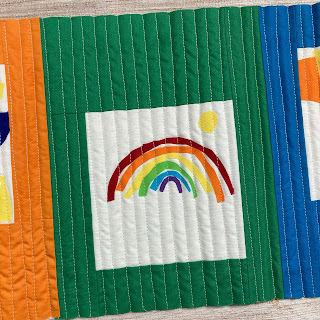
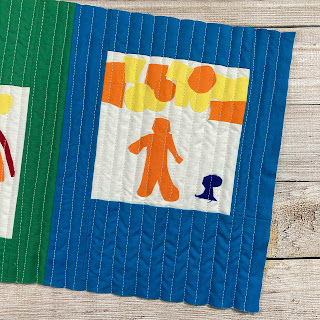
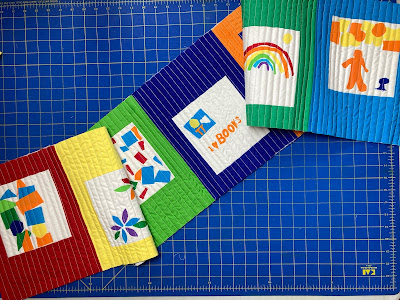
Then the blocks sat for four years. This week, I decided to turn them into a table runner for my sister-in-law (4 of the kids pictured are hers; 3 are mine). I surrounded each block with a solid-colored frame, varying the thick section to add interest and make the runner a little wider (the blocks were originally only 6-1/2" square). 


And the finished runner:


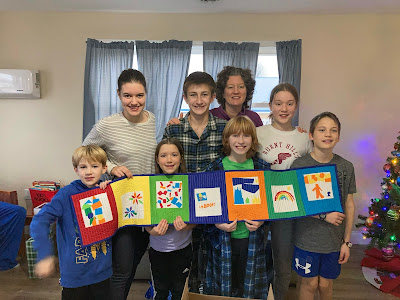
We met up with family this week for a belated Christmas, and I was able to give my sister-in-law the runner in person. Here she is with the runner and all 7 kids who made a block. Such a fun gift! 


Friday, July 3, 2020

Fireworks Table Runner Tute

I do love an excuse to create some fun red, white and blue projects, and 4th of July is great for that! 

I originally created this tutorial for Paintbrush Studio Fabrics using their Painter's Palette Solids. It's super quick and easy--thank you, fusible web! 
I hope you enjoy it! I kind of want to make a larger version now...

Let's get started!
You'll Need: 
1 fat quarter each Painter's Palette Solids: White, Patriot, French Blue, River, Claret, Crimson, and Tomato
Fusible web
1/2 yard backing fabric
12" x 27" piece of batting
How's this for a patriotic bundle?!
(from left: 121-000 White, 121-111 Patriot, 121-131 French Blue, 121-025 River, 121-051 Claret, 121-002 Crimson, and 121-134 Tomato)

Cutting:
From the white:
(3) 7" squares
(4) 2" x 6-1/2" pieces (reserve remaining piece of strip for piecing the long borders)
(2) 2" x 21" strips

From each of the 3 blues and 3 reds:
(1) 2-1/4" x 21" strip for binding
(1) 7" square

From the fusible web:
(6) 7" squares

Make the Quilt: 
Step 1: Adhere a 7" square of fusible web to a 7" Tomato square. Using a thread spool or other small round object, trace a circle slightly off center on the paper side of the fusible web.


Step 2: Using a ruler, draw lines radiating out from the center circle as shown. Note: I marked the rays that would be red with a pencil squiggle to help visualize the negative space the lines will create. Create as many or as few rays as you like, varying widths and angles. 


Step 3: Cut out the negative areas to create a fireworks shape that looks like this: 

(The squiggly lines also help to make sure you leave the correct parts while cutting!)


Step 4: Repeat with the 7" Patriot square--your center circle and rays will be slightly different from the Tomato shape, and that's good! 


Here's what both your fireworks shapes will look like:


Step 5: Position both fireworks shapes on a 7" white square. Try with both the Patriot and Tomato fireworks shape on top (see photos below), and experiment with rotating one of the shapes until you find the look you like. 


Step 6: When you are satisfied with your block, remove the paper and fuse the fireworks shapes onto the white square. 


Step 7: Trim block to measure 6-1/2" square.


Step 8: In the same way, make 2 additional blocks, pairing the River square with the Claret square and the Crimson square with the French Blue square.


Step 9: Lay out the 3 blocks alternating with (4) 2" x 6-1/2" white pieces. 


Step 10: Sew the blocks and white pieces together. Sew the (2) 2" x 21" white strips and remaining 2" x 14" white strip short ends together into a long strip. Cut (2) 24-1/2" lengths. Sew to the long sides of the quilt. 

Step 11: Layer the backing right side down, batting, and quilt top right side up. Baste layers together and quilt as desired. Use short sections of the (6) 2-1/4" x 21" red and blue strips to bind the quilt. 


Block close-ups: