Monday, April 11, 2022

Nursery Blog Hop: Rhombi quilt + baby block tutorial + pattern sale~


I'm excited to be part of Michael Miller's Nursery Blog Hop! 
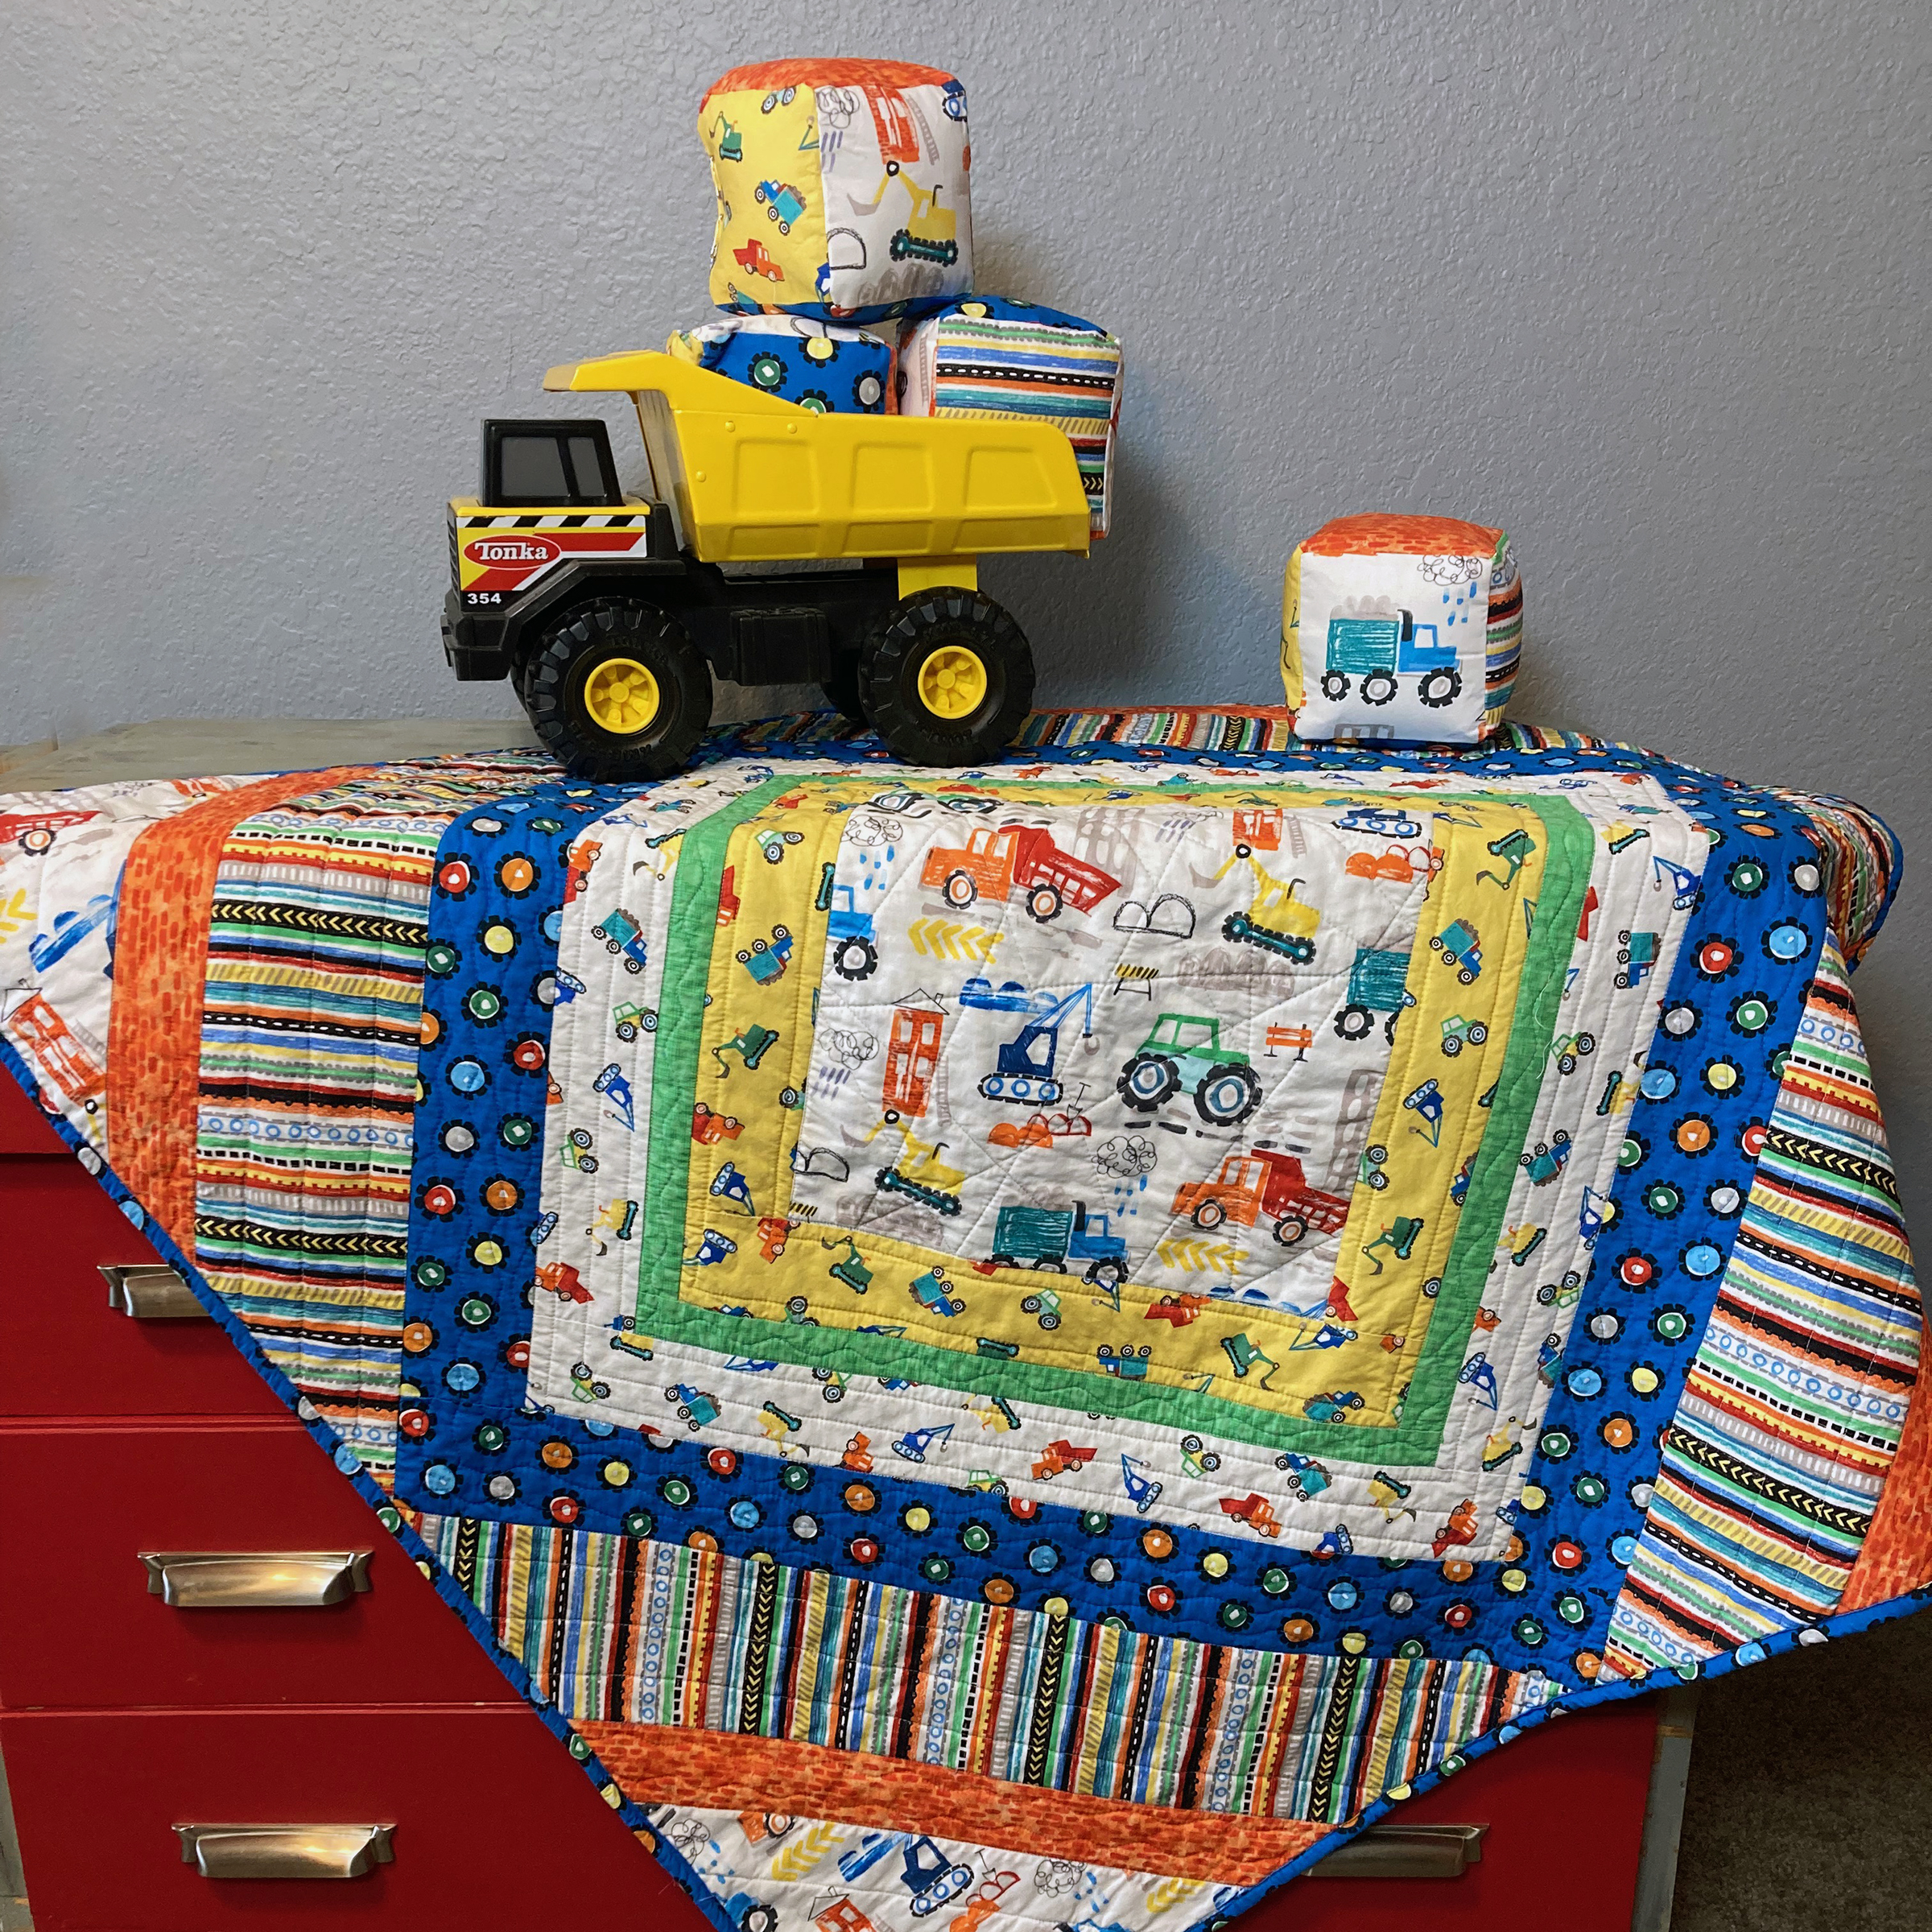
I have three boys at home, and while none are babies anymore (the youngest is 7), construction-themed fabric is right in my wheelhouse. When I saw the Diggers and Dumpers collection, I knew it would be perfect in my Rhombi quilt pattern. (10% off through 4/14!) 

How cute are these prints? I love the bright primary colors.


Purchase the Rhombi quilt pattern here. (10% off through 4/14)


My Rhombi quilt pattern highlights a large focal print--in this case, the construction equipment in the center and corners. Add in a few brightly colored prints (I especially love using a stripe), and this quilt sews up so quickly! I stitched this quilt top in one afternoon. The finished quilt measures 45" square.


I couldn't resist making baby blocks with the remaining fabric. That large focal print was just begging to be fussy cut for block sides! Keep scrolling for the tutorial to sew the baby blocks. 


And the perfect finishing touch? That cozy Minky on the back. My boys are fighting over who gets to use this quilt. 

Baby Block Tutorial
With prints these fun, who can resist sewing some stackable stuffed blocks? Adding a layer of interfacing helps the blocks to keep their shape. 

Here's how:

You'll Need: (to make 4 blocks)
1/2 yard focal print to fussy cut
1/4 yard each four coordinating prints
Fiberfill
Fabric marking pen

Cutting:
From the focal print:
Fussy cut (8) 5-1/2" squares, each centering a motif

From the four coordinating prints:
(4) 5-1/2" squares from each print

From the Interfacing:
(24) 5-1/2" squares

Make the Blocks:
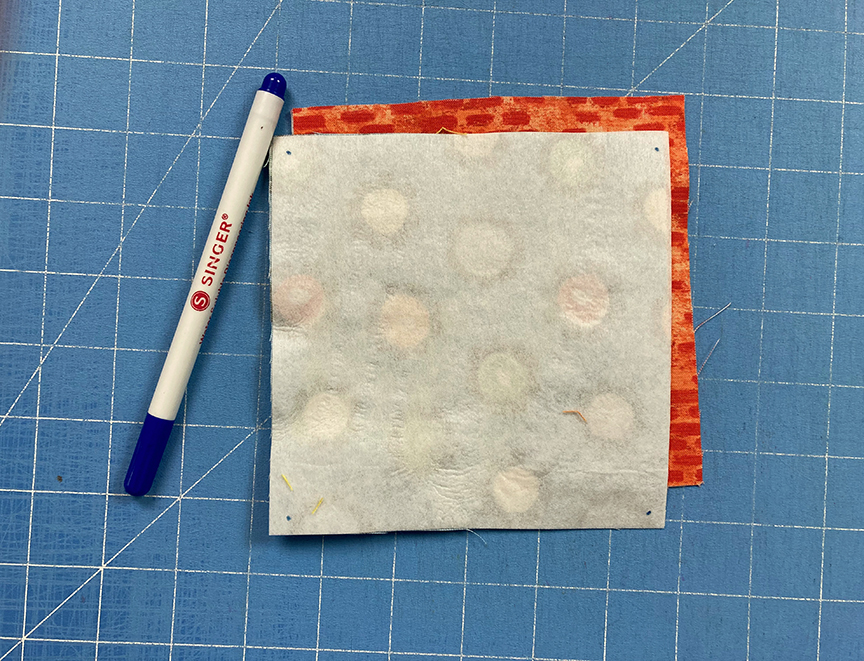
Step 1 Following manufacturer's directions, fuse an interfacing square to the wrong side of each fabric square. 


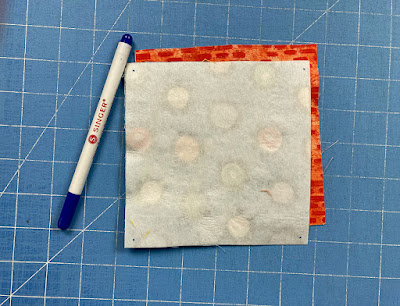
Step 2 Using a fabric marking pen, mark a dot 1/4" from each corner of each square. These will be your starting and stopping points for stitching. 
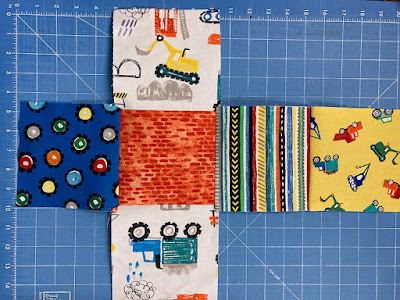
Step 3 Join six squares together as shown, starting and stopping on the corner dots. Back stitch at starting and stopping points to secure the stitches. The four squares in a horizontal row will become the "tube" and the top and bottom squares will become the top and bottom of the block. 
Step 4 Pin raw edges together to start forming a block shape, making sure to align corner dots. 
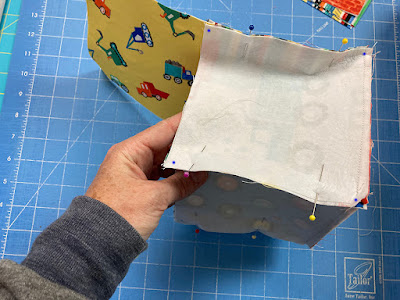
Step 5 Stitch pinned edges from dot to dot, creating an open box shape as shown. Don't forget to backstitch at starting and stopping points!
Step 6 Pin and sew the remaining edges, leaving a 3" opening along the last side for turning. 

Step 7 Turn the block right side out and using a turning tool to poke corners out as much as possible. Stuff firmly with fiberfill and handstitch the opening closed. Tip: Use a thimble to help push the needle through the interfacing. 


I really enjoyed sewing a couple cute projects using these fun fabrics! 

If you're new here, welcome! I hope you'll stay and look around a bit. 
If you like what you've seen here, you can also find me:
To find all of my quilt patterns, visit my Etsy shop
Find me on IG here.
Find me on Facebook here.
Sign up for my newsletter in the right-hand sidebar or here
(You'll receive a free pattern for my Diamond Drama quilt (below) as a thank you!)


Thursday, March 31, 2022

Pillow Talk: Puff Pillow Tutorial


I'm sharing another Pillow Talk tutorial today on YouTube - for a puff pillow! All winter, I planned to make a puff quilt, and it's still in the works. But in the meantime, I knew I could create a quicker version - a large floor pillow that my boys would love. 

I used the Lift Off fabrics from Benartex for my puff pillow. Aren't those rocket ships fun? 

Look at that puffy texture!

You can find the full tutorial on YouTube, but I'm listing some of the numbers that will help you create this pillow here. 

You'll Need:
5 space-themed fat quarters for pillow front
1 yard backing fabric
1/3 yard binding fabric
2/3 yard muslin
Fiberfill

Cutting:
From each fat quarter:
(5) 5-1/2" squares

From the backing fabric:
(2) 18" x 24" pieces

From the binding fabric:
(3) 2-1/4" x WOF strips

From the muslin:
(25) 5" squares


Like I expected, this pillow was a success! My 7-year-old has already appropriated it. :) 

This Puff Pillow is my third tutorial in the Pillow Talk series. Find the other tutorials here


If you're new here, welcome! I hope you'll stay and look around a bit. 
If you like what you've seen here, you can also find me:
To find all of my quilt patterns, visit my Etsy shop
Find me on IG here.
Find me on Facebook here.
Sign up for my newsletter in the right-hand sidebar or here
(You'll receive a free pattern for my Diamond Drama quilt (below) as a thank you!)

Saturday, March 19, 2022

Go Fish! Travel Game Drawstring Bag Tutorial

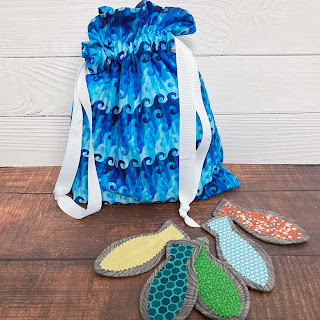
It's almost spring break, and for many families, that means road trips. I shared a Go Fish! travel game tutorial over on the Thermoweb blog - you can find it here. Below, I'm sharing the tutorial to make a simple lined drawstring bag to hold your game pieces. Enjoy! 

Let's get started!

You'll Need:
1/2 yard blue print for outer bag
1/2 yard blue tonal for lining
2 yards coordinating 1"-wide grosgrain ribbon
Fabric marking pen

I was happy to find this blue "wave" fabric--perfect for a fish game! 


Cutting:
From blue print:
(2) 12" x 14-1/2" rectangles

From blue tonal:
(2) 12" x 14-1/2" rectangles


Make the Bag:
1. Sew the (2) 12" x 14-1/2" blue print pieces along the bottom short edge (If your fabric is directional, make sure the print is facing "up" - aka away from the bottom seam on both sides. Sew (1) 12" x 14-1/2" blue tonal piece to the opposite short edge of both the bag front and back as shown. 


2. Fold the pieced strip in half right sides together along the seam between the bag back and front, aligning the edges. The raw edges of the two lining pieces should match up as well. Pin edges to secure. Using a fabric marking pen, measure 2" from the top edge of the lining/outer bag seam and mark a line as shown. Measure and mark a second line 1-1/2" from the first line.


3. Stitch around the three open sides, leaving a 4" opening for turning on the short edge of the lining pieces. DO NOT stitch between the marked lines on either side of the bag front. Backstitch as you approach the line to secure, skip over that 1", and then backstitch as you start again. 


4. Turn the bag right side out through the lining opening. Stitch the lining opening shut. Tuck the lining into the bag and press the top seam. Poke bottom corners out as needed. 

5. Using the existing marked lines on the bag front (re-measure and redraw if you can't see them), continue the lines onto the back side of the bag as well. Stitch on each of these marked lines, being careful to only stitch through one side of the bag at a time. (It will be as if you are stitching a tube--you'll be stitching through the bag front and lining sandwiched together, and rotating as you sew, until you're stitching through the bag back and second lining piece.) This creates the casing for the drawstrings. If you stitch through all layers at once, your bag won't open!


6. Cut the ribbon into (2) 1-yard lengths.Using a safety pin, feed one ribbon into the casing from the left side. Feed through the bag front and bag back, exiting on the left side. Tie the ends together in a knot. Feed the second ribbon into the casing from the right side. Feed through the bag front and back, exiting on the right side. Tie the ends together in a knot. 


Your drawstring bag is complete! Use it to store your Go Fish! game pieces and felt pond. Missed that tutorial? Head over to Thermoweb's blog to find it. 


Happy traveling! 

Friday, January 28, 2022

6 Valentine's Day Mini Quilt Tutorials

It's hearts and chocolate season! Valentine's Day is coming and you still have time to sew a heart-themed project! I've collected my favorites to share with you - most are tutorials available on my blog; a couple are patterns to purchase. I'm also hosting a giveaway on IG, so head over to check it out.

Enjoy and Happy. Valentine's Day!


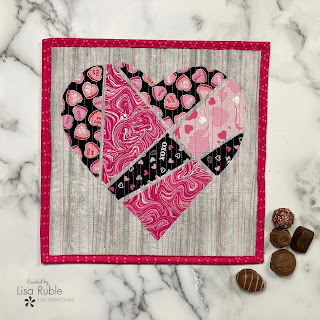
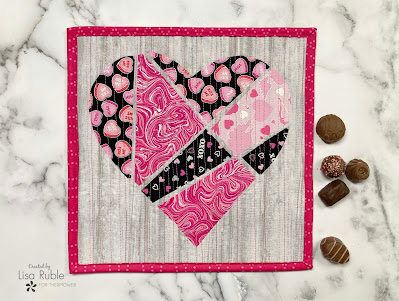
Puzzle Heart Mini Quilt
This no-sew heart is made using HeatnBond fusible applique and random rotary cuts. 


Two each blocks for a fabric version of the classic XOXO make up a fun wall hanging. I used Christa Watson's Gridwork collection.


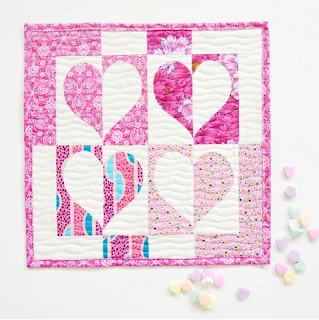
I used an existing heart block pattern and a variety of Valentine colored solids to make this modern mini quilt. 


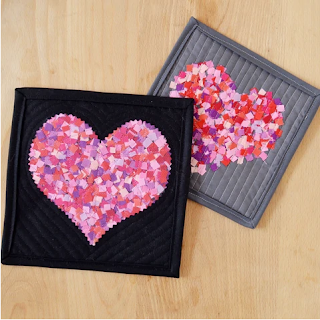
These mini quilts bring the idea of tiny fabric scraps to a whole new level! I originally created this tutorial for PBS Fabrics.


Flip Flop Heart Mini Quilt
Pick your favorite prints plus a contrasting solid to make these easy applique quilt. I originally designed this tutorial for PBS Fabrics. 


This is still a favorite of mine--a fabric tic tac toe board with Xs, Os and hearts.


Plus two quilt patterns:

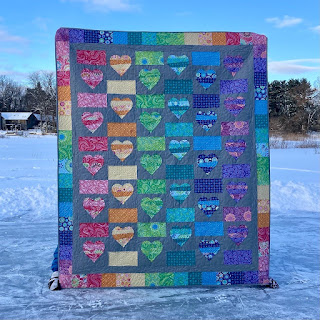
This quilt pattern includes the lap-size quilt you see here, plus instructions to make a baby quilt and a throw pillow.


After I designed my It's a Swirl quilt, I saw some chocolate fabrics and realized how much theseswirls looked like a box of fancy chocolates! These instructions are included in the pattern. The version shown below uses Benartex's Chocolicious collection.


If you're new here, welcome! I hope you'll stay and look around a bit. 
If you like what you've seen here, you can also find me:
To find all of my quilt patterns, visit my Etsy shop
Find me on IG here.
Find me on Facebook here.
Sign up for my newsletter in the right-hand sidebar or here
(You'll receive a free pattern for my Diamond Drama quilt (below) as a thank you!)

Thursday, January 27, 2022

Pillow Talk: Pleated Pillow Tutorial


We can all use more throw pillows in our houses, right?! 
I'm starting a new tutorial series called Pillow Talk. Roughly once per month, I'll be sharing a video tutorial showing how to make a specific style of pillow. 


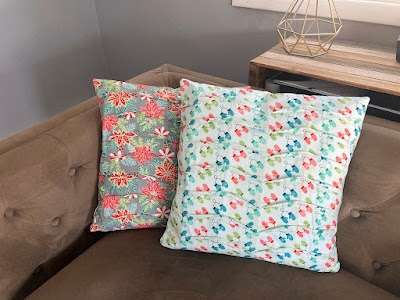
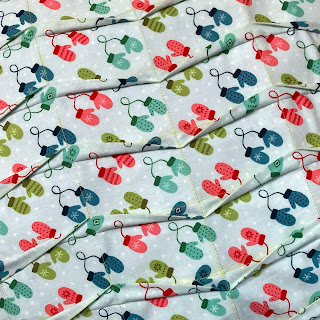
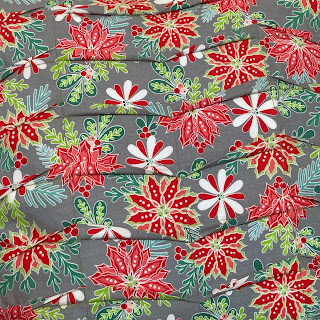
This month, I'm sharing how to stitch a pleated pillow. I just LOVE the texture that these pillows have, and it's so easy to create. 


Benartex has provided the fabric for these tutorials. For this project, I chose four prints from Cherry Guidry's Heart & Home collection from Benartex Fabrics*. They're wintry but fresh and bright, and I really like them. 

You can find the video tutorial here, on my YouTube channel (don't forget to subscribe!), but I've also included some of the numbers required for this project below for reference. 

You'll need (per pillow) 
  • 5/8 yard of two fabrics*
  • 1-yard package Thermoweb Fusible Interfacing*
  • 18" square pillow insert
  • 14" long zipper in a coordinating color
  • Fabric marking pen/pencil/etc.
*These supplies were provided by the companies indicated to create this tutorial. 


Cutting
From the pillow front fabric:
(1) 18-1/2" x 27" piece

From the pillow back fabric:
(1) 18" square (unless you want to make both sides pleated...then you'll need a second 18-1/2" x 27" piece)

From the fusible interfacing:
(1) 18" x 19" piece
(1) 18" square (unless you want to make both sides pleated...then you'll need a second 18" x 19" piece)


Fabric Marking Info
(Note: These instructions won't make sense on their own--you'll need to view the video for steps)
  • Measure 2-1/2" in from one short end of the front fabric piece and draw a stitching line.
  • Draw a second line (the folding line) 1/2" from the first line. 
  • Fold press and stitch pleat as directed in the video.
  • Measure 2" from the stitched line and mark your next stitching line. Measure 1/2" in from that and draw your next folding line.


I hope you enjoy trying this pillow making technique! 


If you're new here, welcome! I hope you'll stay and look around a bit. 
If you like what you've seen here, you can also find me:
To find all of my quilt patterns, visit my Etsy shop
Find me on IG here.
Find me on Facebook here.
Sign up for my newsletter in the right-hand sidebar or here
(You'll receive a free pattern for my Diamond Drama quilt (below) as a thank you!)


Friday, January 21, 2022

It's Valentine Central here...

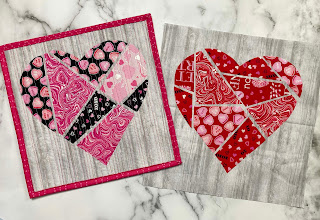
 Today I'm sharing a fun Puzzle Heart Mini Quilt tutorial on the Thermoweb blog. This is a no-sew block made with HeatnBond Lite Fusible Adhesive and it's all about the cutting (sort of like last week's placemats...I'm sensing a theme here...). Although you will need to sew to finish it into a mini quilt.

Puzzle Heart Mini Quilt

Find the tutorial here

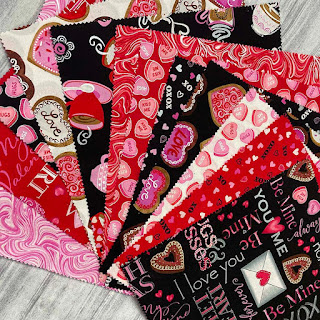
I just want to gush about the fabric a little more. These Hugs & Kisses prints from Benartex are soooo cute! They sent me a layer cake to play with, and the 10" square size is perfect for making these blocks. And I'm thinking maybe I'll use the leftovers for some pillows.


I couldn't decide which fabrics to use, so I made a red heart too!


Make a Table Runner!

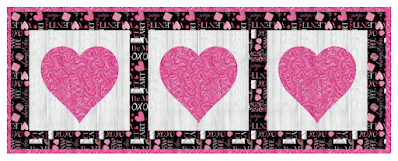
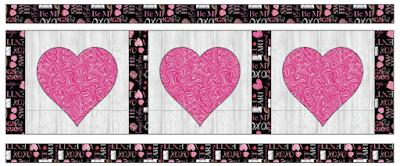
Once you make one of these blocks, you'll still have the pieces left for three more. Plus, they're kind of addicting to make. So I'm going to give you some information to transform three blocks into an easy runner. Just for fun, I popped in one of the bigger prints from Hugs & Kisses for the border fabric. 


You'll Need:

  • (3) 11-1/2" square heart blocks (see tutorial here)
  • 1/2 yard border fabric
  • 3/8 yard binding fabric
  • 2/3 yard backing fabric
  • 19" x 45" piece of batting

Cutting:

From the border fabric:
(2) 2-1/2" x 41" border strips
(4) 2-1/2" x 11-1/2" sashing strips

From the binding fabric:
(4) 2-1/4" x WOF strips


Assemble the Table Runner

Note: Depending on how often you plan to wash your runner, you may want to stitch down the raw edge appliques before assembling the runner. 

Step 1 Sew together (4) 2-1/2" x 11-1/2" sashing strips alternating with (3) heart blocks. 

Step 2 Sew the 2-1/2" x 41-1/2" border strips to opposite long sides of the runner. 


Step 3 Layer the backing fabric, batting and runner top. Baste layers together and quilt as desired. 

Step 4 Use the (4) 2-1/4" x WOF binding strips to bind the runner.

Enjoy!


Friday, January 14, 2022

Feelin' Blue Ripple Placemats

 Hello! 
Today I'm over on the Thermoweb Blog sharing a tutorial for these fun Ripple Placemats. 


They're made using HeatnBond Fusible Adhesive, so there's very little sewing! I've even included a short video showing how to freehand cut these curves (they're so easy!). 

I used the Indigo Batiks fabric from Anthology Fabrics for this project. I'm a huge blue lover, and the range of blues in these fabrics, plus the fun batik patterns, had me hooked from the moment I saw them. (That swirl print...my fave!)

I also used these fabrics to make a blue and white version of my Wonk Around the Block quilt. You can read more about it here. The pattern is available for purchase in my Etsy shop as well. 

Wonk Around the Block pattern

I hope you enjoy the tutorial


I have a bunch of leftover fused, curved strips. I think I need to make a few more placemats...